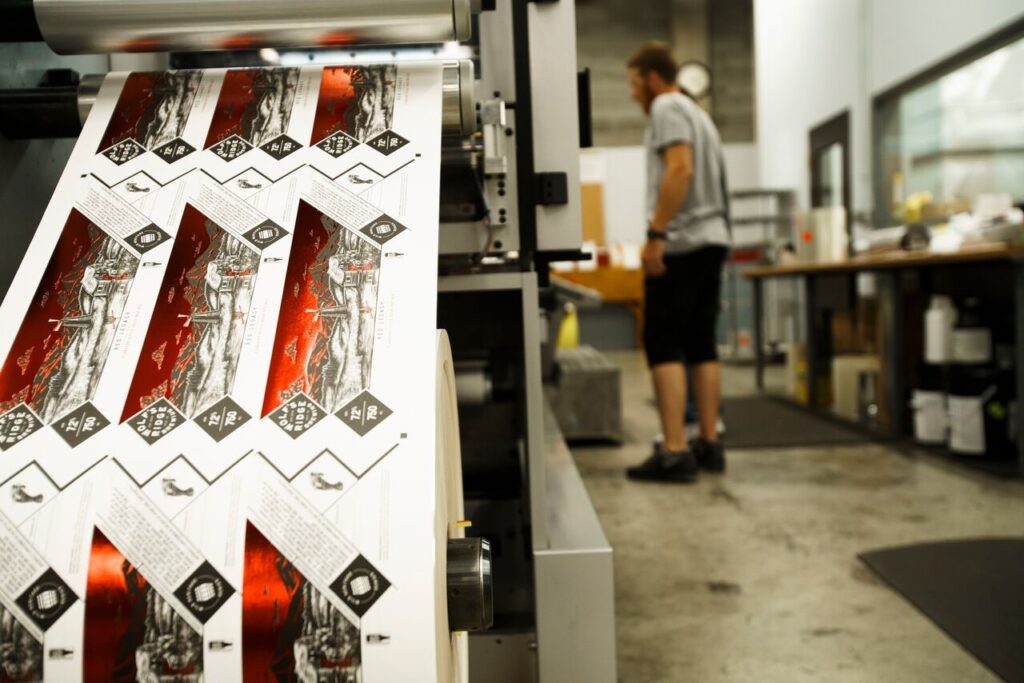
How to Translate Your Brand Identity into Packaging and Labels: A Step-by-Step Guide

⚞ The Highlights:

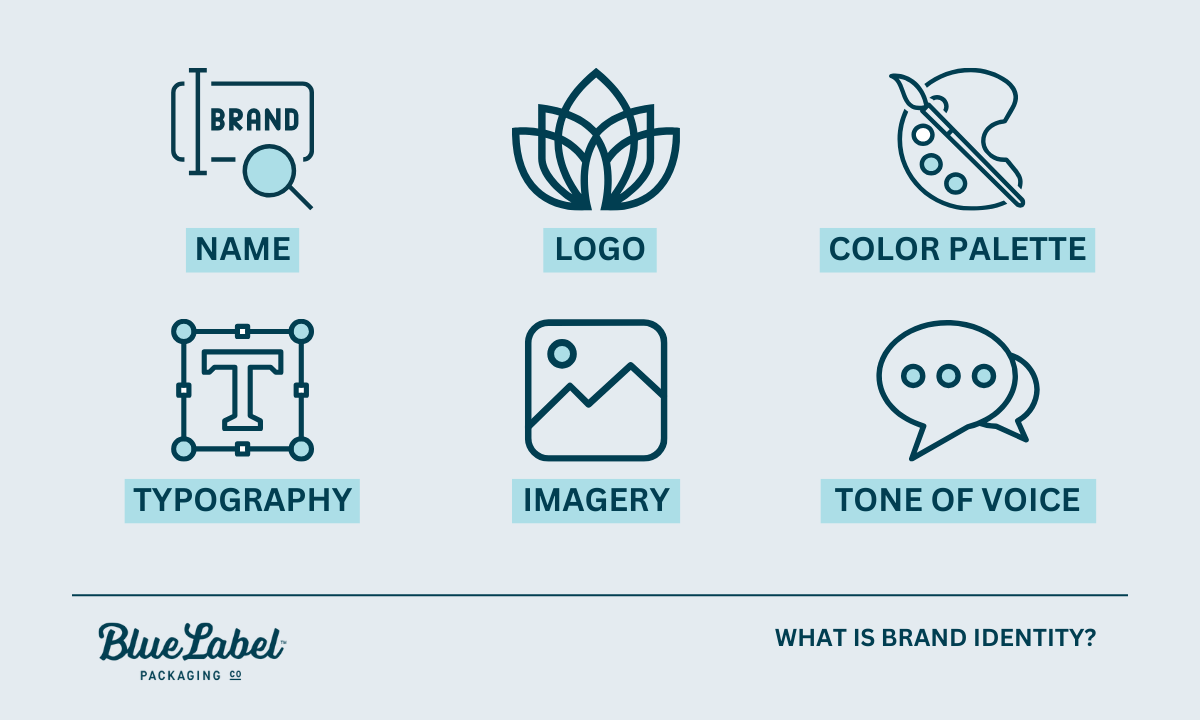
  • Your brand identity is your visual and verbal signature: name, logo, colors, typography, imagery, and voice. Packaging and labels are where customers meet it.
  • Branding, packaging, and labeling are related but distinct: branding is the identity, packaging is the physical container and its design, labeling is the applied label and its information.
  • Translate your identity by carrying your color palette, typography, logo, and voice consistently onto the label, guided by a brand guide.
  • The catch most brands miss: screen colors don’t print exactly, and material and finish change how your brand reads. Plan for the jump from digital to printed.
  • Consistency across your whole product line is what turns a nice label into brand recognition on a shelf.

Translating your brand identity into packaging means carrying the same colors, typography, logo, imagery, and voice that define your brand onto the physical product, so a shopper recognizes you at a glance. Your label is often the first and most frequent place a customer meets your brand, so it has to look and feel like the rest of your identity, not like a separate thing.

We help brands make that jump from a brand guide to a printed label every day, so we see where it goes smoothly and where it breaks down. Below, we walk through how the pieces fit together, how to translate your identity onto a label, and the print realities that catch brands off guard.

Branding, packaging, and labeling: what’s the difference?

These three terms get used together so often they blur, but they’re distinct pieces that work as a system. Understanding the difference makes every choice that follows easier.

Branding Packaging Labeling
What it is Your identity: name, logo, colors, voice The physical container and its design The label applied to the product and its info
Job Define who you are and how you feel Protect the product and present the brand Identify the product and carry required info
Example Logo, color palette, brand voice The bottle, can, box, or pouch The printed label with name, ingredients, barcode

What is brand identity? Infographic

What is branding?

Branding is your identity: the name, logo, colors, typography, imagery, and voice that make your product recognizably yours. It’s the feeling and promise a customer associates with you, expressed through a consistent look and voice.

What is packaging?

Packaging is the physical container and how it’s designed: the bottle, can, box, or pouch that holds and protects your product and presents it on a shelf. Packaging serves a functional job (protection) and a brand job (presentation) at the same time.

What is labeling?

Labeling is the label applied to the product and the information on it. That includes your brand design plus the required details: product name, ingredients, net contents, barcodes, and any regulatory information. The label is usually where your brand identity and the practical, legal requirements meet.

How they work together

Branding sets the identity, packaging gives it a physical form, and labeling carries both the brand and the required information to the customer. When all three align, a shopper sees a coherent product. When they don’t, the product feels off, even if each piece looks fine on its own.

What is brand identity, and why does packaging carry it?

Brand identity is the collection of visual and verbal elements that represent your brand and set it apart. On a shelf, your packaging is the version of that identity a customer actually touches.

The visual elements of brand identity

  • Logo: the primary mark customers recognize.
  • Color palette: the colors that trigger instant recognition.
  • Typography: the fonts that carry your personality.
  • Imagery and graphics: the photo, illustration, or pattern style you use.
  • Voice and tone: how your copy sounds, from playful to refined.

Why packaging is your most-seen brand asset

For a physical product, the package is often the first brand touchpoint and the one a customer sees most: on the shelf, in their cart, at home, in a photo they share. That makes it one of the best places to express your identity. A lot of purchase decisions happen fast and visually at the shelf, so a package that instantly reads as yours helps in the moment someone is choosing.

How packaging shapes what shoppers think

Design choices like color, shape, material, and typography shape how a shopper feels about your product before they read a word. Muted tones and uncoated paper read as natural or premium. Bright colors and glossy finishes read as fun and energetic. None of it is neutral, so every choice should map back to the brand you’re building.

Designing for your target customer

Design for the people you want to buy the product, not for your own taste. Research who they are and what catches their eye, then make choices that fit them. A supplement aimed at serious athletes and one aimed at wellness-focused parents call for very different looks, even in the same category. The clearer your customer, the easier every design decision gets.

How to translate your brand identity onto a label

Here’s how to move from brand identity to a finished label, step by step.

Start with your brand guide

A brand guide is the reference that keeps everything consistent: your logo files and usage rules, exact colors, fonts, imagery style, and voice. If you have one, it’s the source of truth for your label. If you don’t, building even a simple one before you design pays off immediately, and it’s the single most useful thing to hand a designer or printer.

Color

Color is the fastest way people recognize you. Carry your exact brand colors onto the label, and specify them precisely (more on why exact matters in the print section below). Color also carries meaning, so make sure your palette fits the feeling you want, whether that’s calm, bold, natural, or premium.

Typography

Use the fonts from your brand identity, and keep them legible at label size. Your type should feel like the same brand across your website, your ads, and your package. For more on making type work on a label specifically, see our typography tips for product labels.

Logo and imagery

Apply your logo consistently, at a size and clear space that keep it recognizable, and use the same imagery style (photography, illustration, pattern) you use elsewhere. Consistency here is what makes a lineup of products read as one family.

Materials and finish

The material and finish are part of your brand, not just a spec. Uncoated or kraft stock feels natural and honest. Soft-touch matte reads premium and modern. High gloss looks bright and fun, while foil or embossing says luxury. Choose the material that reinforces your identity, not just the cheapest option.

Voice and copy

The words on your label should sound like your brand too. A playful brand can be playful in its product description; a refined brand keeps its copy spare. Voice is easy to forget on a label, but it’s part of the identity you’re translating.


Ready to put your brand on a label?

Send us your brand guide and we’ll help translate it into a print-ready label, matching your colors, choosing the right material, and making sure it looks like you.
Request a Quote Get a Sample Pack


Where brand identity meets the printed label

This is the step brands underestimate, and it’s where we spend the most time with customers. Your brand assets were almost certainly built for a screen, and a label is a physical, printed object. A few things change in that jump, and planning for them keeps your brand looking like itself.

Screen colors vs. printed colors

Screens show color in RGB (light), while labels print in CMYK inks, often with specific Pantone (spot) colors for brand hues. The two don’t map perfectly, so a color that glows on your website can print duller or slightly shifted if it isn’t managed. The fix is to define your brand colors as Pantone or CMYK values, not just a screen hex code, and to check them on a printed proof. For the full picture, see our guide to RGB vs. CMYK color formats.

How material and finish change brand perception

The same design reads differently on different materials. A logo color looks richer on gloss than on uncoated kraft, which absorbs ink and mutes it. A matte finish softens everything; a metallic film adds shine your artwork didn’t have on screen. Because material affects both color and feel, it’s worth choosing it as part of the brand decision and seeing your design on that actual stock before you commit.

What to hand your printer

  • Your brand guide, including logo files and color specs.
  • Vector artwork with fonts converted to outlines (so your type prints exactly, even if the printer doesn’t have your font).
  • Pantone or CMYK values for your brand colors, not just hex codes.
  • Your material and finish preference, or a request for guidance on it.
  • The container details, so the label is sized and shaped correctly.

Hand a printer those, and the translation from brand identity to finished label goes smoothly. Leave them out, and you risk a label that doesn’t quite look like your brand.

Keeping your brand consistent across products

Consistency across your whole product line is what turns individual labels into brand recognition. Use your brand guide to keep the core identity steady across every SKU: logo placement, color system, and typography. Allow thoughtful variation, like a different accent color per flavor, as long as the lineup still reads as one family. When you expand into a new product or market, adapt carefully rather than reinventing, so customers still recognize you. Our post on 8 steps to great label design is a useful companion here.

Frequently asked questions

What is the difference between branding, packaging, and labeling?

Branding is your identity: the name, logo, colors, typography, and voice that make a product recognizably yours. Packaging is the physical container and its design, the bottle, can, box, or pouch that protects the product and presents the brand. Labeling is the label applied to the product and the information on it, including brand design plus required details like ingredients, net contents, and barcodes. Branding sets the identity, packaging gives it physical form, and labeling carries both to the customer.

What is brand identity in packaging?

Brand identity in packaging is how your visual and verbal signature shows up on the physical product: your logo, color palette, typography, imagery, and voice. Because packaging is often the first and most frequent place a customer meets your brand, it’s one of the best places to express your identity consistently.

How do you translate a brand into a label design?

Start from your brand guide, then carry your exact colors, typography, logo, imagery style, and voice onto the label, keeping everything legible at label size. Choose a material and finish that reinforce the brand’s feel. Then account for print realities: define colors in Pantone or CMYK (not just screen hex codes) and check them on a printed proof, since screen color doesn’t map perfectly to printed ink.

Why do my brand colors look different when printed?

Screens display color in RGB (light) while labels print in CMYK inks, often with Pantone spot colors for brand hues, and the two don’t map perfectly. A color that glows on screen can print duller or slightly shifted if it isn’t managed. Define your brand colors as Pantone or CMYK values and confirm them on a printed proof on your actual material.

Why does brand consistency across products matter?

Consistency is what turns individual labels into recognition. When logo placement, color system, and typography stay steady across every product, a lineup reads as one family and customers recognize you at a glance. Thoughtful variation (like a different accent color per flavor) is fine as long as the core identity stays consistent.

Ready to bring your brand to the shelf?

If you’re ready to turn your brand identity into a label that looks like you, we’re glad to help. Request a sample pack to see materials and finishes, or get in touch with your brand guide and we’ll help translate it into print.

More on designing a label that reflects your brand:
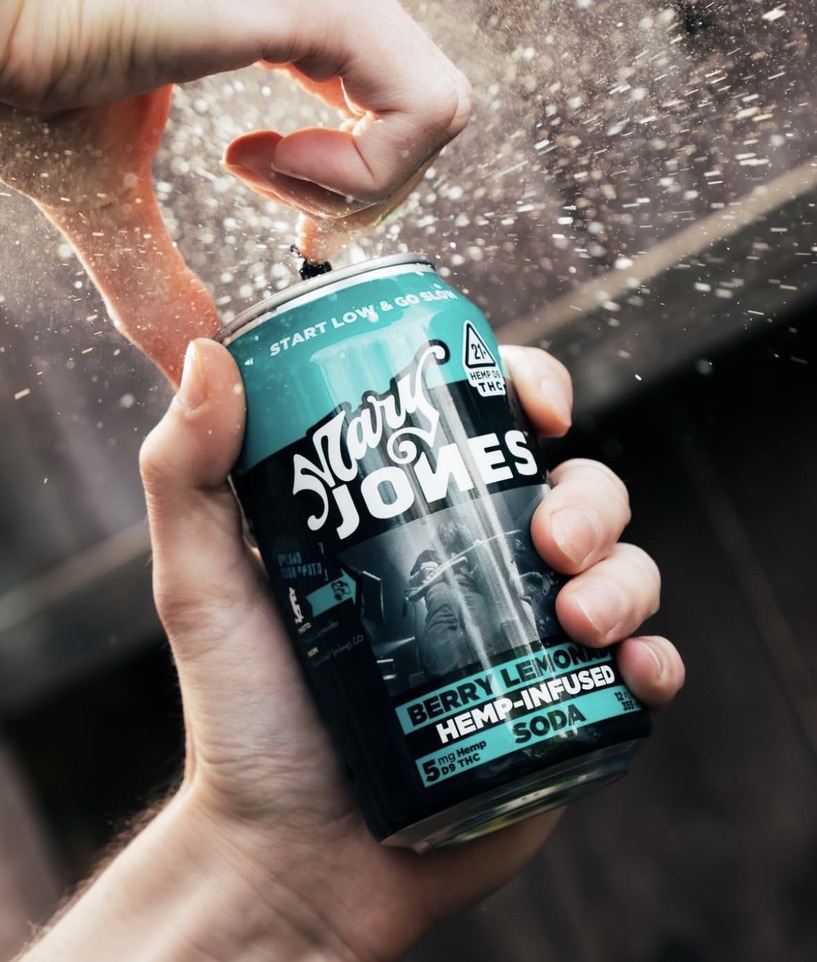
Designing Beer Labels: Sizing and Dimensions

⚞ The Highlights:

  • 12 oz can labels are typically around 3.625″–4″ tall by 7.5″–8″ wide. 16 oz can labels run around 5″ tall by 7.5″–8″ wide.
  • Standard 12 oz beer bottle labels are typically 3.5″ by 4″ for the front, with a back label between 2.5″ by 2.5″ and 3″ by 4″. 22 oz bombers use larger labels, often 4″ by 5″ or bigger.
  • Growler labels sit around 4″–5″ tall by 4″–6″ wide. Crowler labels typically run around 6″ by 9.5″.
  • Three formats for cans: pressure-sensitive labels, shrink sleeves (full 360° wrap), or direct-printed cans (no separate label at all).

A good beer label design needs the right canvas. Beer cans and bottles only give you a few square inches to work with, so getting the dimensions right before you start designing is the difference between a clean rollout and a redesign two days before press. Below is a complete sizing reference for the most common beer containers, plus practical guidance for partial wrap, full wrap, custom shapes, and printed cans.

(more…)

Where Can I Find a Beer Label Designer?

Even a tasty beer can fail if nobody buys it. The craft beer market is growing rapidly, with global data company Nielsen citing that craft sales are up more than 65 percent in the past five years. If you want a nice slice of that multi-billion-dollar pie, you need to make sure your product stands out in a very competitive crowd.

Your beer label is going to be the first thing shoppers will see, so you need to attract their eyes before you can convince their taste buds to go on a second date. A professional beer label designer can create a label that not only sticks out on shelves, but also allows you to tell a story about the beer that you’ve carefully crafted.

Beer can with shrink sleeve

Do You Really Need a Professional Label Designer?

Even if you’re tempted to handle design in-house or try a DIY approach, working with a pro can really take your label to the next level. Professional label designers bring specialized expertise and a proven track record that often translates into higher quality and more effective packaging.

If you don’t believe us, consider these findings from Nielsen’s craft beer design audit:

  • 70 percent of craft beer buyers decide which beer to buy right at the shelf
  • 66 percent of American craft beer buyers say that a beer’s label and packaging are “very” or “extremely” important for getting noticed
  • 60 percent say that a beer’s label and packaging are “very” or “extremely” important in convincing them to give it a try
  • 71 percent of craft beer buyers say they like to try brands with bold and interesting packaging

That’s a lot of people judging a beer by its looks, which is why finding a designer who truly understands your product can be a game changer.

Image of a custom label from a beer label designer.

Getting It Right: Technical and Production Tips

Great design is important—but it’s equally important that your concept translates into the final product. Here’s what you need to know about the technical side:

  • Print Resolution & Color Models: Make sure your artwork is high resolution (at least 300 DPI, meaning it’s sharp enough for printing) and designed in the appropriate color mode—CMYK. This standard printing color model ensures that what you see on your screen matches what comes off the press.
  • Material & Finishing Options: Think about which paper or packaging material complements your design best. Options like matte, gloss, or textured finishes can really change the overall look and feel. Other options like foil stamping, embossing and debossing, and lamination can make parts of the label stand out.

Regulatory & Compliance Factors: Remember, your design needs to follow certain rules—like those in the Alcoholic Beverage Label Act, which spells out what info must appear on your label (health warnings, ingredient lists, alcohol content, etc.). Make sure your designer is aware so you don’t hit any snags during production.

Cans vs. Bottles: Label Design Considerations

When evaluating designers, keep in mind that cans and bottles each have unique design considerations:

  • Label Size and Shape: Bottles often require multiple labels, including front labels, back labels, and neck labels. Each label needs to communicate effectively on its own, but also fit together cohesively. Cans, on the other hand, typically use a single wrap-around label or shrink sleeve, meaning your design needs to work seamlessly from all angles.
  • Visibility and Shelf Presence: Cans offer a continuous canvas that can make bold, graphic-driven designs particularly effective. Bottle labels usually require a more segmented approach, balancing individual elements like logos, text, and mandatory information across multiple labels.
  • Neck Labels and Specialty Areas: Bottles frequently include neck labels, which can enhance brand recognition and premium feel. Ask your designer if they have experience leveraging these smaller labels to make your beer stand out.
  • Material and Finish Differences: Some label finishes and embellishments (such as embossing, foil stamping, or textured papers) might suit bottles better due to their shape and handling. Cans benefit from durable, moisture-resistant label materials and vibrant printing, as condensation and handling can affect how the design holds up over time.

Be sure to discuss your packaging format with your designer early, so your design can maximize its impact, no matter which route you choose.

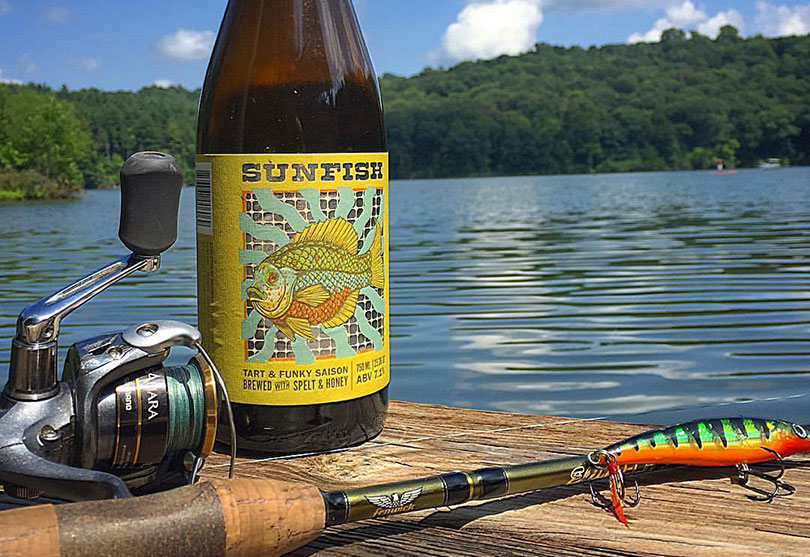
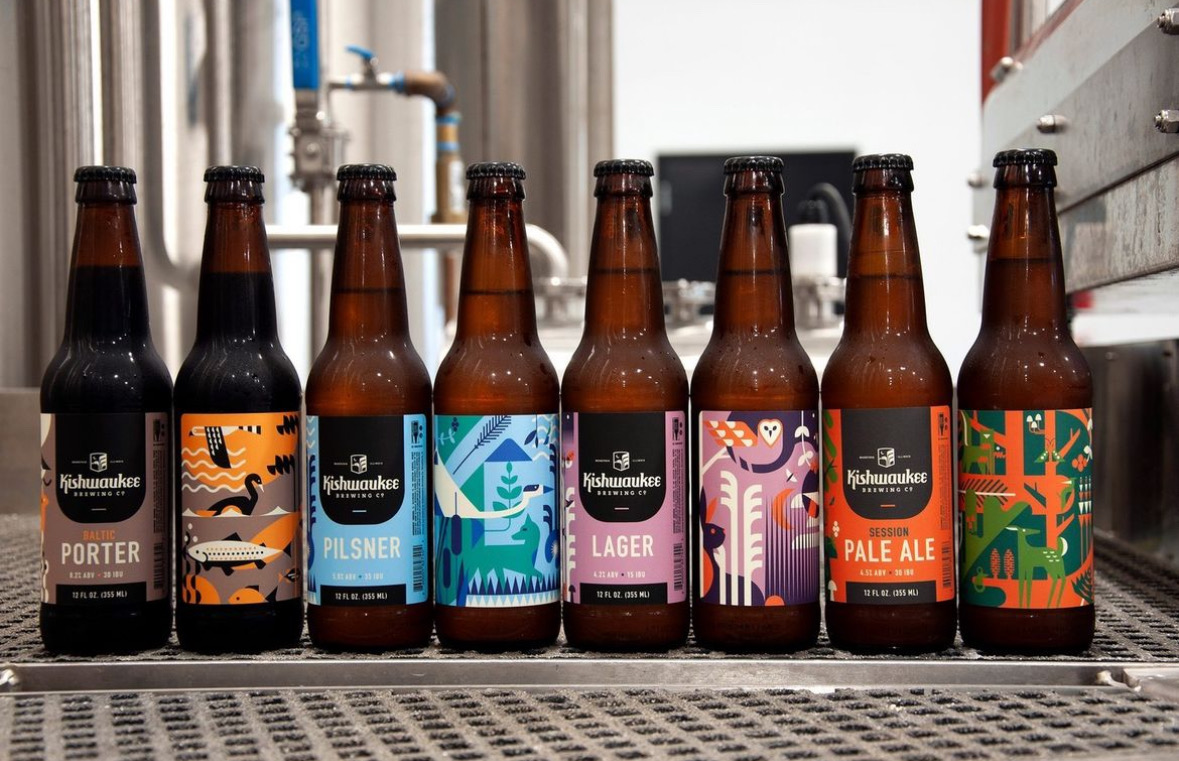
Beer bottles

Your Pre-Production Checklist

Here’s a quick checklist to make sure everything’s in order before you print.

  • Artwork Quality: Ensure your artwork is at least 300 DPI (for clear, sharp images) and in CMYK (to guarantee accurate print colors).
  • Material Selection: Review material samples—whether it’s matte, gloss, or textured finishes—to decide which look best enhances your design.
  • Compliance Check: Double-check that your design follows the Alcoholic Beverage Label Act and that all mandatory info is included.
  • Printer Consultation: Meet with your printer to confirm that your design files and chosen materials will work during production.

How to Choose the Right Beer Label Designer

Before you hire a designer, it’s important to do your homework to find someone who’s the right fit for your brewery. Your beer is unique, and the market is more crowded than ever. Here’s how you can make the best choice:

  • Evaluate Their Portfolio: Look for designers with specific experience in the beer or beverage industry. Their portfolio should show creativity and a solid understanding of how designs work in the real world.
  • Ask the Right Questions: In your initial conversations, ask about their experience with print production, regulatory compliance, and how they capture your brand’s story.
  • Questions to Consider:
    • What experience do you have with beverage labels?
    • How do you ensure your designs meet regulatory standards?
    • Can you share a case study where your design improved a brand’s sales?
  • Set Clear Expectations: Prepare a detailed brief that outlines your technical needs and creative vision. This minimizes misunderstandings and ensures the final product is exactly what you need.

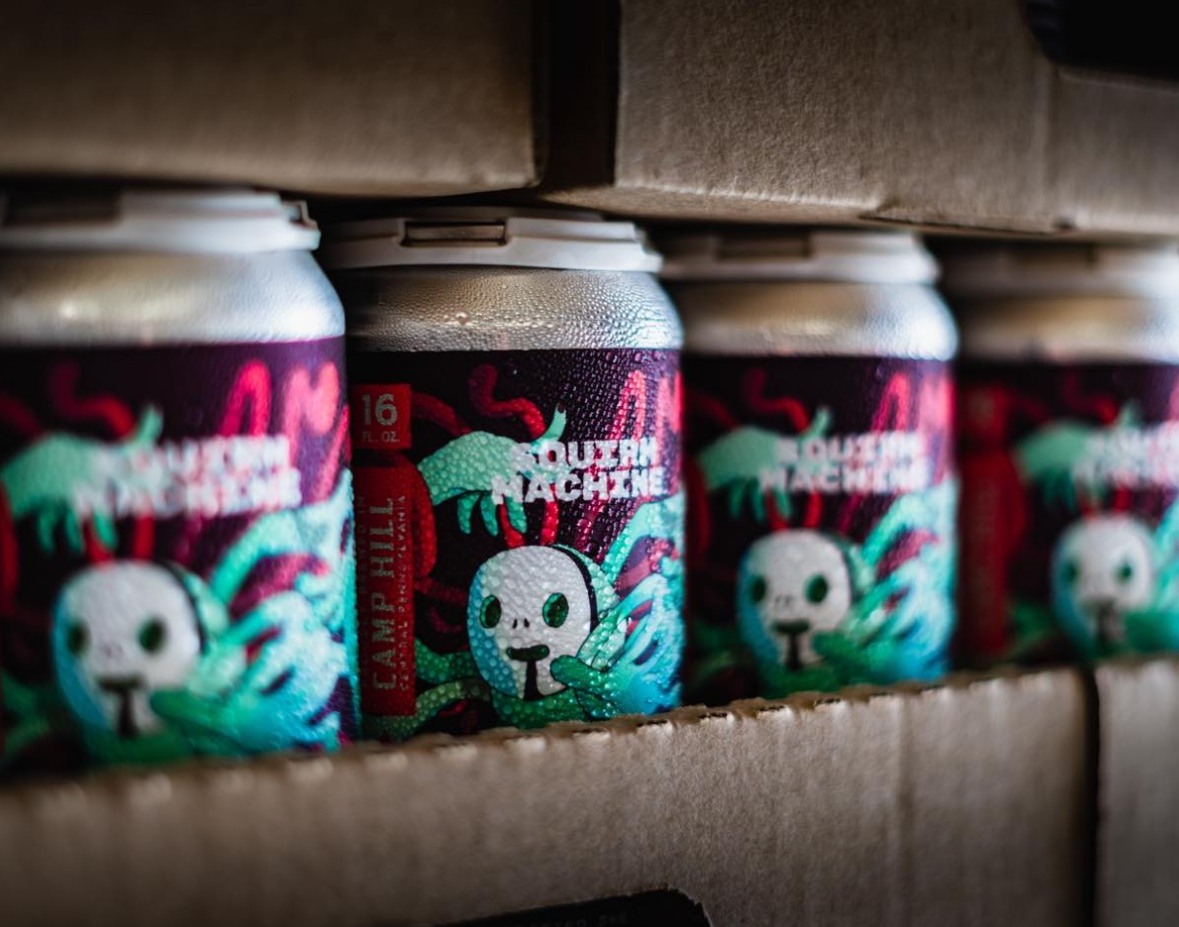
Beer cans with labels

Consider Artwork Styles That Fit Your Brand

When reviewing a designer’s portfolio, pay close attention to their artwork style to ensure it aligns with your brand personality and your target audience. Consider the following elements:

  • Illustration vs. Photography: Does your beer brand lean toward playful and illustrated graphics or more refined photographic imagery? Choose a designer whose illustrative style consistently matches your intended vibe.
  • Typography Choices: Type plays a huge role in readability and personality. Look at whether the designer’s typographic choices—from bold, eye-catching fonts to subtle, minimalist lettering—match your brand’s tone and the impression you want to make.
  • Color Usage: Evaluate if the designer’s use of color resonates with your brewery’s identity. Bold, vibrant colors attract attention but may not align with every brand story, whereas muted or vintage palettes can convey tradition or craftsmanship.
  • Consistency and Flexibility: Consider whether their style can consistently carry through various product lines or seasonal beers while still offering enough flexibility to differentiate each brew.

Ready to Elevate Your Beer Label Design?

If you need a talented designer who can make your labels stand out while ensuring technical excellence and strategic impact, we’re here to help.

Over the years, we’ve worked with plenty of designers who excel at creating incredible designs and understanding the digital printing process inside and out. You can trust our national network of design experts to help your beer win hearts and shelves alike.

Check out our directory of approved beer label designers today. When your design is all set, drop us a line, and we’ll be happy to talk about digital printing options for your bottles or cans.

Red Labels That Inspire: A Gallery of Designs for Red Product Labels

Red is the color of passion, power, and unshakable confidence—and when it’s used on a label, it has the ability to make products pop off the shelves. The color red can make a product feel bold and fiery or rich and refined. In this post, we’re diving into some inspiring examples of red labels that demand attention, connect with customers, and leave a lasting impression.

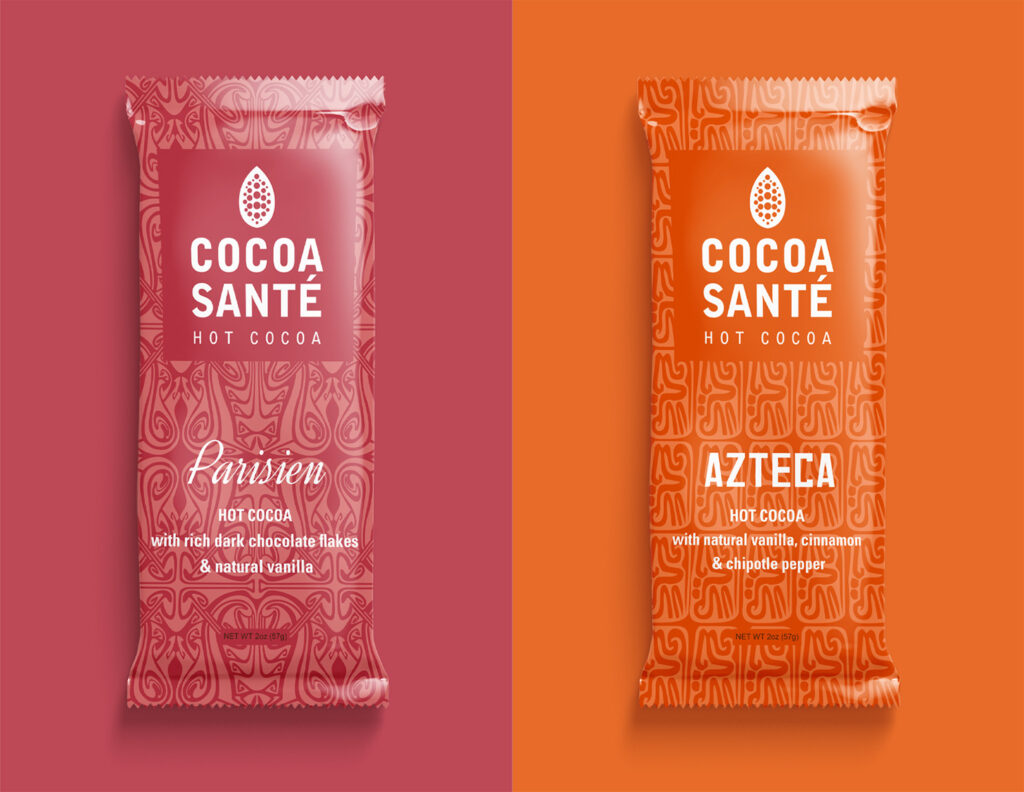
Cocoa Santé Hot Cocoa

The deep red on the Cocoa Santé Parisien label grabs your attention instantly—it’s bold, luxurious, and exudes warmth and indulgence. It’s the kind of color that makes you feel like you’re about to unwrap something truly special, setting the perfect tone for a Parisian-inspired cocoa experience.

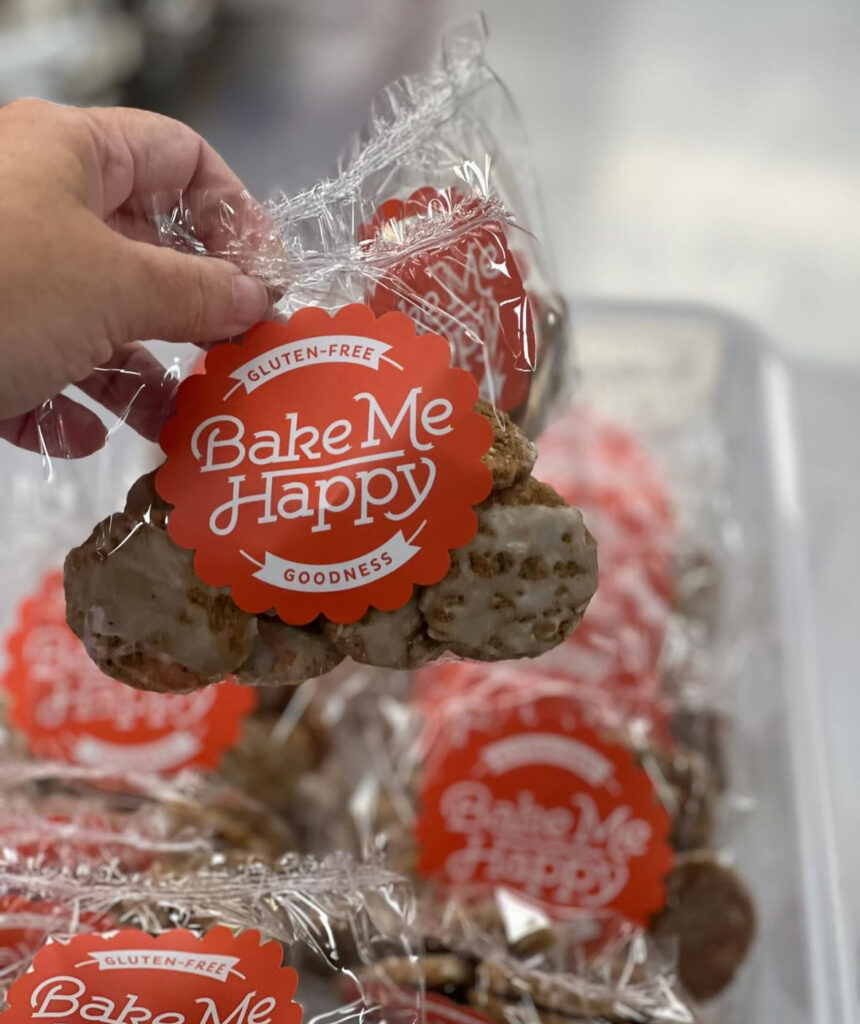
Bake Me Happy Baked Goods

The bright, cheerful red of the Bake Me Happy label is impossible to miss—it’s fun, welcoming, and gives off a sense of homemade joy. Paired with the playful scalloped edge and friendly typography, it’s like the packaging is saying, “Yes, it’s gluten-free, but it’s also packed with pure happiness!”

Baked cookies with custom labels

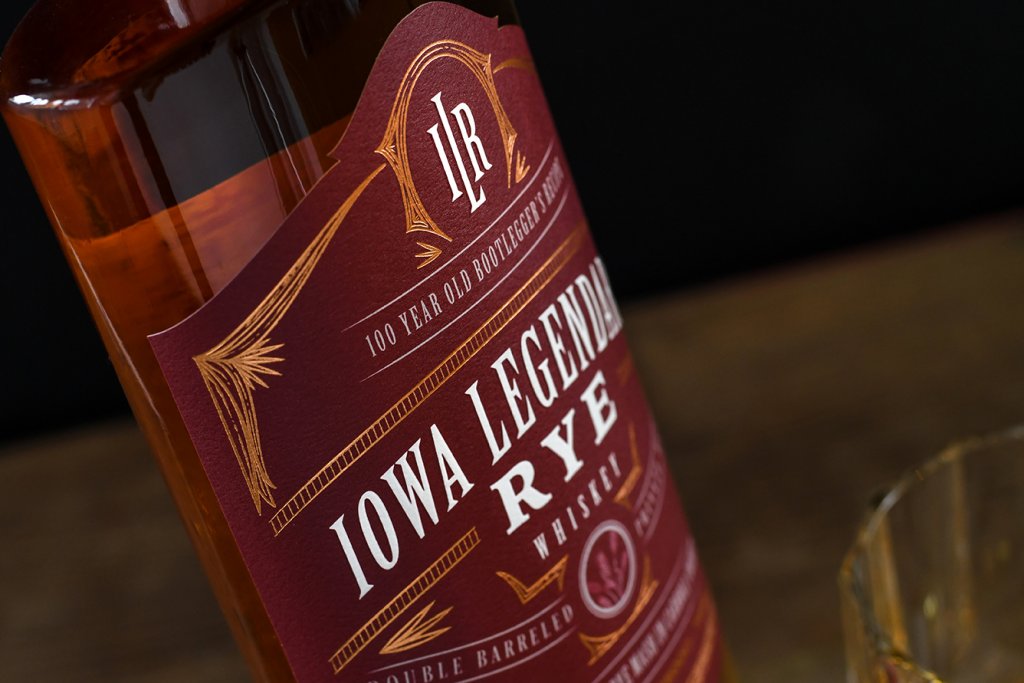
Iowa Legendary Rye Whiskey

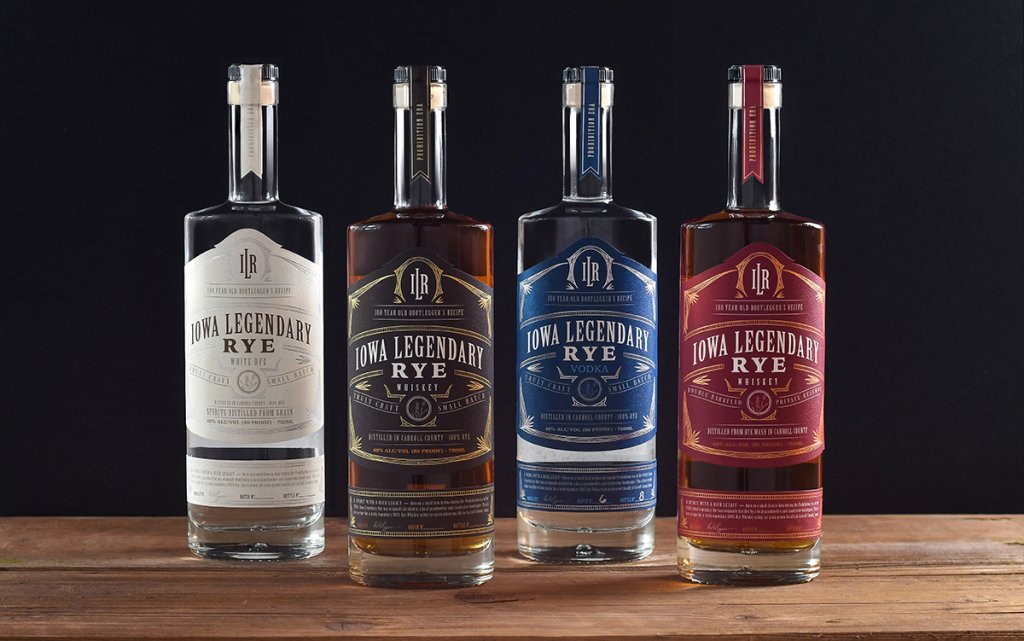
The deep, rich red of the Iowa Legendary Rye label is sophisticated, and gives nod to its storied 100-year history, drawing you into the bootlegger’s era. With its bold typography and intricate golden accents, the design evokes craftsmanship and legacy.

Rye Whiskey Label

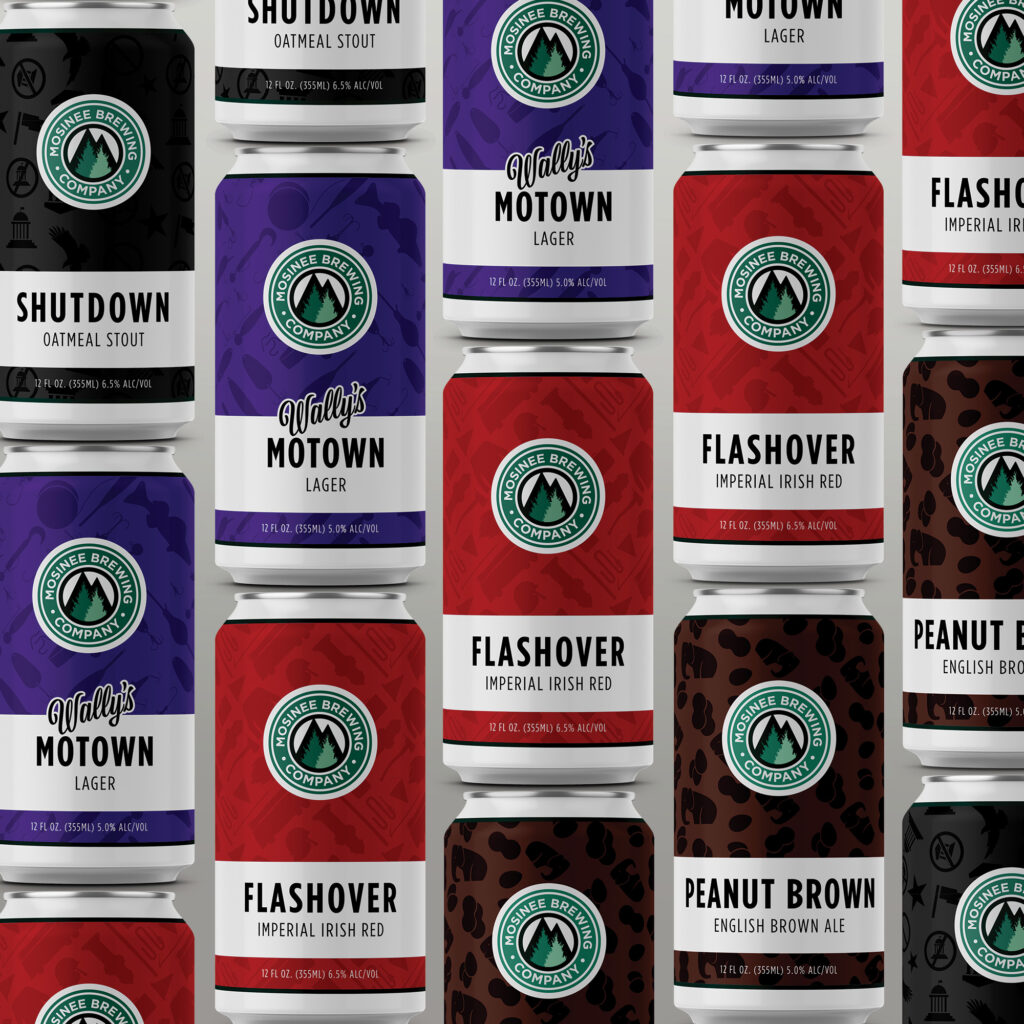
Mosinee Brewing Company’s Flashover Imperial Irish Red

The fiery red design of Mosinee Brewing Company’s Flashover Imperial Irish Red cans gives off intensity and energy, echoing the bold, full-bodied flavor inside. The subtle textured pattern adds depth and character, making this can unforgettable.

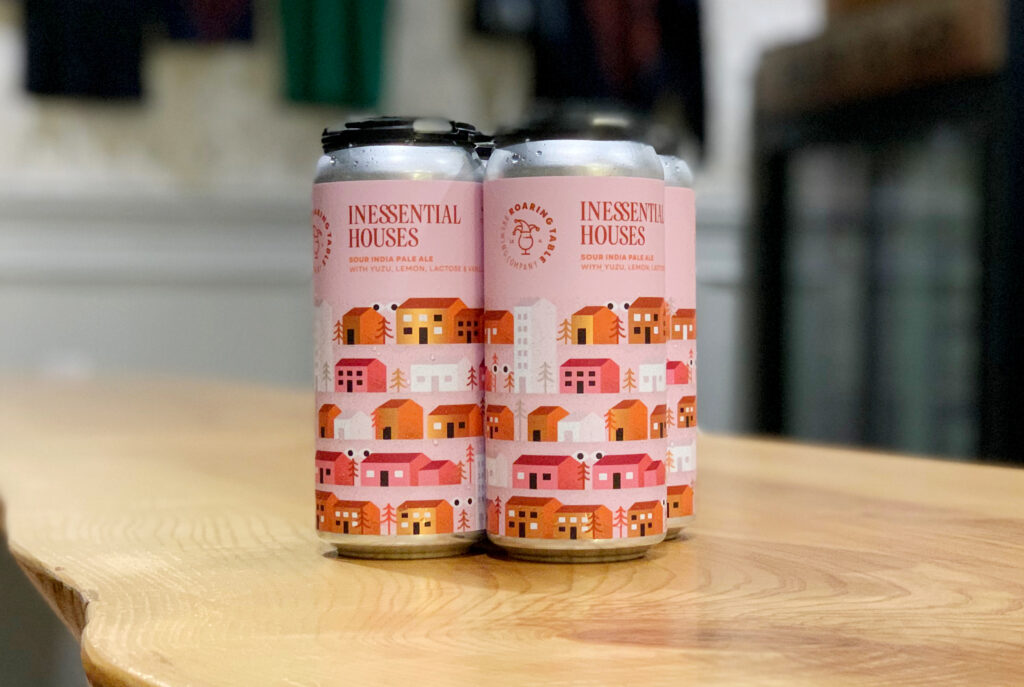
Roaring Table Brewing’s Inessential Houses IPA

The playful pink palette and charming illustrations on Roaring Table Brewing’s Inessential Houses can make it feel like you’re strolling through a vibrant, whimsical neighborhood. The design is as refreshing and unexpected as the Sour IPA inside.

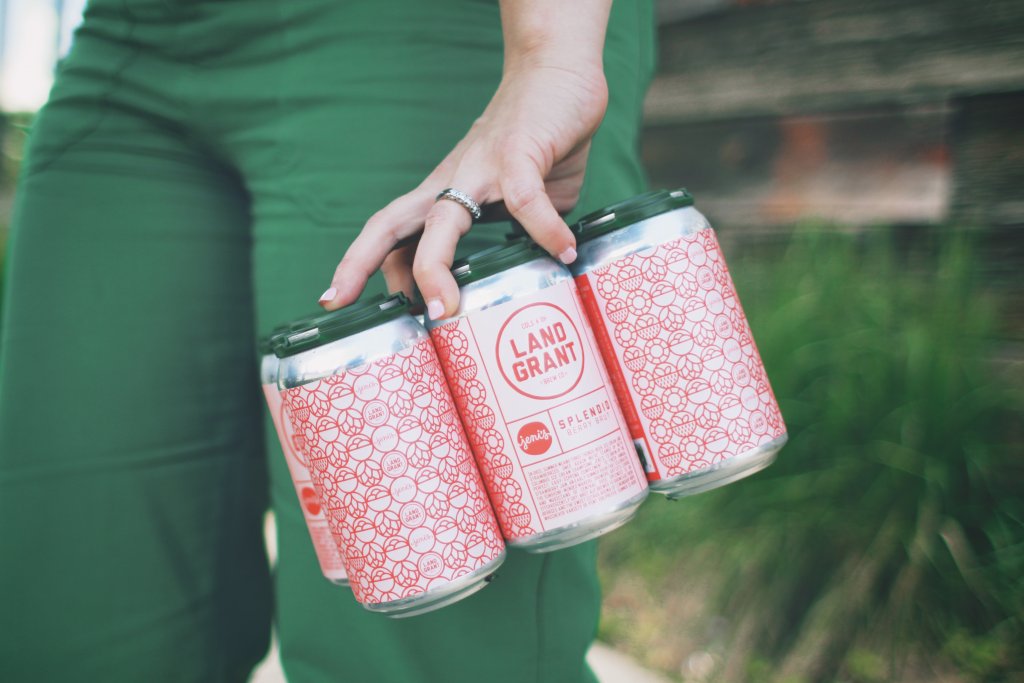
Land Grant’s Splendid Berry Brut

The bright, playful red and intricate patterns on Land Grant’s Jeni’s Splendid cans mirrors the creativity and sweetness of its collaboration with Jeni’s Splendid Ice Creams. The design feels like a joyful celebration in a can—inviting, fun, and as delightful as the treat-inspired beer inside.

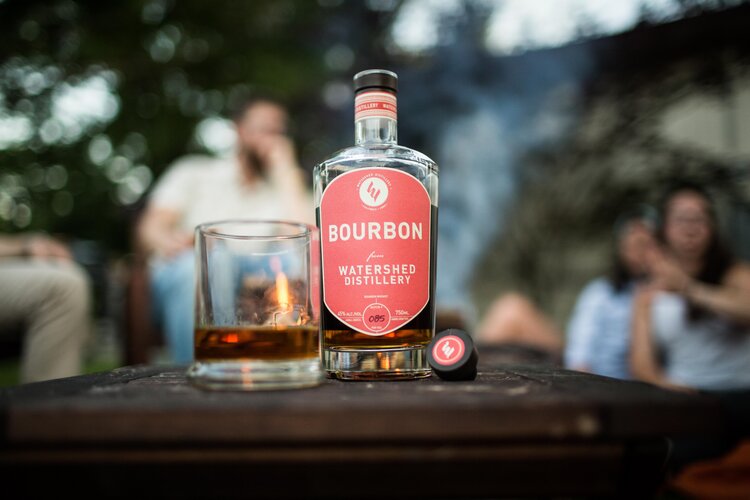
Watershed Distillery Bourbon

The bold red label on Watershed Distillery’s bourbon strikes the perfect balance between modern simplicity and timeless warmth, drawing attention to its refined craftsmanship. It’s a design that feels right at home at any gathering—inviting, approachable, and as smooth as the bourbon it represents.

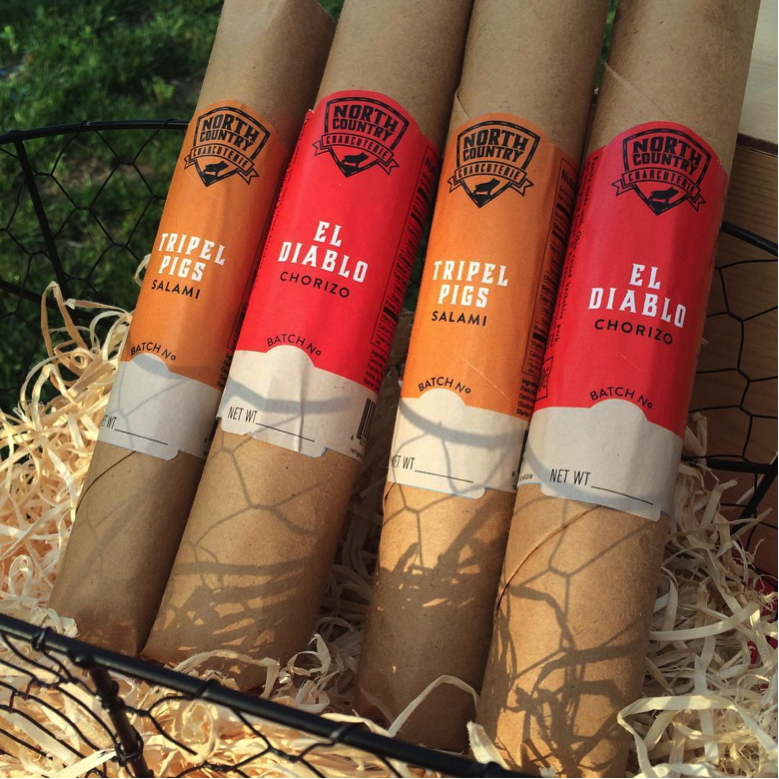
North Country Charcuterie

The fiery red labels for North Country Charcuterie’s El Diablo Chorizo demand attention with their bold and spicy energy, channeling the heat-packed flavor inside. The clean typography and rustic packaging create an artisanal charm.

Custom food label for North Country

Stadium Pizza Write Shot Red

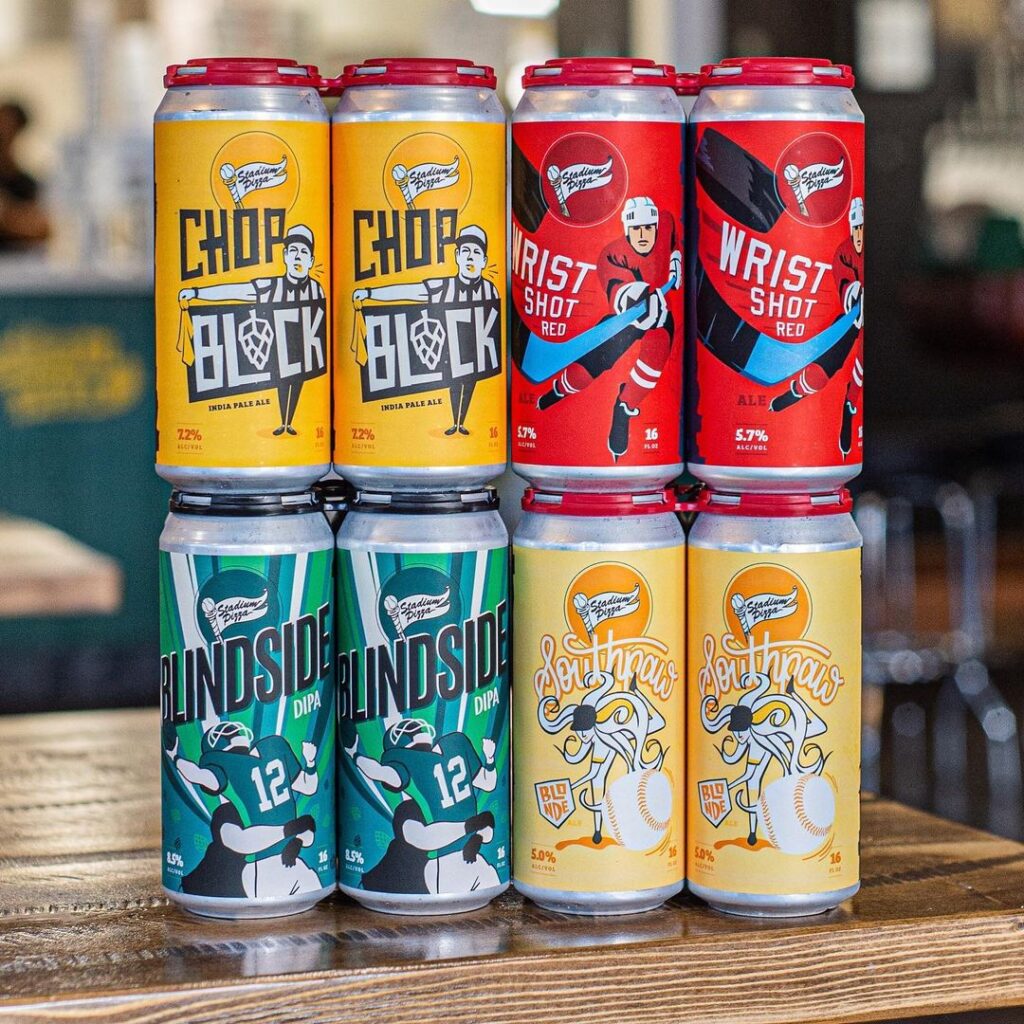
The bold red labels for Stadium Pizza’s Wrist Shot Red amber ale hit the mark with their energetic hockey-inspired design. The striking colors and dynamic illustration make this brew feel like a power play for your taste buds, perfect for game day or any day.

Cà Phê Sữa Đá Sang Vietnamese Coffee

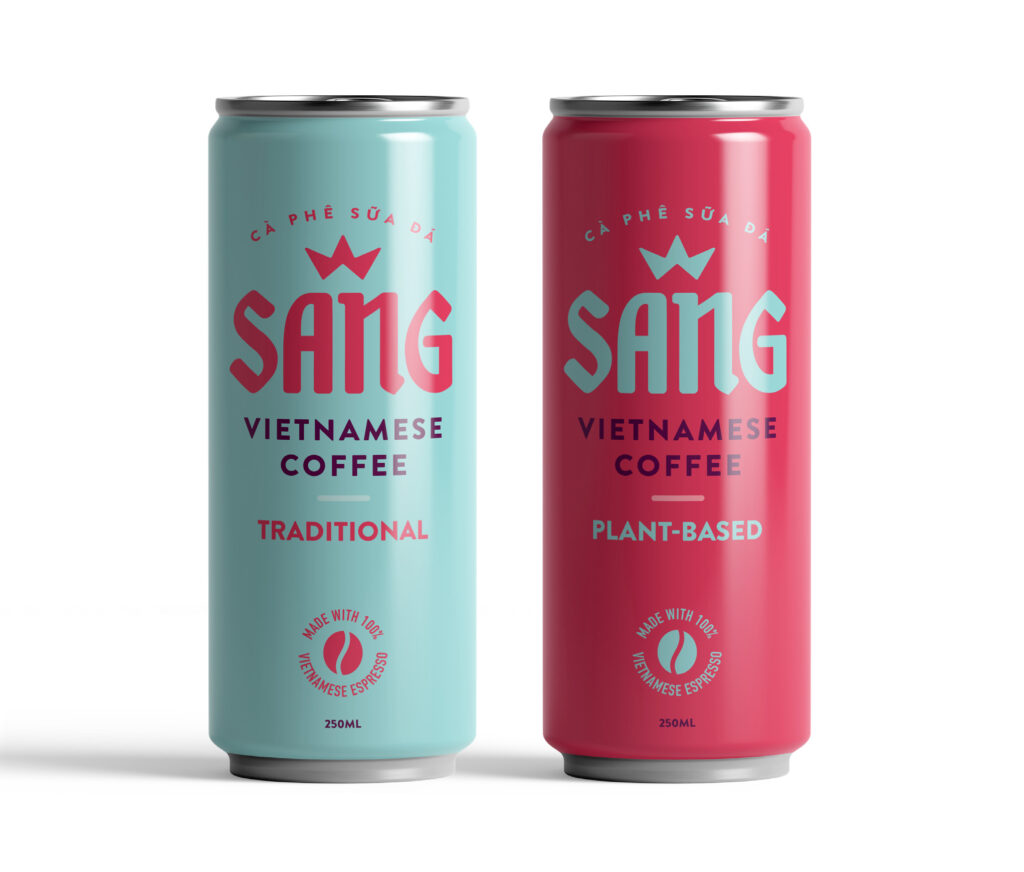
The vibrant red label on Sang Vietnamese Coffee’s plant-based can is bold, modern, and full of energy. Paired with the minty green/blue typography, it’s a fresh twist on tradition that grabs your attention and promises a creamy, plant-powered coffee experience.

Clos du Val Cabernet Sauvignon

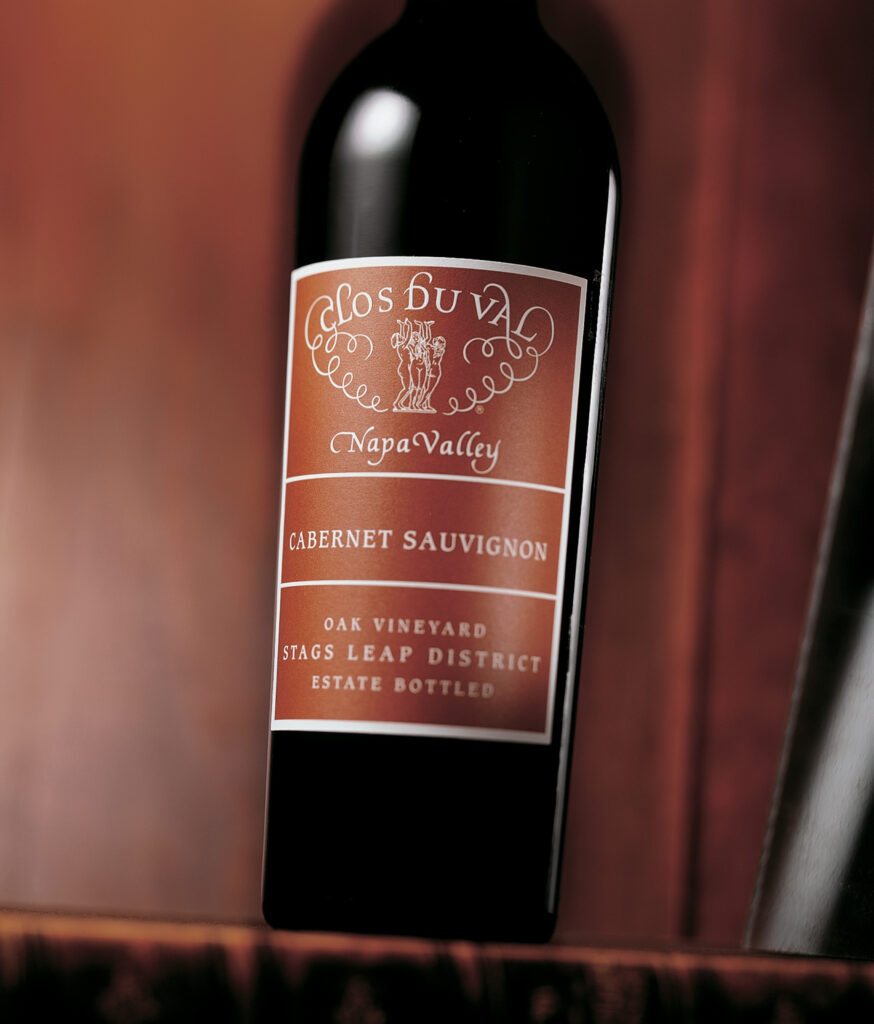
The rich, earthy tones of the Clos du Val Cabernet Sauvignon label evoke elegance and timeless sophistication, capturing the essence of Napa Valley’s craftsmanship. With its delicate script and balanced design, the label feels as refined and complex as the wine itself.

Wine bottle with red label

Big Mountain Ciderworks Cherry Blossom Cider

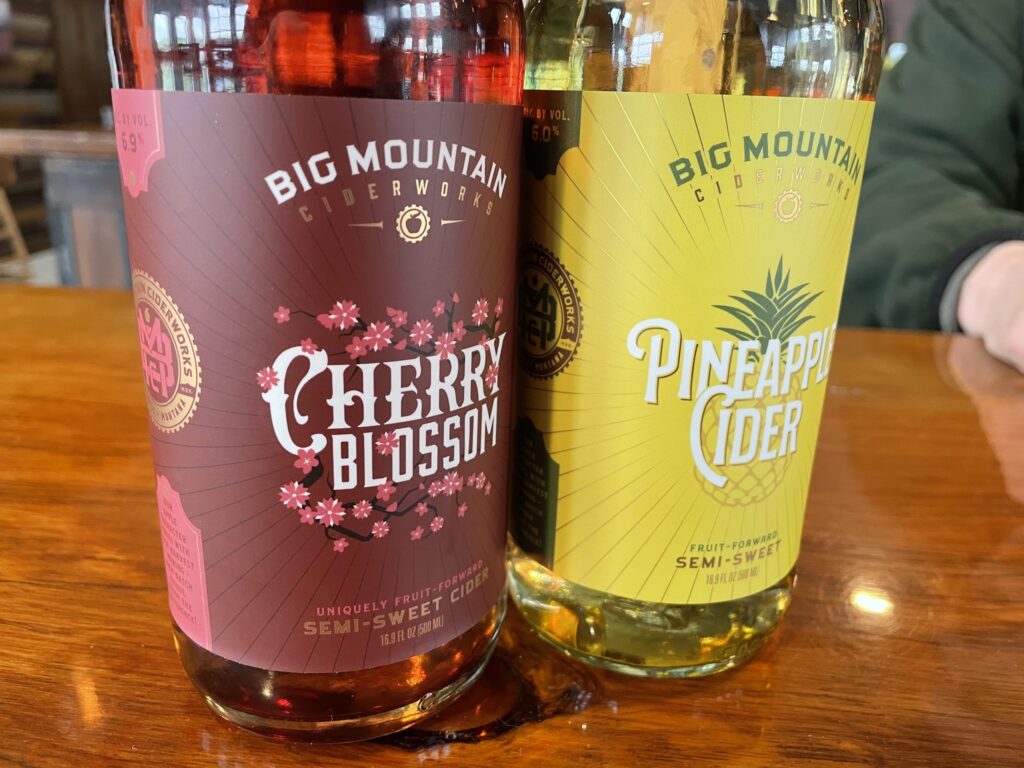
The Big Mountain Ciderworks Cherry Blossom label features a rich cherry-red background adorned with delicate floral accents that evoke freshness and sophistication. The interplay of bold typography and soft blossom imagery creates a perfect harmony, much like the semi-sweet cider inside.

bottle with custom cider labels

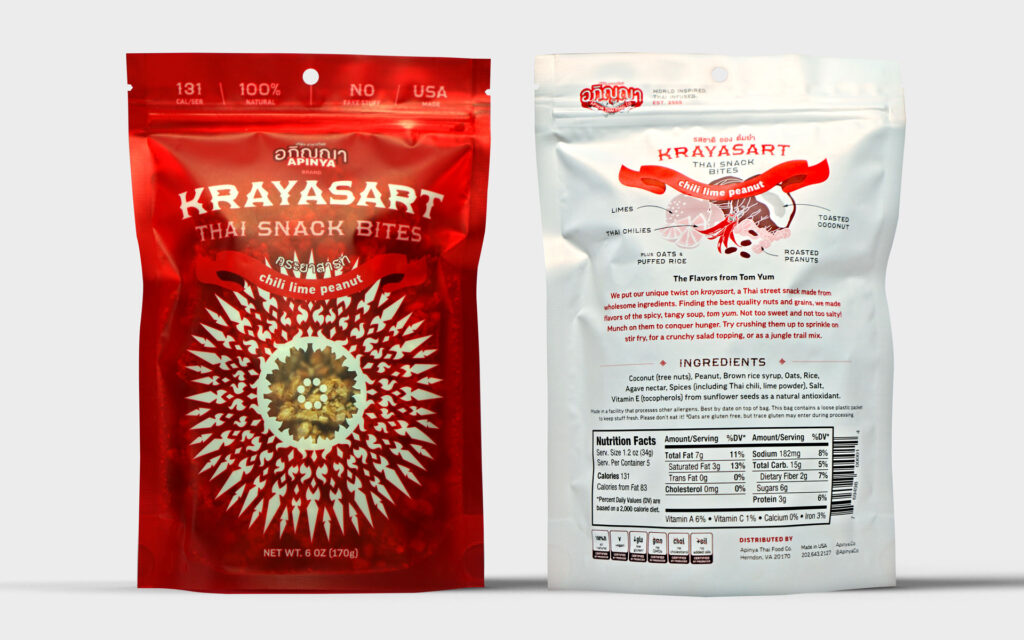
Krayasart Thai snack bites

The vibrant red packaging of Krayasart Thai Snack Bites demands attention with its intricate, mandala-inspired design that radiates energy and cultural authenticity. Perfectly complementing the bold chili-lime peanut flavor, this packaging promises a snack experience that’s as dynamic and exciting as its appearance suggests.

Specialty food packages with custom labels

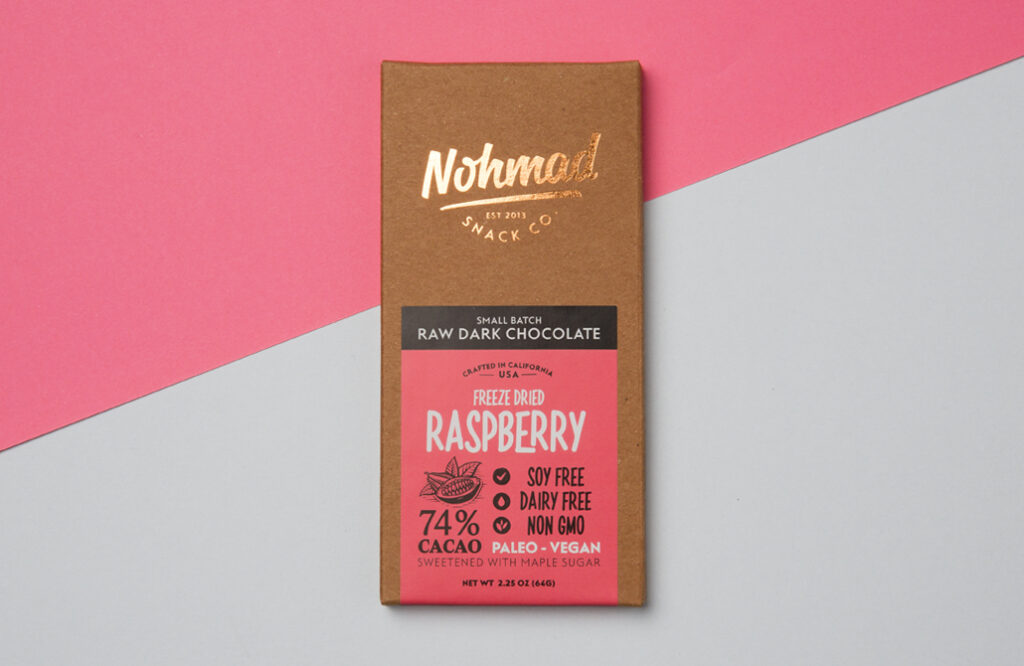
Nomad Snack Company’s Raw Dark Chocolate Bars

The Nomad Snack Company raw dark chocolate bar packaging is a perfect blend of rustic charm and modern flair. With its kraft paper base and vibrant pink accent, it feels natural and handcrafted, while the copper foil logo adds a luxurious touch.

chocolate box with custom label

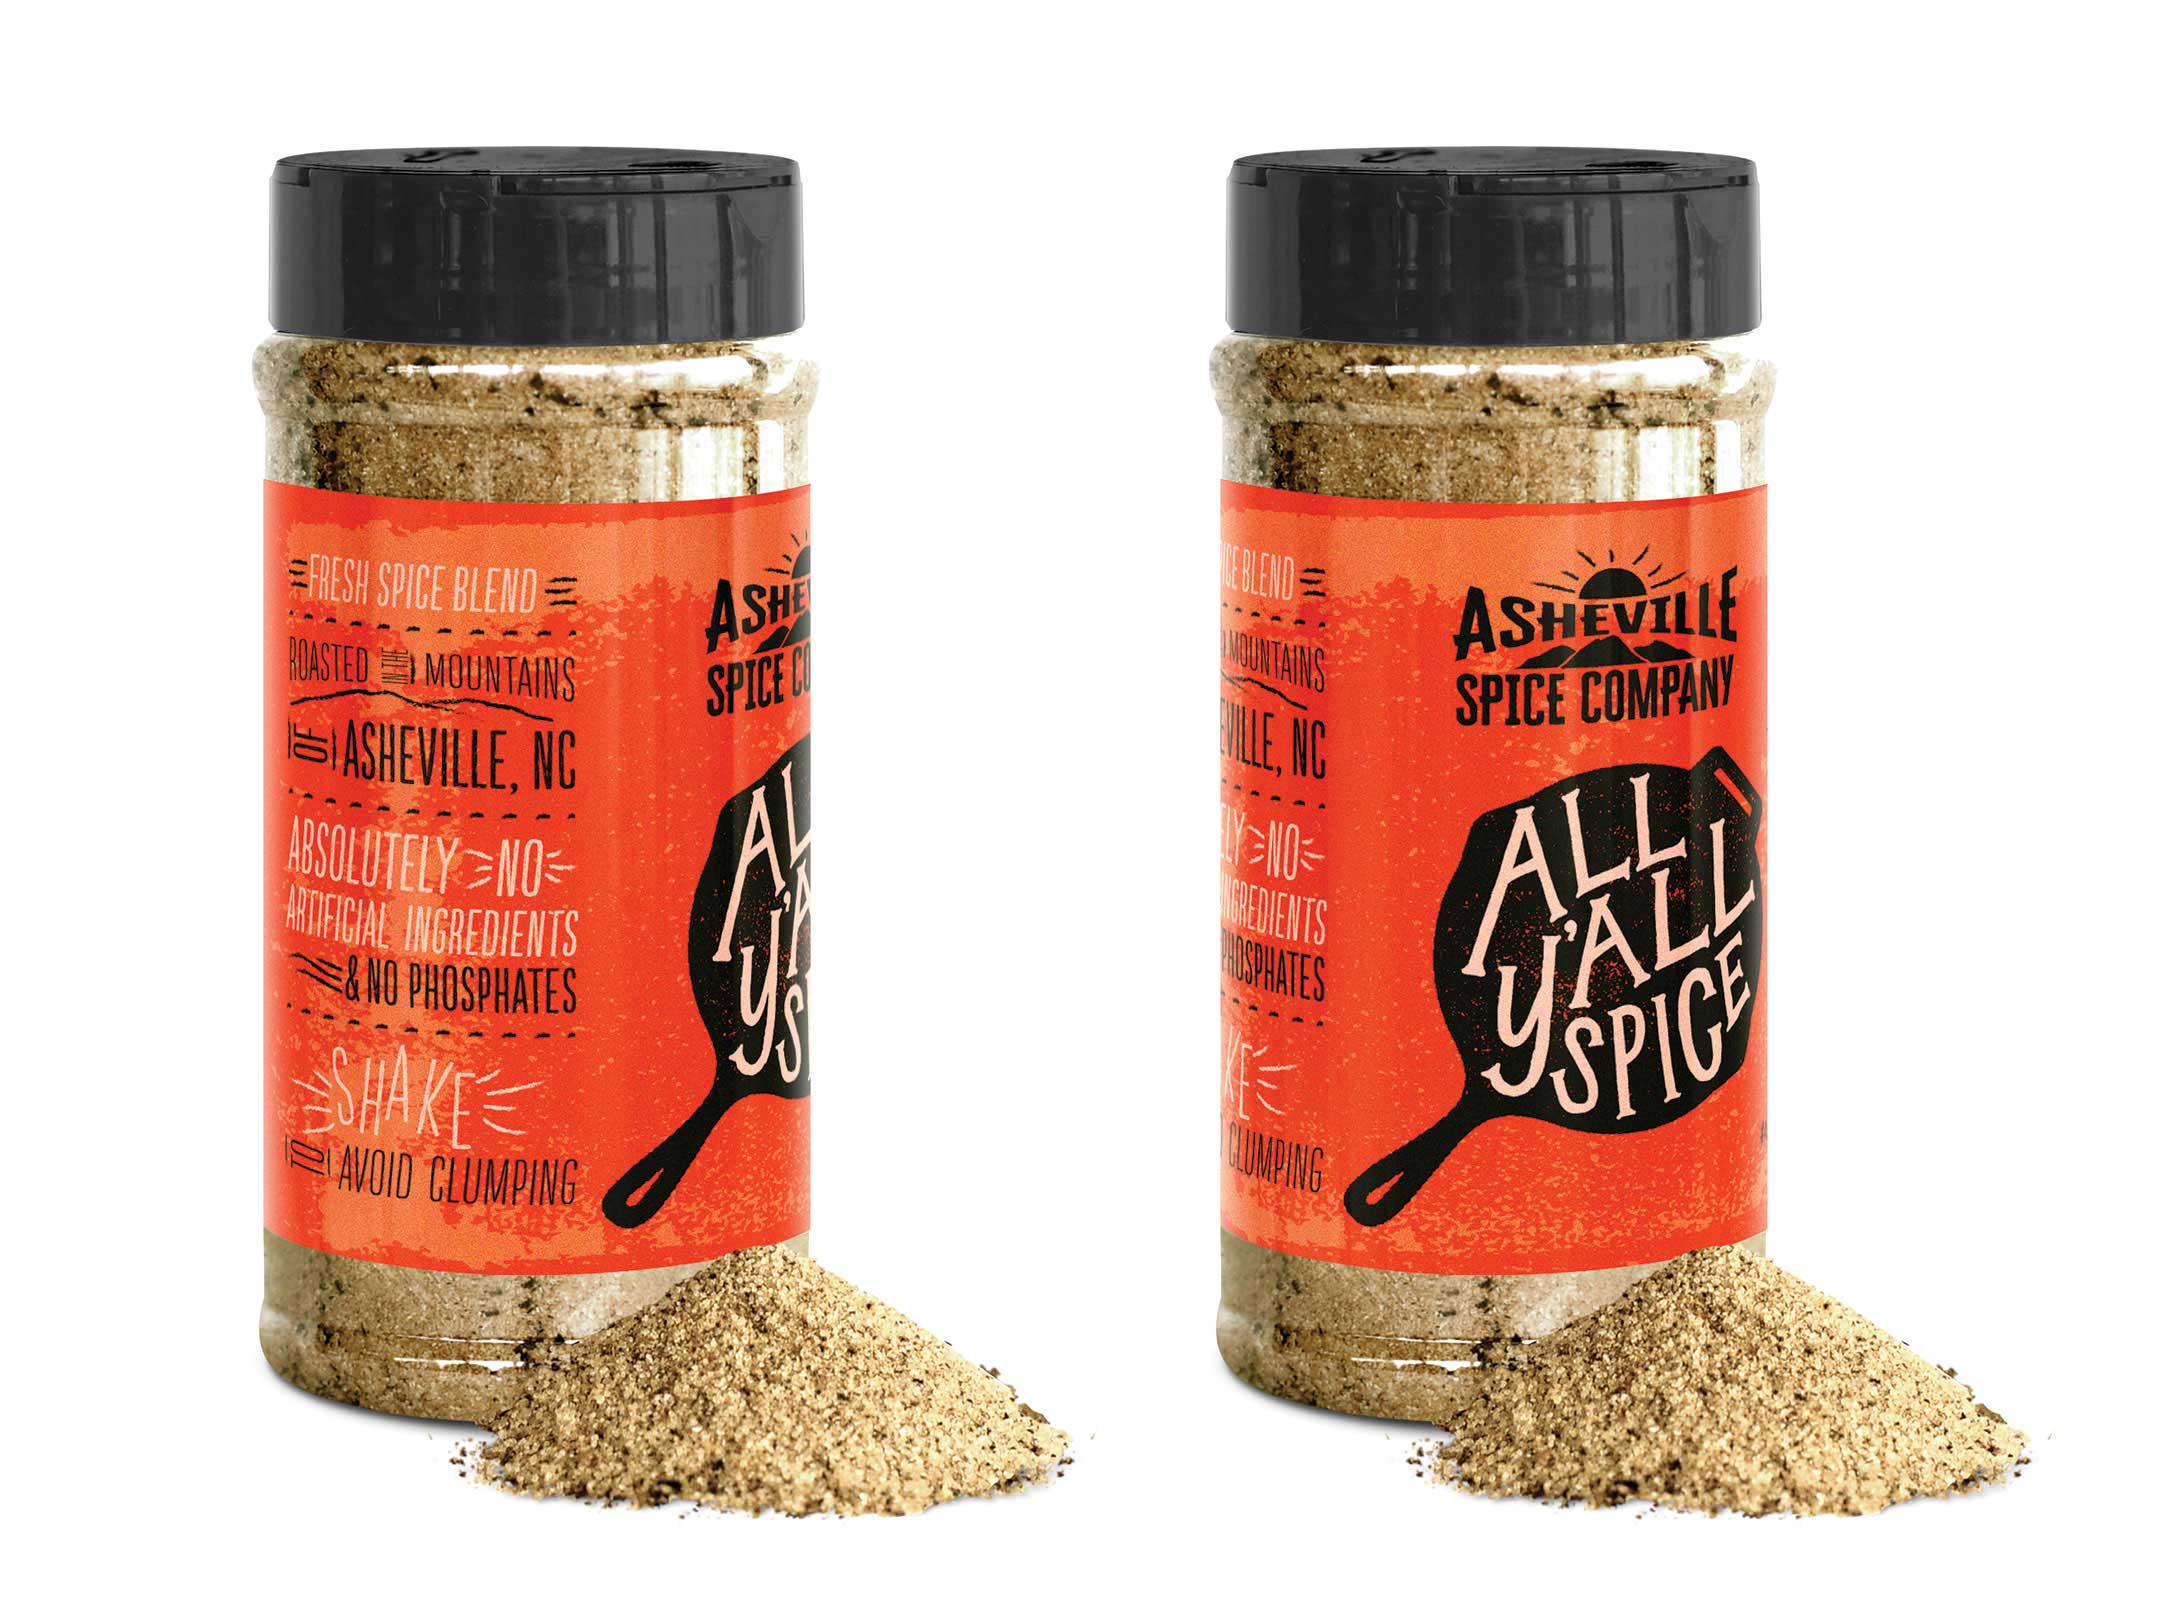
Asheville Spice Company All Y’All Spice

The bold orange/red label for Asheville Spice Company’s All Y’All Spice is as vibrant and flavorful as the blend itself, capturing the warmth of southern charm and the zest of its mountain-roasted ingredients. With its playful skillet graphic and hand-drawn typography, this packaging promises an authentic and lively seasoning experience.

Spice Seasoning Jars with Labels

Pushing the Limit: What Can’t You Do with A Beer Label Design?

Brewers around the world are in a constant battle for people’s attention, whether their products end up on shelves, in coolers, or anywhere else that potential buyers may see their products. In a constant battle for attention, you may want to give your beer labels an extra edge to create a certain brand identity and attract consumers. However, that extra something in your design may be an issue when it comes to label approval.

Whether you’re trying to push some boundaries or simply be clever, your beer label design is ultimately judged by government. The Alcohol and Tobacco Tax and Trade Bureau (TTB) has certain standards for what’s permissible on beer labels. As you may expect, there are a lot of practices that are prohibited for beer label design. The Code of Federal Regulations provides a very long, detailed list, so we’ll try and break down just what may land your design in hot water as succinctly as possible.

What Can’t You Put on a Beer Label?

When you’re trying to push the boundaries with your beer label, it’s important to make sure your design doesn’t conflict with any of the types of statements listed by the TTB. It’s important to note that “statements” applies to more than just text. Anything written, printed, graphic, or portrayed by some other means on a beer label, carton, or case is considered a statement of some sort. As such, any of the following types of statements can lead to the TTB denying your label design.

Untrue or misleading statements

Simply put, the TTB is going to turn you down if they think you’re lying on your label. The TTB considers a statement as untrue if it’s directly false, false by omission, generally ambiguous, or somehow misleading.

For example, a brewery positioning itself to be a microbrewery without meeting the legal definition of one can have its label denied for misleading consumers. Meanwhile, Kona Brewing Company was sued in California for misleading people to think that its beer was brewed in Hawaii. While Kona does use Hawaiian imagery and names, every label clearly states that the beer is not brewed on the island. Because of these statements, the TTB not find the labels misleading (although Kona did eventually agree to a settlement for the lawsuit).

Disparaging statements

While you may want to make a few snide comments about your competitors or some other person or entity, the TTB won’t let you make any statements they determine to be disparaging or hurtful. With that in mind, you may want to rename your batch of “At Least It’s Better Than [Blank] Schwarzbier.”

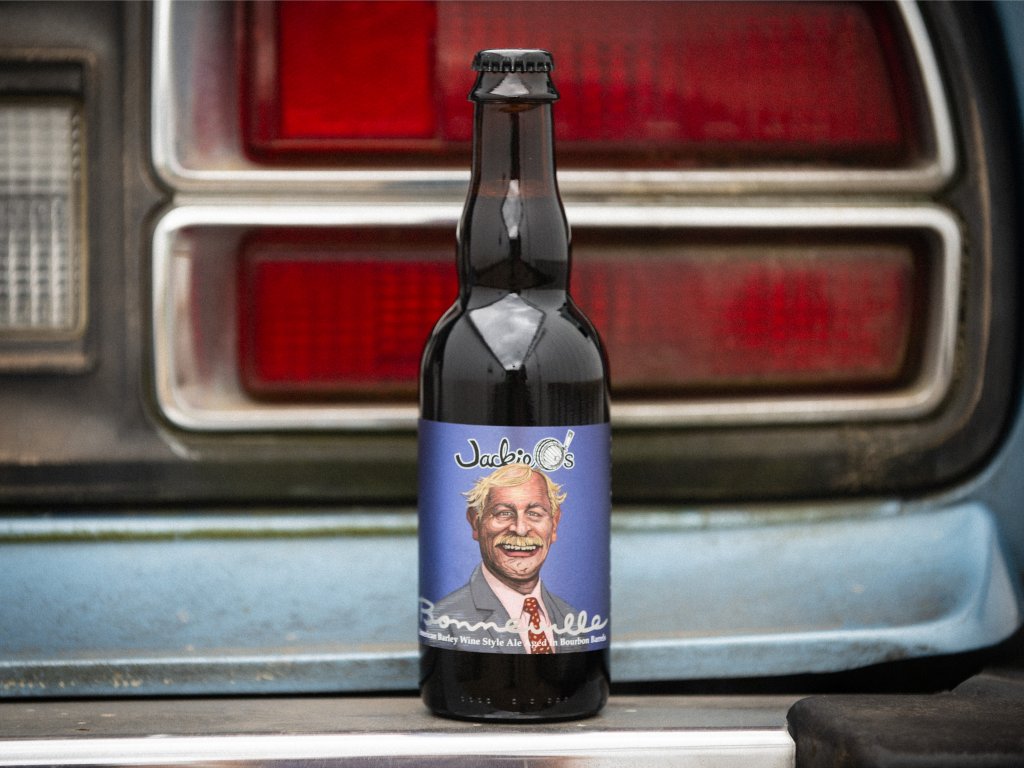
A Jackie O’s beer label featuring a likeness of a fictional person.

Obscenity or indecency

This section will likely be the biggest hurdle for any brewer trying to test some boundaries. According to the TTB, “any statement, design, device, or representation which is obscene or indecent” is prohibited. However, it’s not always clear what the TTB will consider off limits. This type of ruling is one of the hardest to judge because it depends on what a TTB representative finds obscene or indecent, not you or your customers.

Part of the issue with this type of prohibited statement is that various boards around the country have been inconsistent in past ruling. For example, The Alabama Alcoholic Beverage Control Board banned Founders Brewing Company’s Dirty Bastard Scotch Ale despite having already allowed the sale of Stone Brewing’s Arrogant Bastard Ale (the board eventually reversed its stance on Dirty Bastard after public outcry). As such, rulings on obscenity or indecency are up in the air, so be prepared to change your design or fight against the decision if your label might be construed as offensive in some way.

Improper guarantees or tests

Fortunately, guarantees are easier to identify than obscenity. Any element that provides some form of guarantee – aside from a money-back guarantee – is subject to denial if a TTB official finds that the guarantee may deceive consumers. The TTB will also deny any usage of analyses, standards, or tests that may mislead potential buyers. That means you can’t make a guarantee that your beer will provide short-term happiness, even if you did survey a small test group of patrons.

Names and likenesses

While you may have a great pun based on a celebrity’s names, that play on words can lead to a swift label denial (and potentially a cease and desist letter). The TTB bars the use of any names or likenesses of any prominent living individual or organization, which includes using any simulation or abbreviation to hint at the person or group. This practice is in place to prevent breweries from suggesting that certain people or organizations endorse a product.

For example, Hysteria Brewing Company in Maryland recently ran afoul of this section after using Baltimore Ravens quarterback Lamar Jackson’s likeness on a label after Jackson was named NFL MVP.

However, the TTB does provide some exceptions to this rule. Beer labels may use a person or organization’s name or likeness on a label if:

  • The individual or organization is engaged in the production of the beer (such as Rogue Ale’s Beard Beer).
  • A person of a trade or a brand name used the name of any living individual of public prominence, or existing private or public organization, in interest prior to Aug. 29, 1935.

Pretending to be a spirit instead of beer

Depending on your beer, you may want to utilize certain aspects of spirits on your beer label. However, it’s important not to make it seem like your beer is or contains a distilled spirit. Any statement or design element that suggests otherwise can lead to a label denial if the label does not make it clear that the beer is in fact just a beer. For example, a label that truthfully states that the beer was brewed in bourbon barrels is fine, but one that doesn’t contain any references to the product as a beer would is deemed as misleading.

Governmental connections and American insignias

You may want to show off that your beer is proud the be an American, but certain imagery or statements will lead to a quick denial by big brother. These infractions can come in a few forms:

  • The use of the American flag and any flags, seals, coats of arms, crests, and other insignia associated with the armed forces of the U.S.
  • The use of the word “bonded” and other variants that may imply governmental supervision over the production of the beer
  • The simulation or and other design made to resemble stamps for the U.S. or foreign governments

Health-related statements

It may seem funny to make a joke that a beer a day could keep the doctor away, but doing so on a label is a quick way toward having the TTB or some other board turn down your design. Using a health claim on a label is notoriously tricky regardless of product, so it’s best to avoid making any such statements if you’re hoping for label approval, even if that claim is made as a joke.

Shows of strength

Imagine that you brewed a lovely dark beer that clocks in at a relatively hefty ABV. You may want to present to potency of your porter by calling it “strong” on the label. Unfortunately, the TTB isn’t a fan of such language. Any words along the lines of “strong,” “high test,” “high proof,” or other statements that infer alcoholic strength is off limits on beer label unless such language is required by your state’s laws.

Numerals are also a potential pain point. While alcohol by volume statements may use digits, you can’t use numerals elsewhere on your label if it can be considered as a statement of alcoholic content.

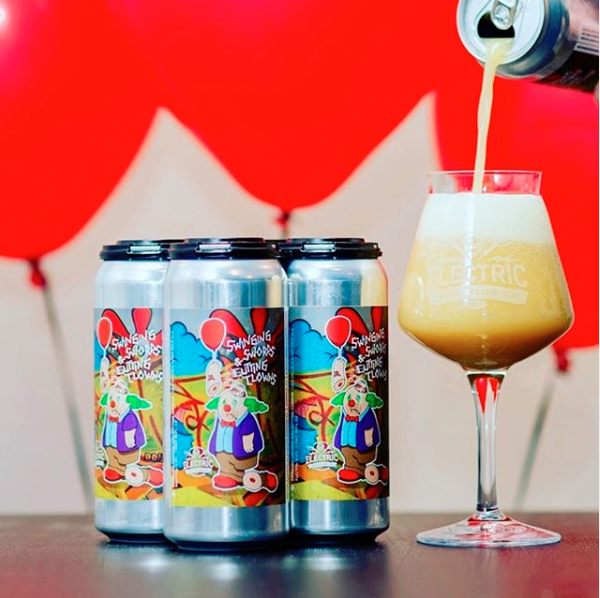
A beer label design for Electric Brewing Co. with TTB approval.

What Happens if the TTB Denies Your Beer Label Design?

Let’s pretend that you came up with a great label design and submitted a Certificate of Label Approval (COLA) to the TTB, but the organization rejected your label. Not only is a rejection frustrating, it can also delay your plans since the TTB can take up to 90 days to process a label application. Some reasons for rejection will be easier to fix, such as removing untruthful statements or disallowed imagery. However, more subjective grounds for rejection like what is considered obscene is tricky.

If the TTB denies your application, you’ll either want to modify your design based on the group’s feedback or fight the ruling. One of the most prominent examples of such a fight was when the Michigan Liquor Control Commission found the name and label of Flying Dog Brewery’s Raging Bitch Belgian-Style IPA to be offensive. Flying Dog fought the ruling in various courts until the brewery came out victorious – in 2015 after a six-year battle.

Fortunately for Flying Dog, they had the means and determination to take that fight to court, but you may not want – or be able – to do the same. In that case, it’s better to regroup and think of an alternate solution. For example, Lagunitas Brewing Company made a beer called “The Kronik” that was initially approved in the state of California, but rejected when Lagunitas resubmitted the design in order to sell the beer in multiple states. Fed up with the agency’s inconsistency involving, Lagunitas renamed the beer “Censored” in protest.

Unfortunately, there isn’t always an exact answer as to what will or won’t be approved by the TTB. If you think there may be an issue, it’s always a good practice to hope for the best but prepare for the worst.

My Label Got Approved – What Now?

First off, congratulations! Now that the TTB has signed off on your new label design, it’s time to make sure the finished product does your design justice. At Blue Label, we have the expertise and technology to provide the perfect labels for your beer cans or bottles. We’ll work with you on everything from identifying the right material for your performance needs to providing special printing capabilities that will highlight your design.

Ready to showcase your new beer label design? Contact us today to have us print quality beer labels for your brewery.

Identifying the Best Design Approach for Your Seltzer Labels

With the burgeoning success of the hard seltzer market, it’s a good time to be in the carbonated water business. Of course, this increase in seltzer sales doesn’t mean your seltzers are guaranteed to make money without proper packaging.

There are many routes you can take when it comes to seltzer labels. Each labeling approach has its benefits, so it’s important to identify what method makes sense for your product labels.

What Do Your Seltzer Labels Need to Do?

Before you can identify the right approach to your seltzer label designs, it’s important to take a step back and consider what you’re trying to accomplish with your labels. There are some objectives that are largely the same for every company – tell people who made your seltzer and include any information required by the TTB or FDA – but there are some other important goals you should consider as well.

A good product label is more than a place to provide basic information. A good label can help you establish a specific brand voice and make your product more than just another can or bottle of seltzer. Your design choices also make a huge different in increasing your visibility on shelves, advertising, and anywhere else consumers will see your goods. With those goals in mind, it’s time for you and your team to figure out the best way to make your brand known.

Different Approaches Toward Creating a Standout Seltzer Label

There is no perfect answer for every brand, but there are are different approaches that may makes sense for your brand. Here are a variety of approaches you can take to make sure your seltzer labels do their job.

Create an instantly recognizable identity through a templated design

Do you have several different flavors and want to create a series of labels that differentiate all your SKUs without creating too much additional design work? A templated approach can help you create a system that allows you to adapt specific details while maintaining a very specific look for your brand.

Iowa Legendary Rye bottles showing off product labels made with a templated design.

Take the the Iowa Legendary Rye labels pictured above for example. The design uses consistent shapes and hot foil stamped borders to create a specific look for their overall brand while changing colors, product names, and descriptions to differentiate individual products. This approach allows them to dominate their specific spot on a store shelf with a cohesive identity that people can remember the next time they look for the Iowa Legendary brand. This approach also means you can utilize variable data printing to use a single design version to print labels for multiple SKUs in a single run.

Promote personality for each product

Depending on your business and customers, you may want to avoid a neat templated style in favor of being big, bold, and different. Each label is a canvas and there are no rules saying you can’t create distinct designs for each product. Whether you want to play up different personalities for each flavor or utilize different imagery for your various SKUs, you can make each one of your products grab attention by being a bit different.

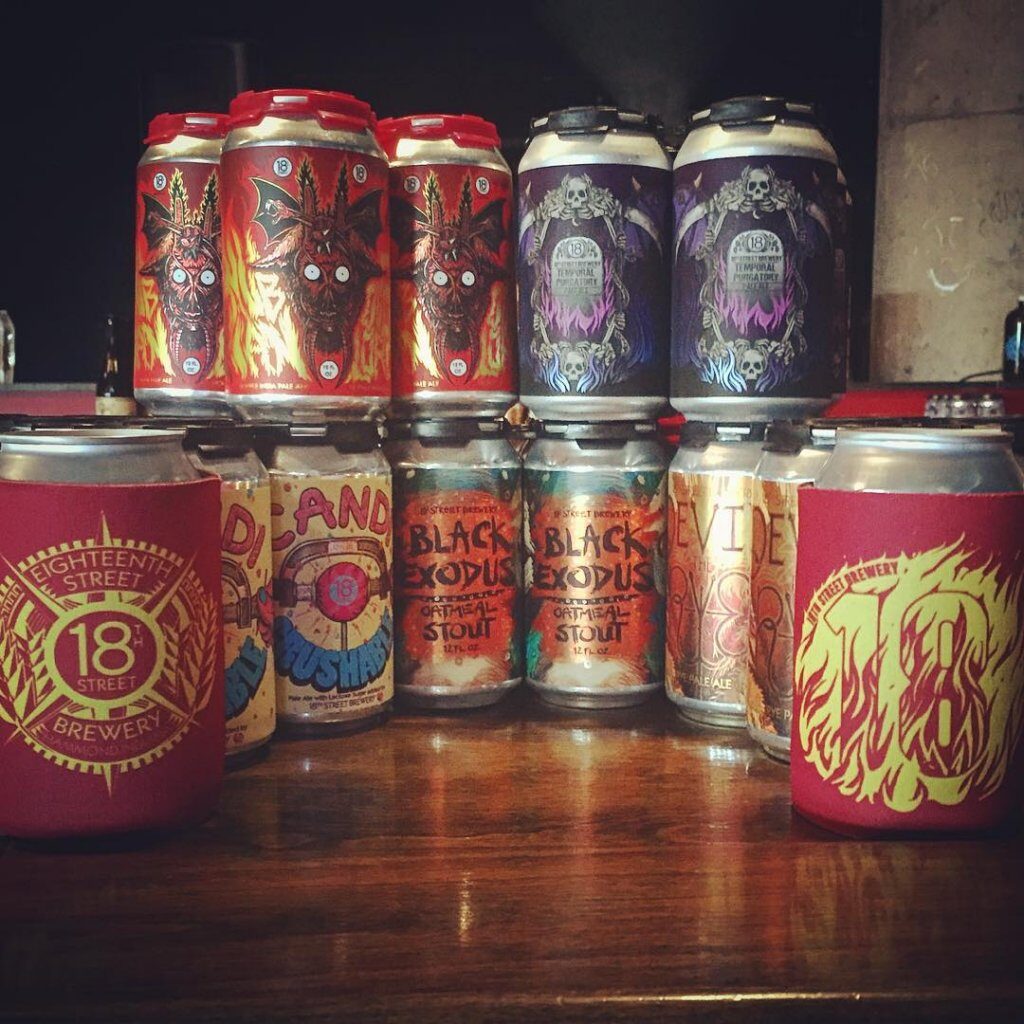
A group of 18th Street Brewery beer cans with custom-designed can labels.

18th Street Brewery embraced this approach for their labels. Each can has its own special design that’s completely original and visually irresistible. They can’t help but grab people’s attention. Not only can this approach give each product it’s own personality, it can lead your consumers to look out for new products to see what else your labels have in store for them.

Focus on an angle

Sometimes you need to focus on what makes your products special. In a growing seltzer market, what makes your seltzers worth trying? This approach can take many forms, whether you’re trying to appeal to someone’s health, wallet, or adventurous flavor palate. Once you identify that angle, you can use your labels to promote your seltzer to everyone within eyesight and help people understand the why behind your brand.

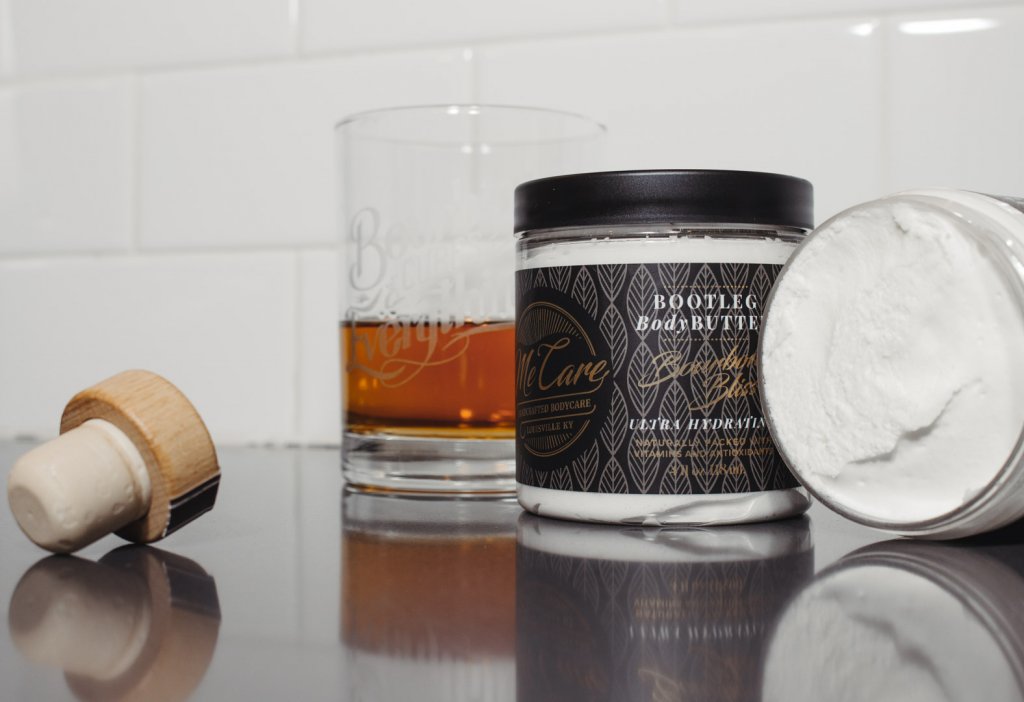
A Me Care body butter with a professional product label.

For example, Me Care used its product labels to highlight its own specific angle: Quality body products that create an authentic Kentucky bourbon experience. Not too many people would think to connect products like handcrafted body scrubs and moisturizers with booze. That specific angle gives Me Care’s labels an edge to help to sell its products to an intrigued audience while still telling a story about their brand.

Choose an Approach That Suits Your Seltzer Labels

There are a variety of approaches you can take in terms of label design, but the right answer depends on you and your product. A templatized approach may make sense for a company with a simple and stated brand of seltzers. Others may prefer turning each product’s label into its own piece of art for a more unique aesthetic. In fact, you can always combine a few approaches to find a blend that suits your product’s style. Who says you can’t have a custom illustration for each seltzer flavor on a partially templated label?

No matter which route you go, it’s important to make sure that you work with a label printing company that can do your designs justice. At Blue Label, we can work with you to balance both your label’s performance and design needs. Need the right material and adhesive for coolers? We got you. Want to add some extra flair to your design. We have the label printing capabilities to help you turn heads.

We’re here to help you get the most out of your seltzer labels. Contact us today about your next labeling project.

Common Label Mistakes to Avoid: Art File Issues

Before a label is made, it starts off as art file. Label printing companies need these files to turn your design into a physical product, so it’s important to have everything in place to set your label project up for success.

An art file contains much more than just your design. Each file needs to include important details and meet certain guidelines so your finished labels look just like your design. As a result, one overlooked file standard can lead to potential problems with your label. Here’s a rundown of the most common issues that can affect your art files.

It’s in the Wrong File Format

Before you get too far, make sure that you’re using the right file format for your printer. Print companies have preferred file formats so that they can take your file and turn it into labels. At Blue Label, we require Adobe Illustrator files or High-resolution PDFs from Photoshop, so make sure to ask your label printer what files they need (if they haven’t told you already). Companies can often accept PDFs made through other software, but it’s best to ask questions or send over art files beforehand to make sure they are compatible with the commercial printing presses used to produce your packaging.

The Images are Blurry

Blurry images are the bane of a good design’s existence. When possible, use vector images in your art file so that they can be resized without worry. Vector-based artwork uses mathematical calculations to create lines and shapes that allow these graphic to look the same even if you zoom in on the file. You can make vector images in Illustrator
If this isn’t an option, you should be fine with pixel-based images if they’re a high enough resolution. Whether you use vector or pixel-based images, they should be a minimum of 300 DPI, although 600 DPI or more is preferable if possible.

A digital printing expert reviewing an art file for a product label.

The File is Too Big

Art files tend to get rather big if you’re not careful. Large file sizes can make it difficult to transfer the file to the printing press. That means it’s best to try and manage file size before yours becomes too big.

Images are the main reason for a hefty art file. Pixel-based images, such as .jpg, .gif, and .png files, are larger than vector-based images in terms of file size, so too much pixel-based artwork will bog down your file. You should also embed or link pixel-based images in your file. Embedded images are kept in the art file, which can contribute more to the overall file size. Linked images are saved outside the file and can save space if you also share the original image files with your printer.

There are some other tricks to reduce image and file size in Illustrator, including playing with raster effects and file cleanup resources. You can learn more about these methods and the processes for linking and embedding images in our guide on managing file size.

The Colors are Wrong

It’s imperative that your art file uses the right color format. Digital printing requires CMYK, which is comprised of four colors – Cyan, Magenta, Yellow, and Black (Key) – with additional hues that allow best-in-class printing presses to attain up to 98 percent of the Pantone spectrum. The RGB color model is designed for use on electronic displays like computer monitors and phone screens, but not for print. This means that you’ll want to use the CMYK model to make sure that your colors come through the way they should on your labels.

If you have a specific color in mind, it’s important to call it out using the Pantone Matching System. This will allow the printer to look up the exact color code and match the exact shade your brand requires. To learn more about using the Pantone Matching System and different color profiles, check out our digital printing color guide.

The Dieline Doesn’t Incorporate Bleed or a Safe Zone

Your art file not only needs to include your design, it also needs a dieline. As much as printing companies try to make exact cuts for every single label, there is a chance of some slight variation. The dieline should consist of three separate lines to prepare for this potential variation:

  • A main dieline that maps out the intended cut of the final design
  • A bleed area to ensure that there are no accidental white spaces
  • A safe zone to protect design elements

The purpose of the main dieline is simple: to show exactly where a die is supposed to cut a label. The bleed space is an extension of the background of the design to eliminate any off-putting white spaces if the cut isn’t exact. This bleed area should be at least 1/8” around all sides of your design.

The safe zone is also designed to provide wiggle room, this time creating a space in your design so that any essential elements – type, logos, etc. – aren’t too close to the dieline. The safe zone should allow for 1/16” of space between the dieline and any elements. You can see an example of a complete dieline with all three components below.

A sample dieline for a product label.

The Text isn’t Outlined

A good design is more than just images – even a minimalist label design is bound to include a few words. To ensure that these words print correctly, it’s important that you have the font outlined in your art file before you send it over to a printing company.

Outlining fonts is critical because it takes each letter and turns it into an image. This practice eliminates the need for font software and files. It also offers a few key benefits, such as making it easier to create custom type tailoring, adding color treatments to parts of characters, and making type heavier for production purposes. For guidance on how to convert font to outlines, check out our font preparation guide.

Find a Label Printing Company That Works with You

A good art file plays a big role in the production of your product labels, but it’s not always easy to figure out exactly what to do to make sure your art file is ready for its close-up. At Blue Label, we do more than just print your labels; we work with your company to guide you through the printing process and assist you from start to finish. Whether you have art file questions, need to identify the right label materials, or want to know more about our printing capabilities for your products, we put in the time to understand your needs and help along the way.

Ready to turn your design into the perfect labels for your products? Contact Blue Label today to talk to one of our experts about your project.

Types of Labels for Unique Containers: What You Need to Know

Uniquely-shaped product containers can make for eye-catching packaging. However, designing the right label to fit on the container may present some challenges. You’ll have to get creative as you factor in the shape and size of the containers and the different materials you can use to create your label. Below, we’ve outlined several different label considerations for your uniquely-shaped containers.

Specialty Die Cut Labels

Designing a specialty die cut label is the most common way to create the most versatile packaging for your container. These labels can be cut to your exact specifications, no matter the shape of your container, ensuring a perfect fit all around.

Die cut label


Tapered Labels

Tapered bottles or containers are unique in that they aren’t perfectly cylindrical. A standard label won’t lay flat when adhered to your container, which is when tapered labels come in handy. Instead, tapered labels can be made to form perfectly by calculating the degree of tapering on your container. Using this type of label will ensure it won’t crease or slant on your tapered container.

Double Sided Labels

Containers made of clear material may benefit from double-sided labels. These labels give you twice the space to market your products and can add depth and originality to your uniquely-shaped container. While important information like nutritional content and FDA warnings need to be clearly displayed on the front of your label, the second side can be used to add a surprise or accent like a patterned background or catchy slogan that you might have not have space for on the primary side.

Specialty Materials

In addition to the type of label, you’ll also want to consider the material of your label. For instance, if you’re in need of a label for a uniquely shaped bottle or tube that will be squeezed a lot, MDO film is a flexible, moldable material that’s much less rigid compared to a paper stock. For products like lotions or shampoos, when you squeeze the bottle, the MDO resists wrinkling and creasing. MDO is just one of hundreds of specialty materials that can be chosen to accommodate your containers needs and functionality.

Custom Packaging Labels

Whatever type of packaging or containers you use, it’s important to work with a digital label printing company that can create high-quality labels to meet your unique needs.

Blue Label is a digital printing company that will work with you to create custom labels for your unique packaging. Our state-of-the-art HP Indigo digital printing presses allow us to find the best solution to provide you with labels that not only attract eyes, but also best suits the needs of your product.

If you need help with your label design, check out our Designer Directory to find the right partner for your product. Once you’re ready to start your next project, contact us to talk to one of our experts about how we can create custom labels for your brand.

4 Science-Backed Ways to Create Eye-Catching Labels

Many brands struggle to find new and creative ways for their products to stand out on the shelf. Tapping into the subconscious mind of the customer, there are several psychological elements that can influence the decision to buy a product, or even notice it for that matter. It all starts with having the right product label design. Here’s how you can use design science to help your product stand out.

Font Type

Different font types can evoke different emotions. Decorative fonts (so long as they are legible) are great for brand and product names, while sans-serif fonts are best for the body copy of your label.

The type of font you choose for your label will depend on your product and brand personality. If you want to portray a simple elegance, maybe for a wine label or perfume label, use fonts that are orderly and classic with narrower lines. On the flip side, quirky and high-spirited fonts with lots of curves and maybe some embellishment comes across as playful and personable and could be used for beer labels or cannabis labels. For earthy and artisanal products, handwritten fonts can be effective in grabbing a customer’s attention. These warmer, more personal fonts would work well on candle labels and organic food labels.

Layout is important in product label design.

Layout Design Science

Spacing between letters and words can impact the way consumers feel about a product. One study, by researchers at Microsoft and MIT, found that participants who read content with a good layout felt more focused and had a stronger sense of clarity, as opposed to those who read the same content with a poorly designed layout.

Good layout design works because our eyes follow a natural pattern that breaks up phrases into scans and pauses when we read. Your eyes typically scan across a label between 7 to 9 words before needing to pause to process what you’re reading.

For your product label design, consider the layout. Rather than long lines of text, it’s scientifically better to break up the text into a series of shorter lines to create the natural pauses needed for visual processing. When customers are scanning shelves for a product, they’ll be significantly more likely to choose a label they can grasp.

Product label designs using the color red can grab a customer’s attention.

Color Psychology

The color of your label design can influence a customer’s purchasing decision, as it can evoke certain moods and feelings. For example, red has been known to increase metabolisms and stimulate appetites, so a food product might want to incorporate red into the label design. Red is also known for its ability to quickly grab people’s attention, so using red on any label is an easy way to make your product stand out.

Keeping in mind that your label likely won’t be one single color, especially when you factor in other elements like text and images, you’ll also want to think about mixing and matching colors. Using complementary colors will help make elements pop. For a more relaxed look that flows together, use analogous colors (any three colors next to each other on the color spectrum) in your product label design.

Applying color psychology to your label is an effective way to make your product stand out in the marketplace.

Visual Processing

You’ve likely heard the saying that a picture is worth a thousand words, and that couldn’t be more true when it comes to product label design. Research below has found that customers are more likely to process and remember text on your product label if it’s paired with images.

People process visuals quicker than words, so adding imagery to your product label design can help it get noticed. In fact, 90 percent of information transmitted to the brain is visual. Keep in mind that, according to the Social Science Research Network, 65 percent of the population are visual learners. Needless to say, an image on our label can go a long way.

Make Your Product Labels Stand Out

Blue Label is a full-service digital printing company that will work with you to create labels to help your product stand out. Our state-of-the-art HP Indigo digital printing presses and variety of finishing techniques allows us to find the best solution to provide you with labels that not only attract eyes, but also best suit the needs of your product.

If you need help designing your label, check out our Designer Directory to find the right partner for your product. Once you’re ready to start your next label project, contact us to talk to one of our experts about how we can bring your labels to life.

Minimalist Design Trends for Product Labels

The minimalist movement is making its way into label design as more brands are forgoing flashy and opting for simple. You’ve surely heard the phrase, “less is more,” which can be especially true when it comes to the design of your product and bottle labels.

A minimalist’s mantra is to remove the unnecessary. In an era of information overload, brands are realizing that customers appreciate minimal labeling. It’s an effective trend that works because of its simplicity. (more…)