What is a Shrink Sleeve Label?

⚞ The Highlights:

  • A shrink sleeve is a printed plastic film that slides over a container and shrinks under heat to fit the exact shape, giving you 360-degree coverage.
  • They give you roughly 150% more design space than a standard pressure-sensitive label, plus the option for tamper-evident packaging.
  • They work on any container shape — straight, tapered, hourglass, or unusual — so they’re a fit when a standard label won’t sit right.
  • Most shrink sleeves today are made from PETG film, with PVC and PLA as alternatives. The material choice affects recyclability, cost, and shrink behavior.

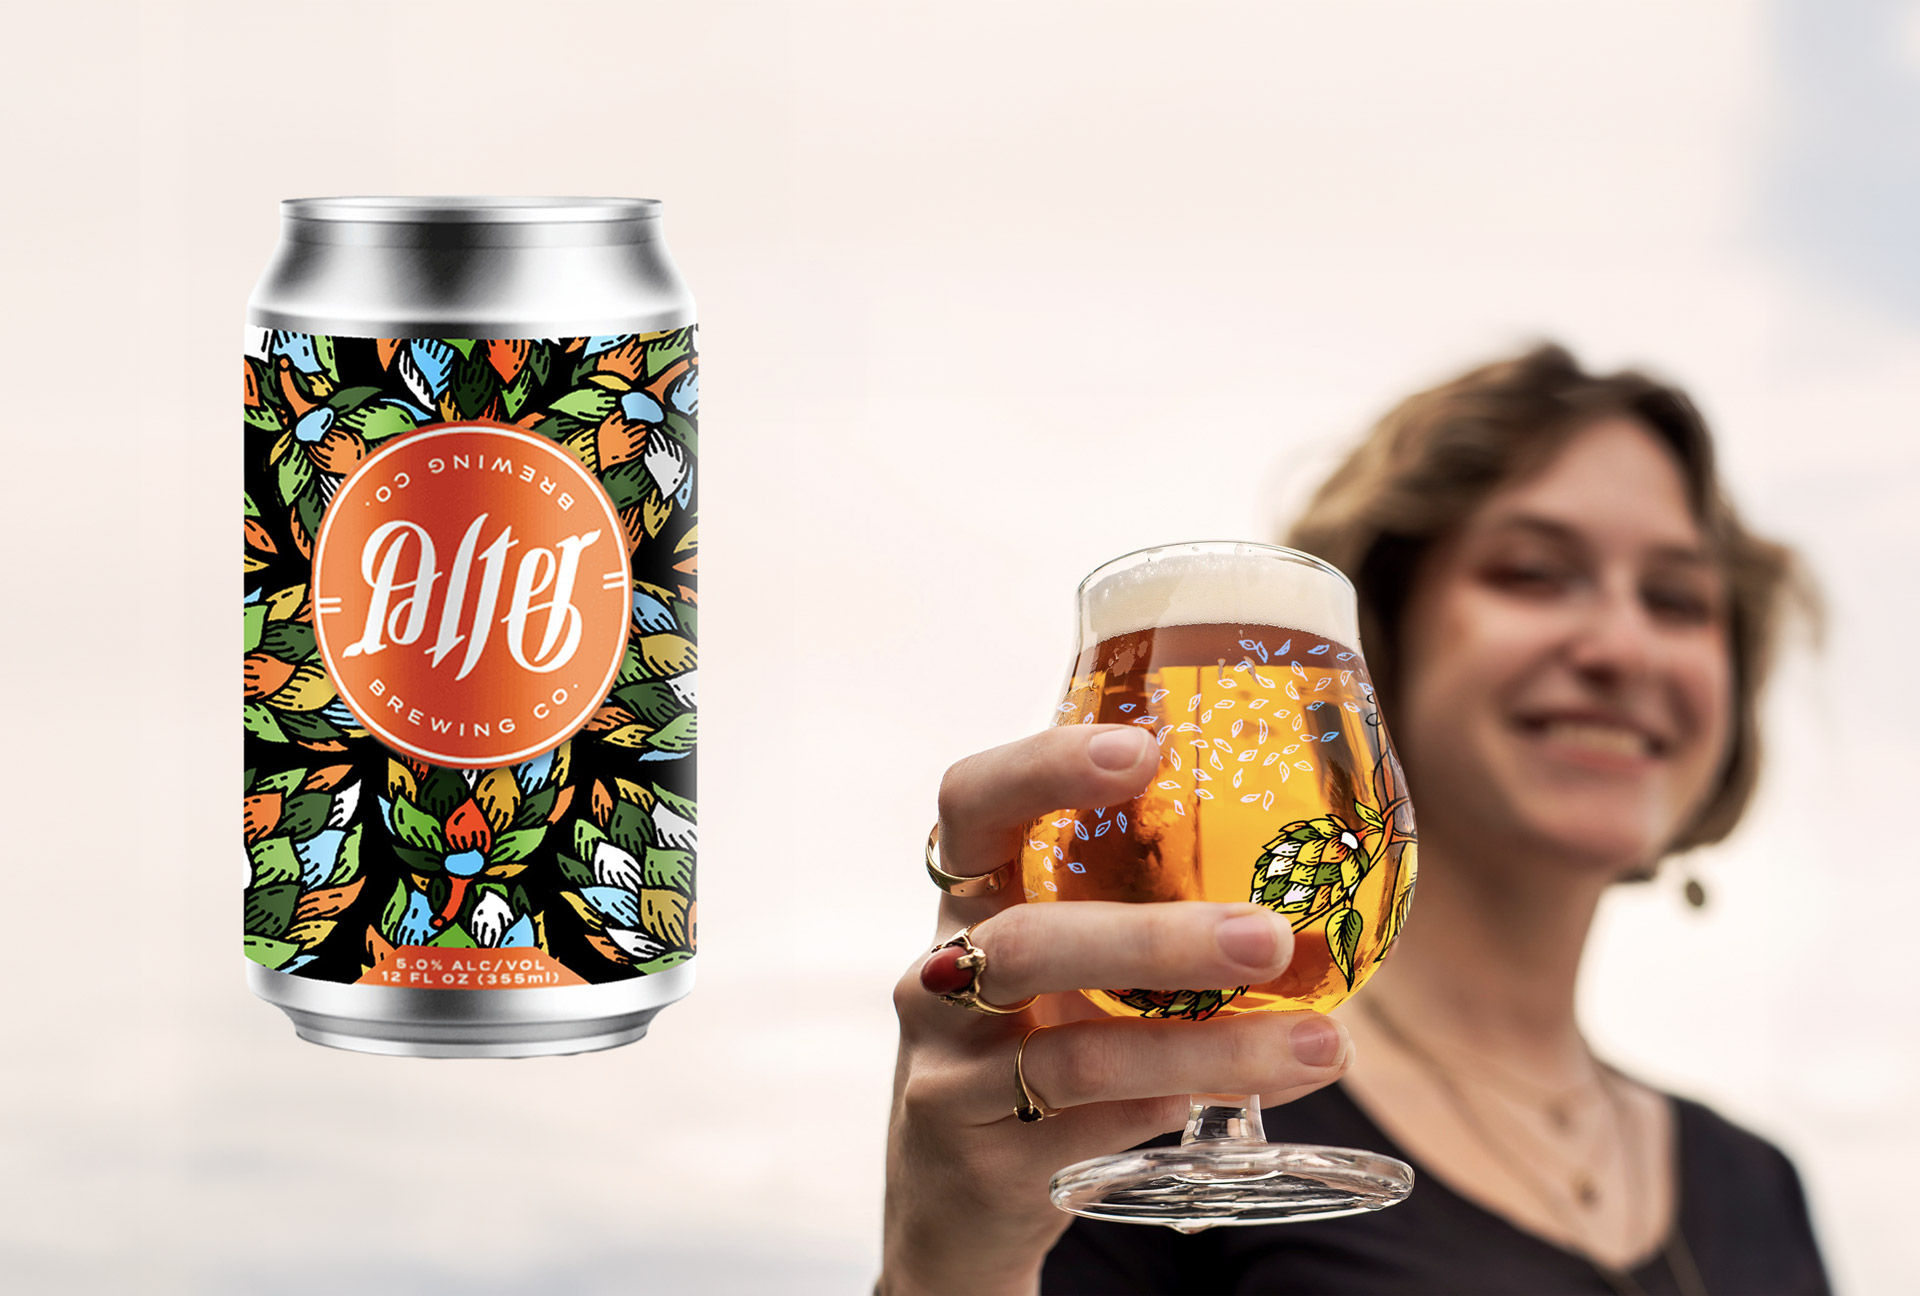
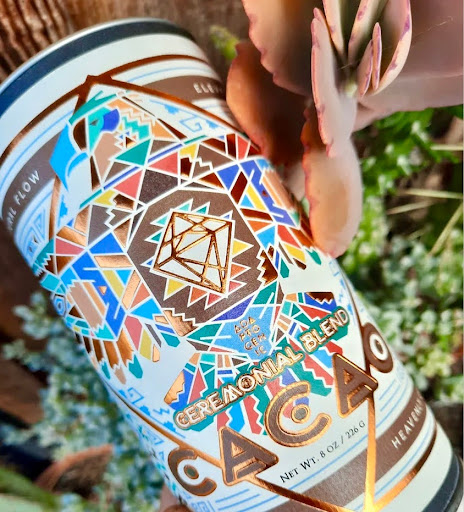
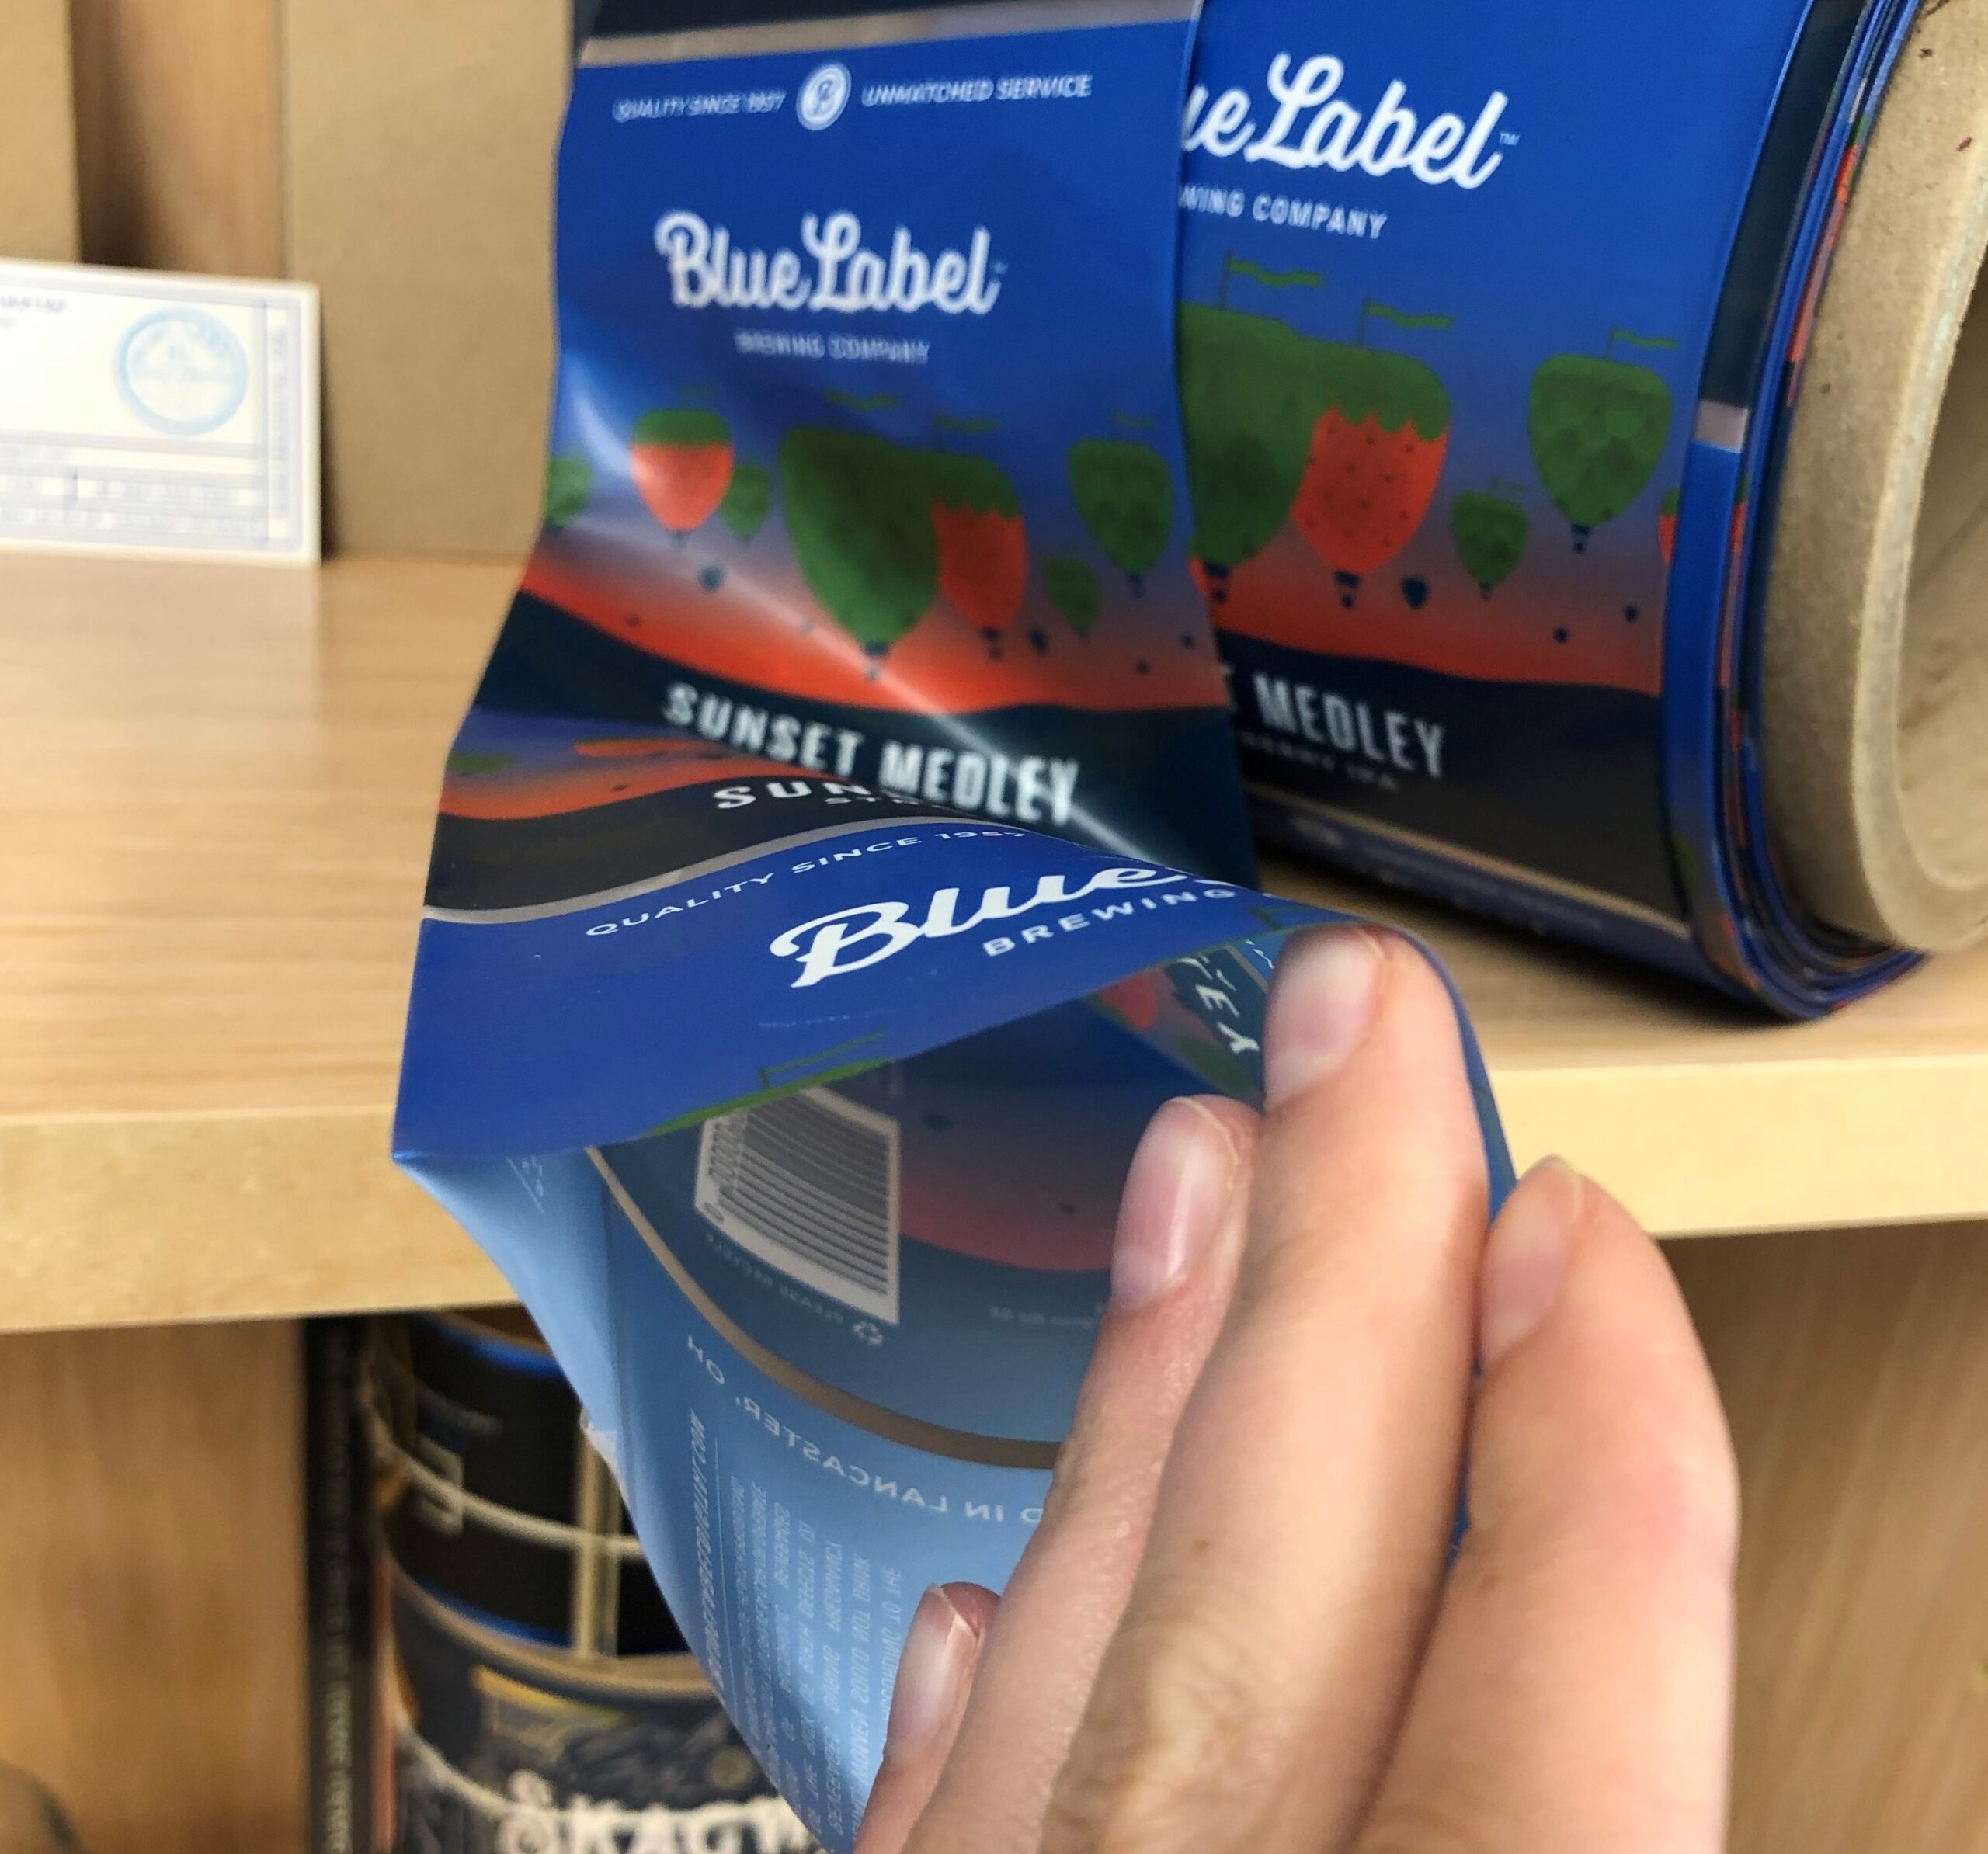
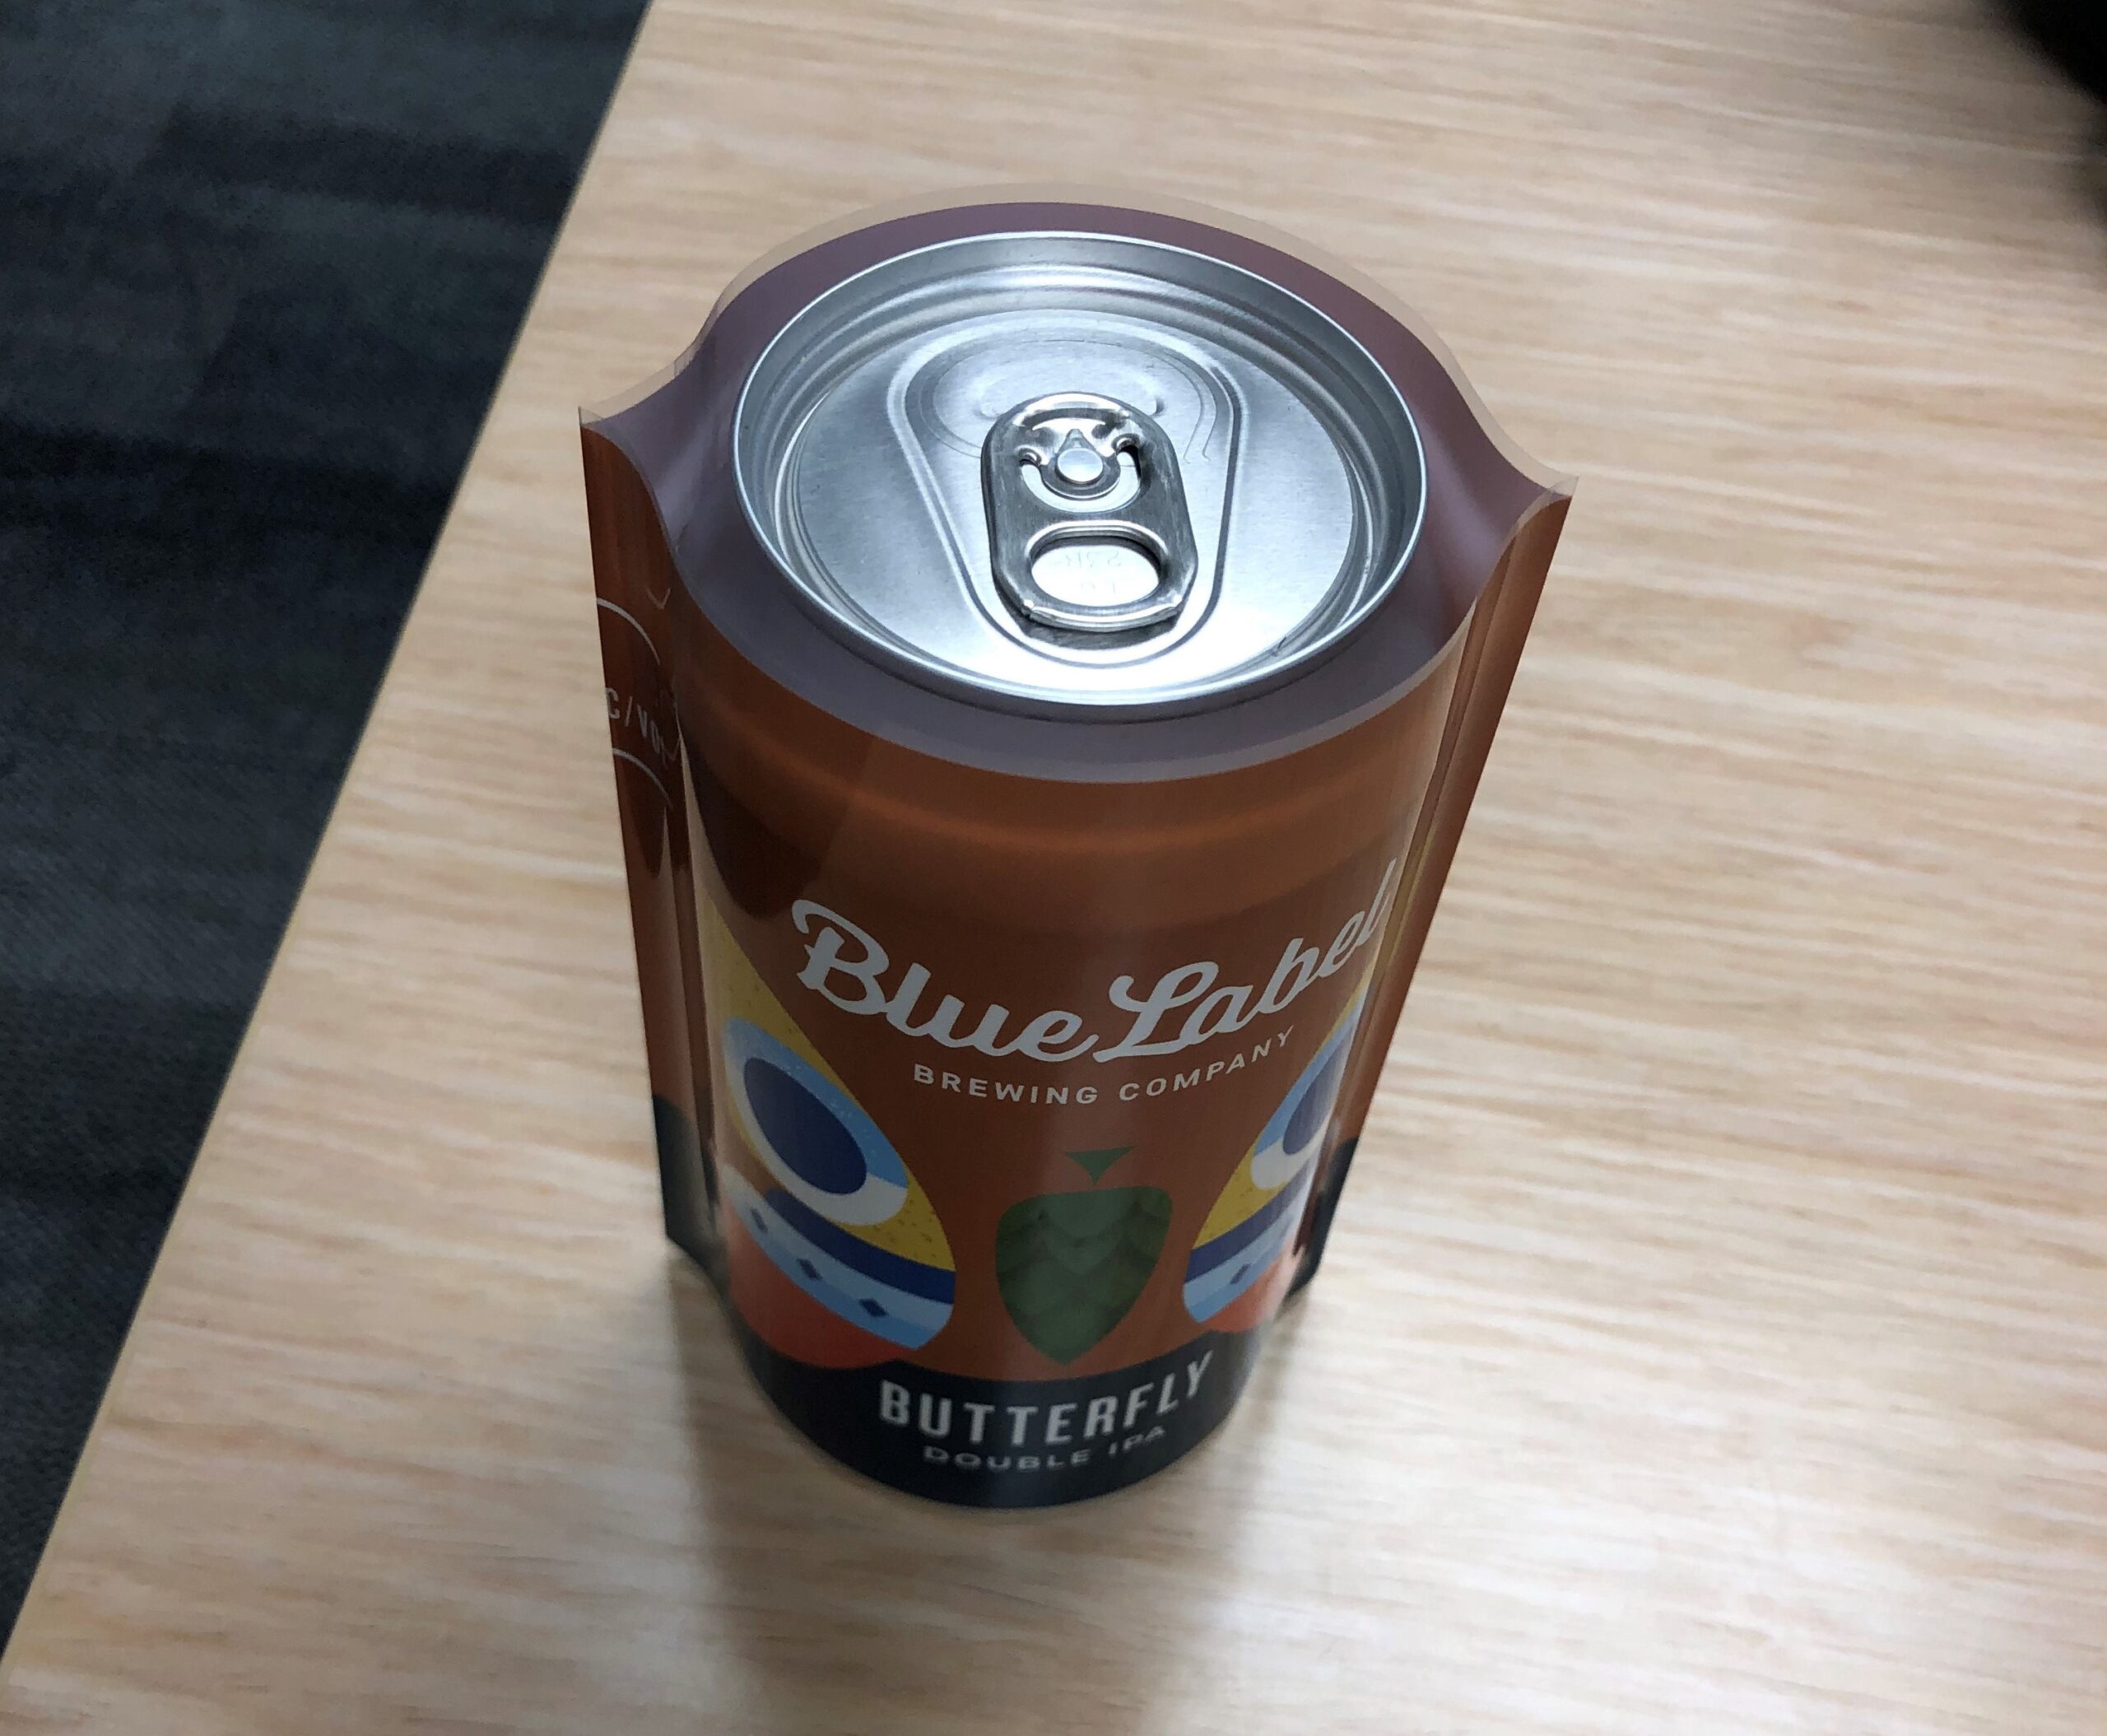
A shrink sleeve label is a printed plastic film that wraps fully around a container, then shrinks under heat to fit the exact shape of the bottle or can. The result is a 360-degree label that becomes part of the container’s surface, with no edges, gaps, or front-and-back panels.

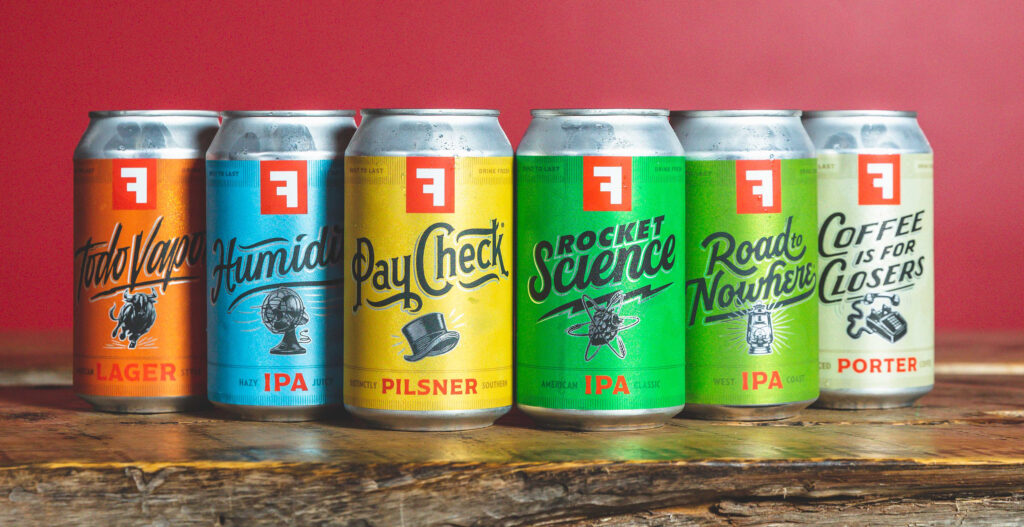
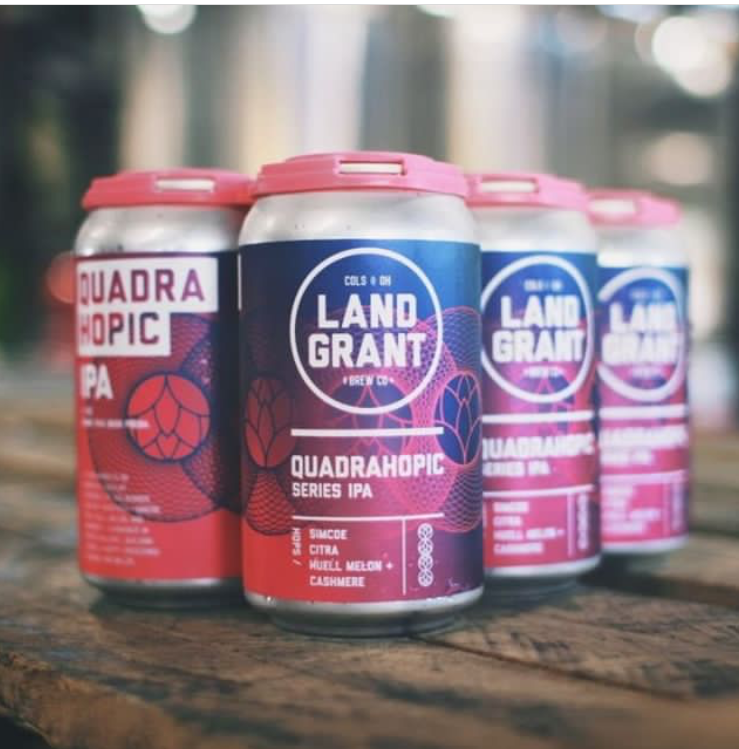
Shrink sleeves picked up momentum decades ago when Tylenol started using them to combine eye-catching packaging with tamper-evident sealing. Today they show up across cans, bottles, and oddly shaped containers in beverage, food, beauty, household, and supplement categories. We work with brands on shrink sleeves all the time, and the right call usually comes down to the container, the design, and the volume.

What is a shrink sleeve?

Shrink sleeve labels are full-color, 360-degree printed labels that use heat to conform to the shape of a container. They’re typically printed on plastic film, then converted into a tube that slides over the bottle or can. Once the container moves through a heat or steam tunnel, the sleeve shrinks tightly to every curve and contour.

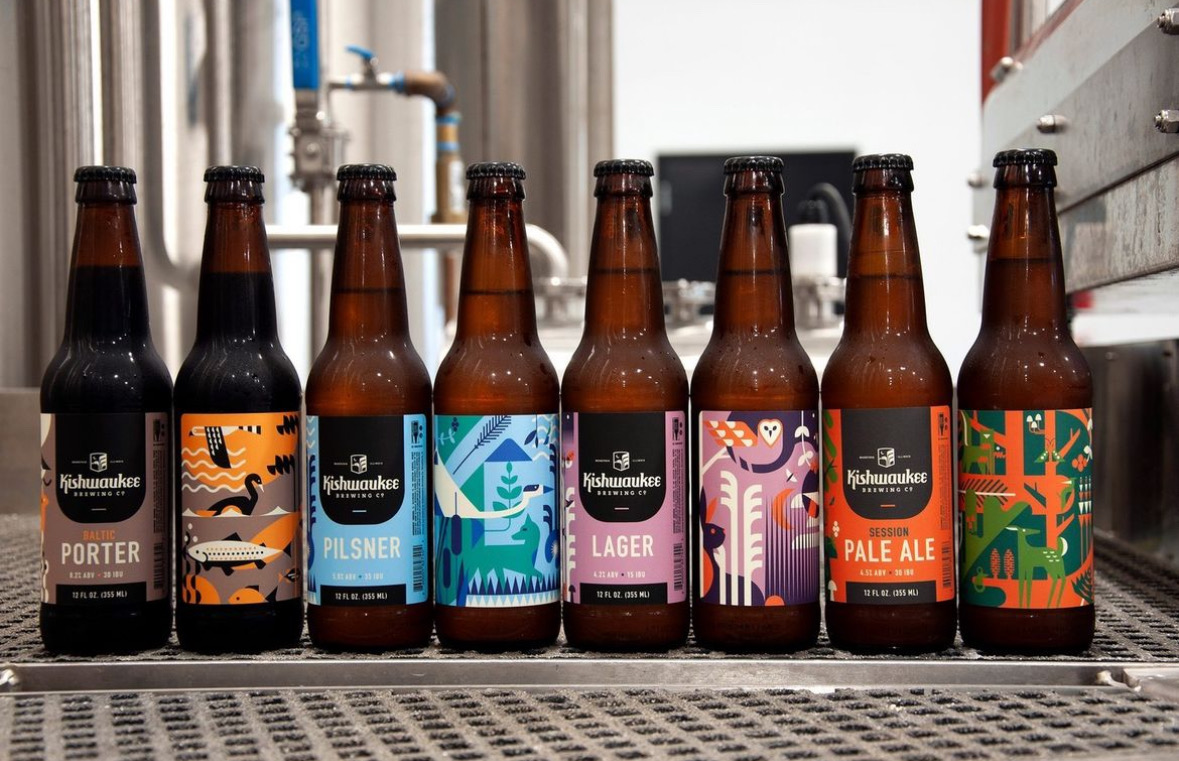
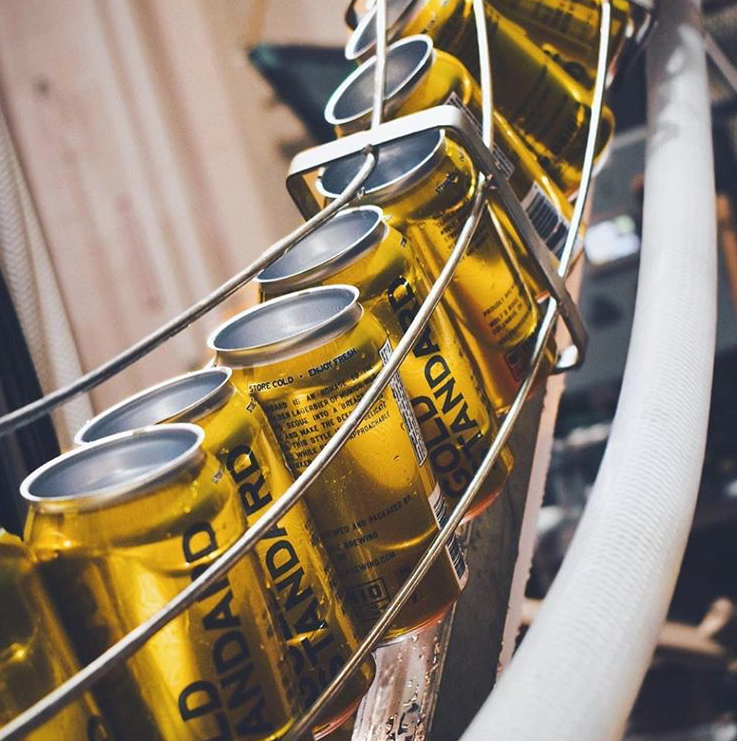
The result is a label with no front-and-back layout — your design wraps the entire container. It’s why shrink sleeves are common on aluminum cans, glass bottles, and any container with curves or unusual shapes that would be hard to label any other way.

The opening of a shrink sleeve label used for various containers.


Looking for Custom Shrink Sleeves?

Custom shrink sleeve labels allow you to add a “second skin” to your containers. When the film sleeve is placed around your container and heat is applied, it conforms to the shape of the container to create a look like it’s truly part of your product.

Request a Quote    Get a Sample Pack


Benefits of shrink sleeves

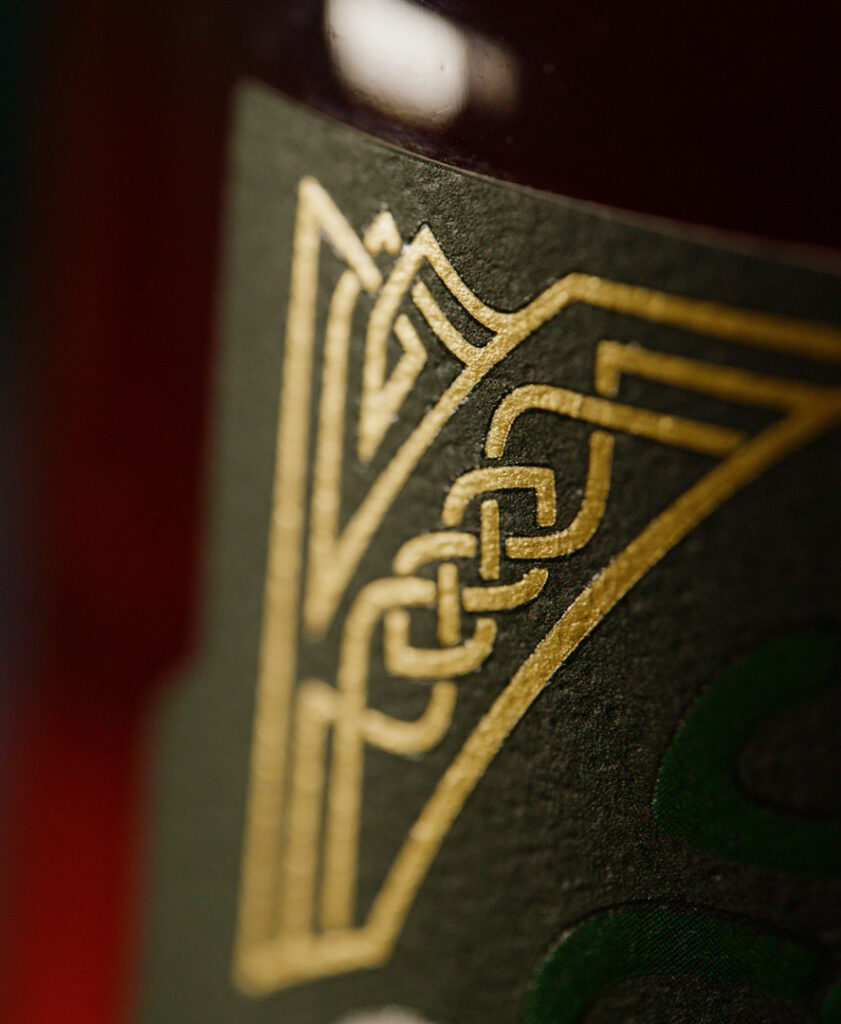
The biggest advantage of a shrink sleeve is design real estate. You get roughly 150% more space than a standard pressure-sensitive label, which means more room for brand storytelling, imagery, regulatory information, and ingredient panels. For brands with a lot to say (or a lot they’re required to say), that extra real estate is the whole reason to choose this format.

Shrink sleeves also do more than just label a product. With a perforated shrink cap, they can serve as tamper-evident packaging — the same mechanism Tylenol popularized. They can also bundle multiple containers together for promotions, sample packs, or two-for-one offers, since the film conforms to whatever shape sits inside it.

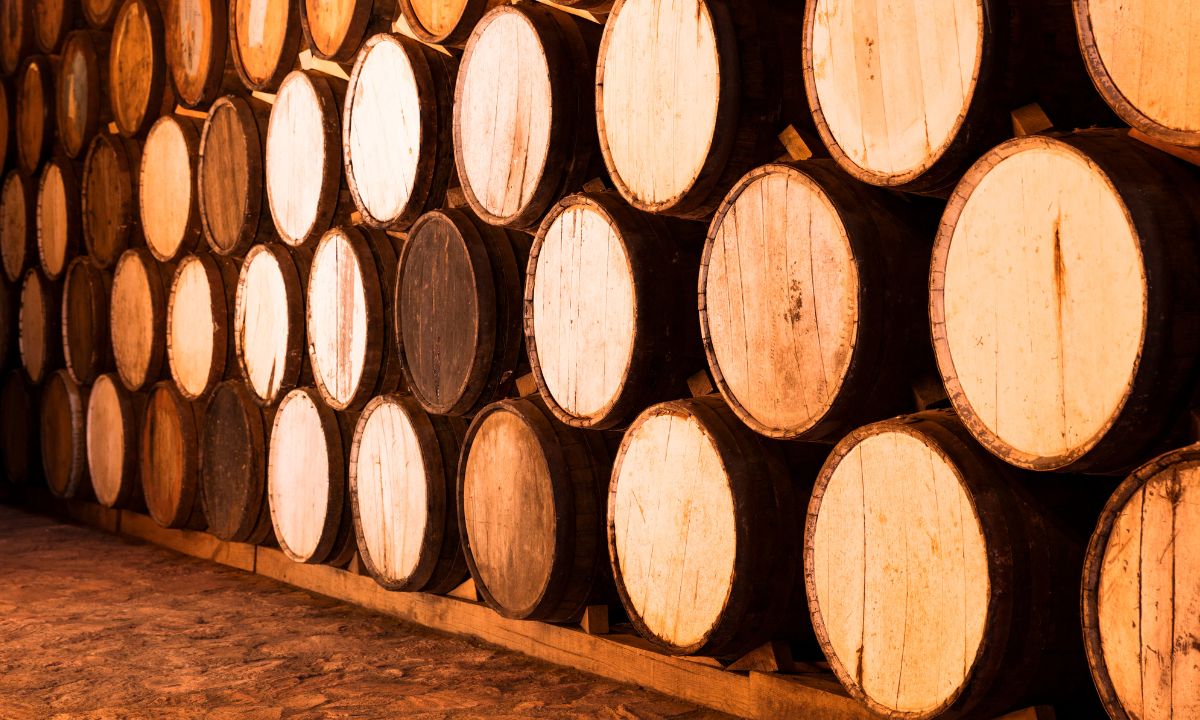
Durability is another benefit. The film material holds up well in humid or moisture-heavy environments — refrigerators, coolers, showers, ice baths — which is why personal care products and craft beverages so often use them.

If a shrink sleeve looks like the right fit for your product, take a look at our shrink sleeve labels page or request a sample to see the finish on a real container.

How do shrink sleeves work?

Shrink sleeves give you a way to add branding and product information to a container, just like a standard label. The difference is in the application: instead of an adhesive that sticks to a surface, the sleeve is a tube of film that slides over the container, then shrinks under heat or steam to conform to the shape. A few steps lead up to that moment.

Creating the sleeve

Like pressure-sensitive labels (the sticker-style labels you’re used to seeing), shrink sleeves can be printed on flexographic or digital printing presses. The key difference is that the ink is printed on the inside of the film instead of the outside. That way the film itself protects the ink as it shrinks against the container.

Once the sheets are printed, they have to be converted into sleeves. Some printers, including us, do the conversion in-house so the film is handled as little as possible before it ships. Other printers send their printed sheets to outside converters, which adds steps and chances for the film to get scuffed, mishandled, or damaged.

Whoever handles the conversion takes the printed sheet, seams the ends together with a specific glue, and creates a loose cylinder open at the top and bottom. Each seam is inspected to make sure it won’t break open during application. The finished sleeves ship as either rolls or individual cut sleeves depending on how they’ll be applied.

A shrink sleeve slipped over a beer can.

Adjusting the design to the sleeve

One of the big draws of shrink sleeves is that they conform to any container shape: every angle, curve, or unusual contour. The flip side is that your artwork has to be designed for that shrinkage, not for a flat layout.

As the sleeve heats up and conforms to the container, the film shrinks more in some zones than others. Wider parts of the container (the body of a can or bottle) shrink less; narrower or tapered parts (necks, shoulders, hourglass curves) shrink more. If your design isn’t pre-distorted to account for that, the result will look stretched, squashed, or off-center once the sleeve is applied.

A few practical rules our team uses when prepping a shrink sleeve design:

  • Pre-distort the artwork to the container’s shrink profile. Your printer should provide a template based on your specific container shape and the shrink ratio of the film. Don’t design on a flat rectangle and hope it works.
  • Place critical elements where shrink is lowest. Logos, brand names, ABV, and ingredient panels work best on the cylindrical body of the container, not on a tapered neck or shoulder.
  • Avoid hairline elements in high-shrink zones. Thin lines, small text, and detailed illustrations can warp noticeably in areas where the film shrinks more aggressively.
  • Keep barcodes off curves. Barcodes that wrap around a curve can fail to scan after shrinking. Place them on a flat or low-shrink area, and test before a full run.
  • Plan for color shifts at the seam. Where the two ends of the sleeve meet, there’s an overlap. Designs with continuous patterns across that seam need extra attention to look clean.

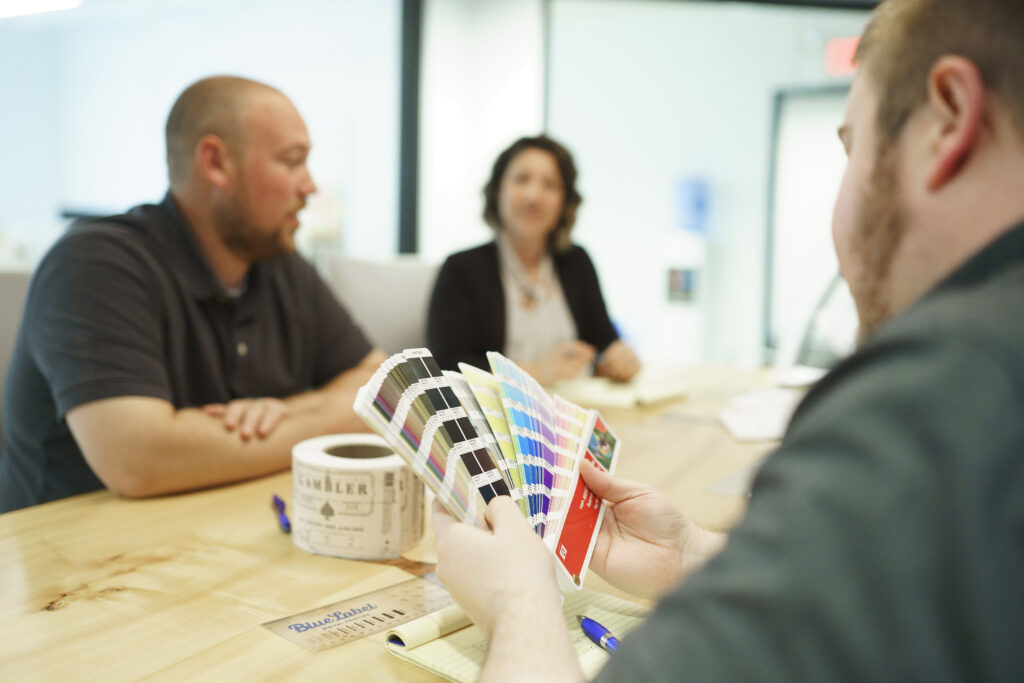
This is one of the reasons we strongly recommend working with a label designer and a printer who have shrink sleeve experience. Pre-distortion isn’t a guess — it’s calibrated to the specific film, container, and shrink ratio you’re working with.

Applying the sleeve

Once the sleeves are ready, they need to be applied to the containers. If you don’t have applicator equipment in-house, an applicator partner handles this step. Either way, the sleeves are slipped over the containers and run through a heat or steam tunnel where the film shrinks tight to the shape.

Storage and shipping matter more for shrink sleeve film than for most label types. Because the film reacts to heat, it can pre-shrink (slightly tighten before application) if it gets too warm in transit or storage. It can also become brittle if it gets too cold. Either condition can affect the finish or render sleeves unusable, which is why proper temperature-controlled handling matters end to end.

Shrink sleeve materials: PETG, PVC, and PLA

Most shrink sleeves are made from one of three film materials. The choice affects shrink behavior, durability, recyclability, and cost.

PETG

PETG (polyethylene terephthalate glycol-modified) is the most common shrink sleeve film today, especially in food and beverage. It has excellent clarity, holds color well, and shrinks reliably across a wide range of container shapes. PETG is generally considered more recycling-friendly than PVC, and many beverage brands have moved to it specifically for that reason. Higher cost than PVC, but it’s the default for most North American shrink sleeve work.

PVC

PVC (polyvinyl chloride) was the original shrink sleeve material and is still in use, mostly because it’s lower cost and has very high shrink flexibility. The downside is recyclability — PVC contaminates PET recycling streams, which has led some retailers and many sustainability-focused brands to avoid it. It’s also restricted or discouraged in parts of Europe. If recyclability is part of your brand promise, PVC isn’t the right pick.

PLA

PLA (polylactic acid) is a plant-based film made from corn or sugarcane. It’s compostable in industrial composting facilities, which makes it a natural fit for brands that lead with sustainability or circular packaging claims. PLA is more expensive than PETG and PVC, and it isn’t recyclable through curbside streams — it requires industrial composting infrastructure that not every market has. Worth considering for premium eco-positioned brands; not the default for general use.

Worth knowing: Recyclability claims on shrink sleeves get nuanced fast. The sleeve, the container, and the local recycling stream all interact. If sustainability is part of your packaging story, talk it through with your printer before you commit, and consider whether a perforated tear-strip sleeve (which can be removed before recycling) is a better fit than the material change alone.

Shrink sleeves vs. pressure-sensitive labels vs. printed cans

Shrink sleeves aren’t the only way to label a container, and they aren’t always the right call. Here’s how they compare to the two other formats most beverage and CPG brands consider.

Shrink Sleeve Pressure-Sensitive Label Printed Can
Coverage 360° full container Front and back panels 360° on the can body
Container shape flexibility Any shape, including curves and contours Best on cylindrical or flat surfaces Aluminum cans only
Tamper-evident option Yes (with perforated shrink cap) Not typically Not applicable
Application method Heat or steam tunnel Self-adhesive Direct print on the can
Best for Multi-shape containers, full-wrap branding, regulatory-heavy products Standard bottles, cans, jars; smaller runs; quick changes High-volume can production, retail, distribution
Setup cost Higher (sleeve conversion + applicator) Lower Variable; lower with digital direct-to-object printing
Per-unit cost at scale Mid Low to mid Drops as run size grows
Typical minimum order Mid (thousands) Low (hundreds) Around 1,500–2,000 cans per design with digital printing


The short version: shrink sleeves are the right call when the container shape demands full coverage, when you need tamper-evidence, or when you have more brand or regulatory information than a flat label can hold. Pressure-sensitive labels are the most flexible and the easiest to change, which makes them the standard for short runs and frequent design updates. Printed cans are usually the play once your volume justifies a planned run on aluminum.

What do shrink sleeves cost?

There’s no single price for a shrink sleeve. Cost depends on several factors:

  • Container size and shape. Bigger containers use more film, and complex shapes require more careful conversion and heat tuning.
  • Film material. PETG is mid-priced; PVC is the lowest cost; PLA is the highest.
  • Print run quantity. Like all printing, per-unit cost drops as the run gets bigger. Setup costs are amortized across more sleeves.
  • Number of colors and finishes. Standard CMYK runs cheaper than designs with metallics, custom inks, or special effects.
  • Design complexity. Heavy distortion mapping or multi-SKU variant work adds prepress time.
  • Application method. If you’re applying in-house, you’re set. If you need an applicator partner, that’s a separate cost line.

For a real number, the fastest path is a quick conversation about your container, your run size, and your design. We can ballpark quickly and refine as the artwork develops.

How to work with a shrink sleeve label company

Once you’re ready to move forward, the process looks like this:

  • Have your design ready or find a designer who can prep one. If you don’t have a designer in-house, our designer directory is a starting point for finding someone who’s worked on shrink sleeves before.
  • Get your container specs and quantity to the printer. Container shape, neck-to-base dimensions, run size, and timeline drive the quote.
  • Work through pre-distortion together. Your printer will provide a distortion template based on your specific container. Don’t skip this step or trust a generic distortion file.
  • Approve a proof before production. A press proof (or for digital, a sample run) on the actual film and container is the only reliable way to confirm color, fit, and finish before a full run.
  • Plan the application. If you don’t have an applicator, your printer can usually point you to one or coordinate the handoff so the sleeves arrive ready to go.

At Blue Label, we handle shrink sleeve printing and conversion in-house, which means fewer hands on your film and a single point of contact through the project. We’ll also flag practical issues — barcode placement, color match concerns, design elements that won’t survive distortion — before they become reprint problems.

Frequently asked questions

What’s the difference between a shrink sleeve and a pressure-sensitive label?

A pressure-sensitive label is a sticker. It has adhesive on the back and sticks to a flat or cylindrical surface. A shrink sleeve is a printed film that slides over the container as a tube, then shrinks under heat to fit the exact shape. Pressure-sensitive labels typically cover front and back panels; shrink sleeves wrap the whole container.

What materials are shrink sleeves made of?

The three common materials are PETG (most popular today, good clarity, mid-priced, more recycling-friendly than PVC), PVC (lower cost, very high shrink flexibility, but recyclability concerns), and PLA (plant-based, compostable in industrial facilities, premium price). Most beverage and food brands work in PETG.

Are shrink sleeves recyclable?

It depends on the film and the local recycling stream. PETG sleeves are generally easier to recycle than PVC, which can contaminate PET streams. Some brands use perforated tear-strip sleeves so the consumer can remove the sleeve before recycling the container. PLA is compostable but requires industrial composting infrastructure, not curbside pickup. If sustainability is part of your packaging story, walk through the specifics with your printer.

How much do shrink sleeves cost?

Cost varies based on container size, film material, run quantity, number of colors, and design complexity. PETG is the standard mid-priced film; PVC is cheaper; PLA is more expensive. The biggest cost lever is run size — per-unit cost drops noticeably as your quantity grows. For a real number, send your container specs and run size and we can quote.

What’s the minimum order quantity for shrink sleeves?

Shrink sleeve minimums are typically in the low thousands, depending on the printer and the press setup. That’s higher than the few-hundred minimums common with pressure-sensitive labels but lower than traditional offset can printing. If you need a smaller test run, ask — it’s sometimes possible with digital printing.

Can I use a shrink sleeve on any container shape?

Almost any. Shrink sleeves are uniquely good at fitting curves, tapers, hourglass shapes, and other containers that wouldn’t take a flat label. The catch is that more aggressive shapes need more careful artwork pre-distortion. Very tight necks or extreme contours may also be at the edge of what the film can handle without visible distortion in the print.

Why does my artwork need to be “pre-distorted” for shrink sleeves?

Because the film shrinks unevenly. The body of the container shrinks less; the neck and shoulders shrink more. If you design on a flat rectangle, your artwork will look stretched and warped after the sleeve is applied. Pre-distortion takes that shrinkage into account in advance, so the design looks correct on the finished container. Your printer should provide a distortion template based on your specific container.

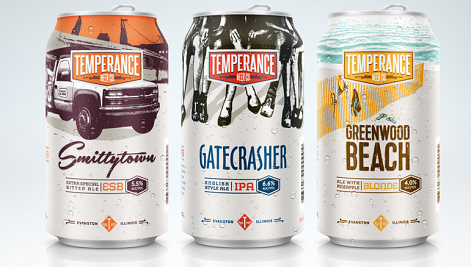
Are shrink sleeves better than printed cans for craft beer?

Different tools for different jobs. Shrink sleeves are flexible — change the design, swap a SKU, run a small batch — and they don’t require a planned production run on the can itself. Printed cans give you the cleanest aesthetic (no separate label) and lower per-can cost at scale, but they require a larger commitment per design. Many craft breweries use both: shrink sleeves for one-offs and seasonal experiments, printed cans for flagship SKUs that justify a planned run.

Ready to talk shrink sleeves?

If you think a shrink sleeve might be the right call for your product, we’re here to help you sort through it. Take a look at our shrink sleeve labels page for more on what we offer, or request a sample pack to see and feel the materials in person. If you have specific questions about your container or design, get in touch and we’ll talk it through with you.

Want to learn more about shrink sleeves? Check out some of our other posts:

Can Paper Labels Be Used on Cans?

Thinking about using a paper label on your cans? It’s possible and it can look great if you get the materials and application just right. Here’s what to consider before you commit.

Checklist Before Choosing Paper Labels

1. Can Surface & Shape Compatibility

Standard aluminum cans give you a smooth surface to work with, but things like condensation and spillage, it can still mess with label adhesion. Paper labels work well on gently curved cylinders. They’re not a great fit for tapered or sharply contoured shapes (see below).

2. Environmental Conditions

Paper without a protective finish struggles with moisture, cold, and friction.

  • Cold environments: Paper labels can start to struggle if your cans sit in cold storage (think under 40°F) for more than a quick chill.
  • Abrasion and handling: Labels can scuff, fade, or peel if not protected. A UV varnish or laminate makes a difference. (check out our guide to label durability for more info on this)

Paper needs a finish to survive distribution and refrigeration. That’s especially true for cans chilled before shelf display or used in ice buckets.

3. Finishing Options & Design Considerations

Paper gives you a lot of flexibility with look and texture, but without protection it won’t last in tough conditions.

You can improve both performance and presentation with:

  • UV varnish or gloss/matte lamination – a clear coating or protective film that shields your label from moisture, friction, and fading. See our lamination options.
  • Embossing or foil stamping – great options for coated or metalized paper

These finishes help keep moisture out, especially around the label edges where peeling or bubbling usually begins. They also help preserve that premium, hand-crafted texture that makes paper stand out.

4. Adhesive & Application Process

Not all adhesives behave the same on metal, especially in cold or wet conditions. 

Acrylic-based adhesives generally hold up better in cold or humid environments.

It’s worth checking with your label provider to make sure the adhesive has enough tack time for your fill speed and conditions. If your line runs above 300 containers per minute or you’re applying labels to chilled cans, slower-tack adhesives can lead to labels shifting or lifting, especially if there’s condensation.

5. Regulatory & Food‑Safety Compliance

Any adhesive or ink needs to meet FDA indirect food contact standards. That means no harmful transfer if the label touches the product (like a wet can top contacting your mouth).

Your label also has to include everything required by the FDA or TTB: nutrition facts, identity statements, traceability codes, and allergen info, and it all has to hold up in real conditions without smearing or wearing off.

If you’re not sure how your label will hold up, ask about durability testing. There are standard ways to check for things like peel strength and moisture resistance.

6. Recyclability & Sustainability Trade‑Offs

Paper labels usually add about 1 to 1.5 grams to a standard aluminum can (around 8–10% of its total weight, depending on the material and finish). That can cause issues in some recycling systems that use weight to sort materials. For example, in parts of Canada, labels that add more than 1% to the can’s weight may keep it out of curbside recycling.

Removable adhesives can make things easier at the MRF (Materials Recovery Facility), but they don’t hold up as well in cold or wet environments and tend to tear more easily.

Quick Checklist: Can Paper Labels Work for You?

If you check all of these boxes, paper might be a viable option for your cans:

  • Label will be applied to a clean, oil-free metal surface
  • Can shape is gently curved—not heavily tapered
  • Environment does not include heavy refrigeration, condensation, or handling
  • You use coated paper with laminate or UV varnish for moisture and abrasion resistance
  • Adhesive is chosen for specific storage conditions 
  • All inks and adhesives meet food-safety and traceability specs
  • You’ve considered recyclability and weight impact

Practical Use Cases Where Paper Works Well

You can expect paper labels to perform reliably when these apply:

  • Medium‑volume products stored in dry or ambient environments (like dry-mix cans)
  • Cans sold at room temperature or filled/packed with minimal chilling
  • Brands that want a natural or craft look but still need a label that sticks

In these situations, coated paper with a durable finish gives you a lower-cost solution that doesn’t sacrifice style or performance.

paper labels

When You Should Consider Film Instead

While paper can work on cans with all the right considerations, we typically recommend film labels, especially in high-moisture or cold-fill environments. Think about film labels in the following situations:

  • Your cans go into ice, freezers, or chilled displays for long periods
  • You handle large volumes that require consistent, high-speed application
  • Your can shapes include steep tapers or ridges where adhesion is tricky
  • Your product must be “infinitely recyclable” without residue

Film labels like BOPP, PET, or shrink sleeves are better suited for moisture, abrasion, and temperature extremes.

Bottom Line

Paper labels can work on cans, but only if you pair them with the right coatings, adhesives, and application process. When the conditions get tough (cold, wet, abrasion), film often becomes a safer bet.

If you’re ready to explore options or see samples, just contact us. We’ll walk you through how these materials perform in real-world conditions.

How to Choose the Right Packaging for Alcohol Shipping: Safety, Compliance, and Branding

Whether you’re a small business looking to send out your craft spirits or a large brand aiming to distribute widely, making sure your products reach their destination safely and legally is crucial. Shipping alcohol can be a complex process filled with numerous regulations and requirements that vary significantly from state to state.

This guide will break down the essentials of alcohol shipping regulations, including the necessary permits, packaging for shipping alcohol techniques, and state-specific guidelines that you need to follow.

Beer kegs in a warehouse

Regulatory Compliance

Before arranging any shipment of alcohol, you should be aware of each state’s transportation regulations.

Shippers should also obtain the necessary licenses and establish agreements with carriers such as FedEx and UPS. Each state may have its own specific regulations regarding the shipment of alcohol. However, some states completely prohibit it.

Some licenses that are required include:

  • Federal Basic Permit: Issued by the Alcohol and Tobacco Tax and Trade Bureau (TTB), this permit is necessary for any business engaging in the production, importation, or wholesale distribution of alcohol.
  • State Alcohol Shipping Permit: Each state requires shippers to obtain an alcohol shipping permit. The necessary type of permit varies by state, and some states may require multiple permits depending on the nature of the shipment.
  • Carrier Agreements: Agreements with carriers like FedEx, UPS, and DHL that outline the terms and conditions for shipping alcohol.
  • Sales Tax Permit: Required by most states to legally collect sales tax on shipped alcohol.
  • Shipping Carrier Compliance Bond: A bond that some carriers require to ensure compliance with their alcohol shipping guidelines and regulations.

Adult Signature Verification

All alcohol shipments require an adult signature (21+ years) upon delivery. Alcohol Signature Verification ensures that alcohol is not delivered to minors and typically incurs an additional fee. Carriers have specific procedures to verify the recipient’s age and identity at the time of delivery.

These procedures often include checking a valid government-issued identification and obtaining a signature to confirm that someone of legal drinking age received the package.

Safety and Durability

After checking with federal and state laws, your next priority is to get your customer a safe and intact product. Proper packaging helps your products withstand transit shocks, vibrations, and potential impacts.

These are a few best practices for getting your alcoholic beverage delivered in mint condition:

  • Use the right materials: Choose a durable box with inner packaging made of polystyrene, molded pulp, or die-cut corrugated.
  • Protection: Inside the box, each bottle should be individually cushioned with padded dividers or foam inserts to prevent movement and breakage. To protect bottles, you can also use bubble wrap or wine bottle sleeves.
  • Pack tightly: Fill any empty space with filler material like foam peanuts, air pillows, or crumpled paper. Wrap each bottle individually to prevent them from breaking. Pack the box so that it doesn’t move when shaken.
  • Secure the package: Use strong tape to seal the box along all edges and corners. You can also reinforce the bottom with extra tape or a corrugated pad.
  • Label instructions: Mark the box as “Fragile” or “Handle with Care”.
  • Seasonal considerations: Temperature control is another consideration—using insulated packaging or gel packs can help maintain the beverage’s quality, especially during extreme weather conditions.

Packaging and Branding Materials

Picture this: your beautifully crafted product travels thousands of miles, enduring various handling stages and environmental conditions, only to arrive with a worn-out, unreadable label.

Using the proper packaging materials will help your alcohol shipments reach your customers in their best condition. Below are a few important considerations to keep in mind when shipping alcohol.

Materials

Using acceptable materials like molded polystyrene, pulp dividers, and sturdy corrugated cartons ensures your product and its packaging remain intact. When it comes to a safety net, reinforced bottoms are your best friend.

Most major carriers, like FedEx and UPS, include detailed guidelines on what materials can be used for packaging on their websites.

Strong adhesives

Whether braving downpours or UV rays from the sun, a label with strong adhesive should stay put. The right adhesive helps your label stay put and in compliance no matter what wild adventures it may encounter.

Label laminates

Laminates act as barriers against environmental factors, protecting labels from moisture, temperature changes, and abrasion. High-quality laminates keep crucial information like legal disclaimers, barcodes, and brand details intact and readable during transit.

UV coatings

UV coatings provide a layer of protection against harmful ultraviolet light, which can degrade both the label material and the printed information over time. By applying UV coatings, labels are protected against fading, discoloration, and other forms of deterioration caused by UV exposure, particularly during extended periods in transit or storage.

Alcohol Label Requirements

Preparing your label before it gets picked up by your carrier helps avoid issues during shipping. Here is what you need to know:

  • Electronic shipping solutions: Shippers must use carrier-approved electronic shipping solutions to create and manage shipping labels. This allows shipments to be properly documented and traceable.
  • Active alcohol shipping account: Carriers like FedEx and UPS have specific systems for processing alcohol shipments. For instance, FedEx requires shippers to have an active alcohol shipping account and a signed agreement.
  • Special labels: A special alcohol label and an adult signature requirement sticker. Similarly, UPS mandates that shippers have a UPS Agreement for Approved Beer or Wine Shippers.
  • Declaration: You’ll need to provide details about the contents of the package with clear identification. Alcohol shipments must be clearly labeled as containing alcohol.
  • Adult signature: Labels should indicate that an adult signature is required upon delivery.
  • Compliance with origin and destination regulations: Special labels can be obtained from the shipping carrier, and packages must comply with both origin and destination state labeling requirements.

Direct-to-Consumer Alcohol Packaging vs. Distribution Packaging

​​As an alcohol manufacturer, you might be wondering about the differences between direct-to-consumer alcohol packaging and packaging designed for distribution and shipping on a larger scale.

When shipping directly to consumers, packaging needs to cater to a more personal experience—think appealing designs that embody your brand and provide an unboxing experience. Consider how your packaging can spark joy, but be tough enough to handle.

On the other hand, B2B or distribution packaging focuses more on efficiency and durability; your primary goal is to ensure products arrive intact and ready for resale. This often means using more robust supplemental materials and prioritizing functionality over aesthetics.

Both packaging types have one thing in common—they require a focus on product protection. If you choose the right packaging partner, both can look good and maintain the integrity of your product.

Let Blue Label Help You Choose the Right Packaging

Blue Label Packaging Co. has dedicated experts who can guide you through the ins and outs of packaging regulations. We offer customized solutions like alcohol-compliant labels with no minimum order, second-skin shrink sleeves, and hang tags with luxe finishes.

At Blue Label Packaging, we put our expertise to work. Explore our product labels or talk to an expert about your next packaging product.

Finding the Perfect Match: Beer Container Types and Beer Labels

⚞ The Highlights:

  • The main beer container types are cans, bottles, growlers, crowlers, kegs, and barrels. Each one needs a different approach to labeling.
  • 12 oz and 16 oz cans dominate craft beer. Cans can be branded three ways: pressure-sensitive labels, shrink sleeves, or direct-printed cans.
  • Growlers (refillable jugs, 32 or 64 oz) and crowlers (single-use 32 oz aluminum cans) both serve taproom-to-home customers, just with different cost and reuse profiles.
  • Kegs use collars and wraps, not full body labels. Barrels and casks rarely need consumer-facing labels at all.

Cans, bottles, growlers, crowlers, kegs, and barrels are the main containers breweries use to get beer to customers. Each one has different sizing, label requirements, and use cases. We work with breweries on labels for all of them, and the right container often depends as much on where the beer is going as on what’s inside.

Below is a quick comparison of the main beer container types, then a breakdown of each with sizes, label dimensions, and what we typically see breweries use them for.

Beer container quick reference

Container Common volumes Label format Typical use
Can 8.4, 12, 16, 19.2 oz Pressure-sensitive label, shrink sleeve, or direct-printed Retail, distribution, taprooms
Bottle 12, 16.9 (500 mL), 22, 25.4 (750 mL) oz Front + back labels (or full wrap) Retail, premium and specialty releases
Growler 32, 64, 128 oz Pressure-sensitive label, hang tag, or wrap-around Taproom-to-home (refillable)
Crowler 32 oz Pressure-sensitive label Taproom-to-go, outdoor events, sample shipping
Keg 5, 5.16, 7.75, 15.5 gal Keg collar (around the top) + optional keg wrap Bars, restaurants, large events
Barrel or cask 4.5, 9, 53, 59, 66 gal Minimal labeling (typically internal use) Aging, secondary fermentation, specialty batches

1. Beer Cans

beer labels for beer cans

Cans dominate craft beer for a few simple reasons. They’re lightweightcost-effective, and easy to ship. The metal blocks light, which protects flavor better than clear glass. They’re highly recyclable, which matters for both brewers and consumers paying attention to packaging waste.

And cans give you size flexibility. You don’t have to stop at the standard 12 oz format.

Common can sizes

  • 8.4 oz. Often used for specialty releases or high-ABV beers
  • 12 oz. The classic standard
  • 12 oz slim. Same volume, narrower profile
  • 12 oz “Sam Can”. A wider-mouth format produced for Boston Beer Company
  • 16 oz. The “tallboy” or “pint” can, popular for IPAs and tap-pour-style craft beers
  • 19.2 oz. The “stovepipe,” often sold as single-serve
  • 32 oz crowler. An aluminum can used for taproom fills (covered separately below)

Can label dimensions

For 12 oz cans, pressure-sensitive labels are typically around 3.625″–4″ tall by 7.5″–8″ wide.

16 oz cans usually run around 5″ tall by 7.5″–8″ wide.

If you’re using shrink sleeves, the label can cover the entire can from top to bottom: roughly 5″–6″ for a 12 oz can or 6″–7″ for a 16 oz can, depending on how much real estate you want for the design.

Pressure-sensitive labels, shrink sleeves, or direct-printed cans?

The same can can be branded three different ways:

  • Pressure-sensitive labels are the standard sticker-style label. They go on flat or cylindrical surfaces with adhesive. Lower setup cost, low minimums, and easy to change between runs. The format most craft breweries start with.
  • Shrink sleeves wrap the entire can in a printed film that shrinks under heat. They give you 360° coverage and more design real estate, but cost more and have higher minimums. A fit when the design needs to wrap or the container has unusual shape.
  • Printed cans (direct-to-can) put the design directly on the aluminum, with no separate label at all. They used to require minimums in the hundreds of thousands. Digital direct-to-object printing has changed that. We typically work with breweries on minimums around 1,500 to 2,000 cans per design, which is realistic for a single seasonal SKU rather than a year’s worth of inventory.

For a deeper comparison of growlers, crowlers, and printed cans, see our Growlers vs. Crowlers: What’s the Difference? post.

2. Beer Bottles

Beer bottles

Bottles are still a real part of the craft beer market, even with cans pulling ahead in raw volume. Bottles hold a loyal following for specialty releases, premium positioning, and traditional formats. Some brewers prefer them for high-gravity or barrel-aged beers, where the slower oxygen exchange lets nuanced flavors develop over time.

Why choose bottles?

  • Brand image: glass carries a premium or nostalgic feel that some consumers still associate with quality.
  • Flavor preservation: dark glass shields beer from harmful light, especially important for hop-forward and barrel-aged styles.
  • Tradition: many craft beer drinkers still associate bottled beer with authenticity and craftsmanship.

Common bottle sizes

  • 12 oz. The classic standard for craft and mainstream beers
  • 16.9 oz (500 mL). Popular for breweries with European roots or styles
  • 22 oz “bomber”. Frequently used for limited-edition or specialty releases
  • 750 mL. Typical for high-end Belgian-style or barrel-aged releases

Beer labels for beer bombers

Bottle label dimensions

Beer bottles typically use a front label and a back label, though some breweries use a single wrap-around label that covers the whole bottle.

A common front label is around 3″ x 3″. The back label typically runs between 2.5″ x 2.5″ and 3″ x 4″, depending on the bottle shape and how much regulatory information you need to fit.

3. Beer Growlers and Crowlers

beer labels for growler beer containers

Growlers and crowlers serve the same goal. Getting fresh draft beer out of the taproom and into a customer’s hands. With two different approaches.

Growlers (refillable)

A growler is a refillable jug, typically amber glass with a handle, sized at 32 oz or 64 oz (and occasionally 128 oz / one gallon). The customer brings it back to the brewery for refills, which makes it the natural fit for taproom-focused breweries that build local repeat business.

Growler labels generally sit in the 4″–5″ tall by 4″–6″ wide range, depending on the curve of the bottle and how much branding you want to show. Some breweries use larger wrap-around labels (around 4″ x 14″) for full-coverage branding.

Crowlers (single-use)

A crowler is a 32 oz aluminum can filled and sealed at the brewery on demand. The name is a mash-up of “can” and “growler,” and the format borrows the best of both: the freshness of a growler fill, with the durability of a can. Crowlers are single-use; once you’ve finished it, the can goes in the recycling bin.

Crowler labels typically run around 6″ x 9.5″. Most breweries apply them at the time of fill so the same blank crowler stock can serve multiple SKUs.

Worth knowing: Crowlers ship better than growlers because aluminum is durable, the seal is airtight, and there’s no UV light penetration. For breweries that send out samples or fulfill small online orders, crowlers (or printed cans) are usually the more reliable option than glass growlers.

For a deeper comparison of growlers vs. crowlers vs. printed cans, see our Growlers vs. Crowlers: What’s the Difference? post.

4. Beer Kegs

beer labels for beer kegs

Kegs are the workhorse of draft beer. A lot of craft beer sales happen on-premise. Bars, restaurants, taprooms. And aluminum kegs are how that beer moves. The decision to use kegs usually comes down to cost-efficiency (refillable, reusable), reduced packaging waste, and straightforward shipping logistics.

Why choose kegs?

  • Bulk distribution: built for high-volume on-premise service.
  • Quality control: minimal oxygen exposure keeps beer fresh longer than bottles or cans on a shelf.
  • Sustainability: reusable containers reduce per-pour packaging waste.
  • Cost efficiency: fewer materials per ounce of beer than individual cans or bottles.

Common keg sizes

  • Half barrel (1/2 bbl): 15.5 gallons, the standard for bars and large events
  • Quarter barrel (1/4 bbl): 7.75 gallons, often called a “pony keg”
  • Sixth barrel (1/6 bbl): 5.16 gallons, popular for smaller tap rotations and limited releases
  • Cornelius keg (“corny keg”): 5 gallons, common for homebrewers and small-scale operations

Keg label sizes

Keg collars sit around the top of the keg and usually measure 6″–7″ in diameter. They carry compliance information (style, ABV, brewery) and basic branding.

Some breweries also use keg wraps, longer narrow labels that wrap around the keg’s body. These typically run 3″–6″ tall and up to 30″ wide, depending on the keg’s circumference. A well-designed wrap helps a keg get noticed in a crowded cellar or cooler line.

5. Beer Barrels and Casks

Beer casks

Barrels and casks are used by craft breweries for aging or secondary fermentation, typically after the initial brewing process. Wood barrels can infuse unique flavors into the beer (oak, bourbon, wine notes) that can’t be replicated in stainless steel. The result is more complex, layered profiles.

Brewers usually reach for a barrel when they want to create limited-edition or specialty batches that stand out. Beers that command premium prices and generate buzz among craft enthusiasts.

Why use barrels or casks?

  • Flavor enhancement: wood barrels previously used for spirits or wine can add vanilla, caramel, tannins, or residual whiskey or wine character.
  • Extended aging: slower oxygen exchange creates subtler, more nuanced flavor development over time.
  • Brand differentiation: barrel-aged beers stand out on shelves and menus, and they support premium pricing.

Common barrel and cask sizes

  • Standard bourbon barrels (53 gallons): often repurposed from bourbon distilleries; the most common size in the U.S.
  • Wine barrels (59 gallons): popular for sour or wild ales, where vinous qualities add complexity
  • Hogsheads (66 gallons): larger barrels used for extended aging
  • Firkins (9 gallons): smaller traditional British casks used for real ale or specialty releases
  • Pins (4.5 gallons): half the size of a firkin, ideal for very small-batch cask ales

Smaller casks are useful when you’re trying out a new recipe without a big commitment. Larger barrels hold more beer and support extended aging when the recipe is dialed in.

How to choose the right container for your beer

The container is half of the packaging decision. The label is the other half. A few factors usually drive the call:

  • Where is the beer going? Retail shelves want cans or bottles. Taprooms, refill programs, and event sales lean toward growlers and crowlers. On-premise distribution is keg territory.
  • What’s the volume per SKU? Pressure-sensitive labels and shrink sleeves are flexible at smaller volumes. Printed cans get cost-competitive once you commit to a planned run.
  • How often will the design change? Seasonal SKUs, one-off collaborations, and frequently rotating releases benefit from formats with low minimums and short turnaround. Flagship beers that hold a design for years can justify a longer-run printed can.
  • What’s the brand’s positioning? Bottles still carry premium or traditional connotations for some consumers. Cans signal modern craft. Growlers feel local and refillable. Each format sends a signal before anyone reads the label.
  • What’s your operational setup? If you don’t have an applicator, shrink sleeves require a partner. If you don’t have a seamer, crowlers do too. Format choice has logistics implications beyond the design.

Frequently asked questions

What’s the most common can size for craft beer?

The 12 oz can is the long-standing standard. The 16 oz “tallboy” has become equally common for craft IPAs, sours, and seasonal releases over the last decade. Most craft breweries use both, with 12 oz for flagship year-round beers and 16 oz for limited or higher-ABV releases.

What’s the difference between a growler and a crowler?

A growler is a refillable glass jug (typically 64 oz). A crowler is a single-use 32 oz aluminum can filled and sealed at the brewery on demand. Growlers are reusable; crowlers are recycled after use. Crowlers ship better and stay fresh longer once sealed; growlers are the better fit for local taproom-to-home programs. For a deeper comparison, see our Growlers vs. Crowlers post.

Can you put a label on a printed can?

You can, but it usually defeats the point. Printed cans carry the design directly on the aluminum, so a separate label adds cost without adding visual real estate. Most breweries that use printed cans go without an additional label. The exception is a small “neck” label or sticker for limited-edition variants on a base printed can.

What size label fits a 12 oz can?

A standard 12 oz can label is around 3.625″–4″ tall by 7.5″–8″ wide when applied as a pressure-sensitive label. Shrink sleeves for the same can run roughly 5″–6″ tall and cover the full body of the can.

How big are bottle labels?

Most beer bottles use a front label around 3″ x 3″ and a back label between 2.5″ x 2.5″ and 3″ x 4″, depending on the bottle shape and how much regulatory information you need to include. Wrap-around labels for bottles can run up to roughly 3″ tall by 10″–12″ wide.

Do kegs need labels?

Yes, but they’re different from bottle or can labels. Kegs use collars (round labels that sit on top of the keg, around 6″–7″ in diameter) for compliance and identification. Some breweries also add longer keg wraps around the body of the keg for branding visibility in a tap-line cooler. The collar is required; the wrap is optional.

Why do some brewers use bombers (22 oz bottles)?

Bombers carry a “specialty release” feel that 12 oz bottles and cans don’t. Brewers use them for limited editions, barrel-aged releases, anniversary beers, and other one-off projects where the format itself adds perceived value. The bigger format also handles barrel-aged or high-gravity beers that benefit from more headspace and aging time.

Ready to talk through containers and labels?

Your container is half the story. The label that goes on it is the other half. Whether you’re packaging a first run of 12 oz cans, a 22 oz specialty release, or building a refill program with growlers, getting the format right comes down to your audience, your distribution, and your timeline.

If you’re sorting through which container fits your brewery’s stage, take a look at our digitally printed cans page for more on direct-to-can production, or our craft beer label printing page for an overview of label work across all formats. Request a sample pack to see materials and finishes in person, or get in touch if you have specific questions about your beer and your container.

How to Choose a Craft Beer Label Printing Company in 2024

Finding the perfect labels for your craft beer can be challenging. With so many printing companies to choose from, it can be difficult to identify one that truly understands your unique durability, design, and customization needs. We’ve worked with thousands of breweries and craft beer makers in your position.

Don’t sweat it. This guide is packed with tips to help you identify a printing partner who gets your brand and makes your beer stand out.

We’re covering the essentials: understanding materials and techniques, how to weigh costs, figuring out order sizes, and making sure your labels stay compliant. Plus, you’ll get a cheat sheet of questions to ask printers, making your decision-making process a whole lot smoother.

Cans with custom labels

Understanding Your Custom Beer Label Needs

Successfully choosing a printing partner starts with identifying your goals. Consider the following:

Identifying Your Goals

Start with the end in mind—your goals will likely include brand recognition, cost efficiency, durability, legal compliance, and customer engagement. These will help potential partners understand how to strategically design custom labels aligning to your specific needs. Here are some tips:

  • Brand Recognition: Share style inspirations or designs to collect feedback.
  • Cost Efficiency: Provide expected order volumes for advice on printing options that match your budget.
  • Durability: List product varieties like beers, seltzers, and ciders that require durable wet labels. Communicate the different environments that your product might have to endure.
  • Legal Compliance: Specify label content needs like government warnings supporting industry compliance (tip: we can help with this).
  • Customer Engagement: Discuss target demographics and labeling ideas to captivate them.

Decide What’s Most Important

Like any major business decision, it’s important to determine what matters most, whether it’s exceptional customer service, competitive pricing, the ability to create standout labels, conveying your brand story, eco-conscious materials, or a combination of those.

  • Standout Label Designs: Will custom shapes, special effects like foils or specialty printing techniques be featured? Determine must-have aesthetics.
  • Storytelling Through Labels: What brand narratives do your labels need to convey? Share themes inspiring designs.
  • Eco-conscious Practices: Do you require sustainable printing methods and materials? Ask about green production options.
  • Customer Service: How important is an expert team available for technical support? Assess level of involvement expected.
  • Printing Cost Factors: Will you print high volumes for cost efficiency or need flexibility for small batch prototyping? Request rate breakdowns.

Comparing capabilities in key areas helps identify ideal printing partners matching must-haves. Weigh whether you will compromise on certain preferences if strengths align well in other dimensions.

Custom bottle label with metallic foil and embossing

Key Considerations in Choosing a Craft Beer Label Printing Company

Choosing the Right Materials

When assessing the quality and materials capabilities of a printing partner, breweries should evaluate factors like durability, material options, and print quality.

The choice of material for your craft beer labels plays a significant role in their overall look, feel, and durability. Here are some considerations to keep in mind:

  • Water-Resistant Materials: Given the conditions that craft beer bottles and cans are often subjected to, from ice buckets to refrigerators, selecting water-resistant materials is crucial. Options like BOPP (biaxially oriented polypropylene) and vinyl offer excellent moisture resistance, ensuring your labels remain intact and visually appealing, no matter the environment​​.
  • Durability Against Moisture and Cold: It’s not just about water resistance; the material should also withstand cold temperatures without losing its integrity. Materials that can endure these conditions without peeling off or getting damaged are vital for maintaining a pristine look from the brewery to the consumer’s hand​​.
  • Aesthetic and Texture Options: Beyond durability, the material of your label affects its aesthetic appeal. Matte, gloss, and satin finishes can dramatically alter the look and feel of your labels. Each finish has its own way of interacting with light and can complement the design of your label to make colors pop or provide a sophisticated understated look.
  • Eco-friendly Options: With a growing emphasis on sustainability in the craft beer industry, considering eco-friendly label materials can resonate with your target audience’s values. Materials like recycled paper or biodegradable films can significantly reduce your brand’s environmental footprint while maintaining high-quality aesthetics.

Label Sizes and Shapes

Standard label sizes and shapes have evolved, largely influenced by the industry’s most common container types and sizes. For example, a typical beer bottle label might measure around 3.5 inches wide by 4 inches high, offering ample space for branding, artwork, and necessary information without overwhelming the container​​. Similarly, can labels often wrap entirely around the vessel, providing a 360-degree canvas for design creativity and brand messaging.

However, the “standard” is not one-size-fits-all. Different bottle and can dimensions, such as slim cans or larger bomber bottles, require tailored label sizes to ensure a perfect fit. The key is understanding the dimensions of your specific containers and how much of that space you want your label to cover.

Going Beyond Standard Options: The Case for Customization

While standard labels serve many brands well, the craft beer industry thrives on uniqueness and personality. Custom labels—those that break the mold in terms of size, shape, and application—are becoming increasingly popular for craft brewers looking to differentiate their offerings.

  • Embracing Unique Shapes: Custom-shaped labels can mirror the contours of unusual bottle or can designs, create visual interest, and enhance shelf appeal. From sleek, minimalist labels that hint at the contents to intricate, die-cut shapes that tell a story, the possibilities are limited only by imagination.
  • Considering Wraparound Labels: For cans, a full wraparound label maximizes the available design space, allowing for bold, engaging visuals that attract attention from every angle. This approach (often called shrink sleeves) can be particularly effective for limited edition releases or flagship brews that deserve extra emphasis.
  • Size Matters for Compliance and Clarity: When considering custom sizes and shapes, it’s essential to remember regulatory requirements for labeling alcoholic beverages. Every label must have space for mandatory information, including alcohol content, volume, and manufacturer details, without compromising readability​​. Balancing creative aspirations with these requirements is key to a successful label design.

Tips for Choosing the Right Label Size and Shape

  1. Start with Your Container: Measure your bottles or cans carefully, considering curves, necks, and any other features that might influence label adhesion and appearance.
  2. Reflect on Your Brand’s Personality: Let your label shape and size be an extension of your brand story. Are you bold and avant-garde, or classic and traditional? Your label can reflect this.
  3. Consult with Design and Printing Experts: Professionals in label design and printing can offer valuable insights into what works well for different types of beers and containers. They can also provide templates or guidelines to help visualize your ideas.
  4. Experiment with Mockups: Before finalizing your design, use digital or paper mock-ups to see how your label will look on the actual container. This step can help identify potential issues with size, shape, or legibility before you commit to printing.

Cost and Scalability

For breweries and craft beer makers, understanding the costs and scalability options of label printing is critical for both startup ventures and established brands. You’ll want to take into account factors such as minimum order quantities, volume discounts, the flexibility of printing across multiple SKUs, and the efficiency of re-ordering processes.

Understanding Pricing Models

Label printing costs can vary widely depending on several factors, including material choices, print techniques, label size and shape, and the complexity of the design.

Most providers use a pricing model that decreases the unit cost as the order quantity increases, rewarding larger orders with better per-label pricing. However, the starting point and scale of these price breaks can differ between providers, making it important to get detailed quotes for various order sizes​​.

Minimum Order Quantities and Volume Price Breaks

  • Minimum Order Quantities (MOQs): Many label printing companies set MOQs to ensure profitability. For craft breweries, especially those in the startup phase or with a rotating selection of small-batch brews, finding a provider with low MOQs can be crucial. Understanding a provider’s MOQs will help you determine if they’re a good fit for your production scale.
  • Volume Price Breaks: Volume discounts are a key consideration when planning your label orders. Providers typically offer price breaks at certain thresholds, which can significantly impact your cost per label. When comparing providers, ask for a detailed breakdown of pricing tiers to understand where these breaks occur and how they align with your anticipated order volumes.

Scalability and Flexibility for Multiple SKUs

Craft breweries often produce a wide range of beers, each requiring its own label design. Some key considerations include:

  • Flexibility Across SKUs: Look for providers that offer flexibility in aggregating different label designs to qualify for volume discounts. This can be particularly beneficial for breweries that want to print similar designs for multiple SKUs without the need to place large individual orders for each.
  • Digital Printing Advantages: Digital printing technology offers significant advantages in terms of scalability and flexibility. It allows for cost-effective short runs and easy updates to designs without the need for new plates or setup fees, making it an excellent option for breweries with a wide variety of labels​​.

Ease of Re-Ordering

The ability to quickly and easily reorder labels as needed is essential for maintaining inventory levels and responding to demand fluctuations. Consider providers that offer streamlined re-ordering processes, possibly through online platforms, which can save time and reduce the time to re-order.

Comparing Prices and Making Informed Decisions

When comparing label printing providers, consider the following steps to ensure you’re making an informed decision:

  1. Request Detailed Quotes: Obtain quotes for various order sizes, including the costs for different materials and print techniques. This information will help you understand the full scope of potential expenses.
  2. Evaluate Total Cost: Look beyond the sticker price to consider other factors like setup fees, design services, shipping costs, and lead times, which can all affect the total cost.
  3. Consider Long-Term Needs: Choose a provider that can scale with your brewery. A company that offers competitive pricing for small orders but also has the capacity to handle larger volumes efficiently can be a valuable partner as your business grows.

Turnaround Time and Reliability

For breweries and craft beer makers, timing can be everything. Whether you’re gearing up for a seasonal release, restocking a bestseller, or launching a new brew, the turnaround time for getting your labels can significantly impact your operations. You’ll want to consider everything from artwork approval to set up, printing, and shipping to help you plan effectively and avoid unexpected delays.

The Components of Turnaround Time

Turnaround time in label printing is influenced by several key stages, each contributing to the total time from placing your order to receiving your labels.

  1. Artwork Approval: The process begins with your design. Once you submit your artwork, the printing company will review it to ensure it meets technical requirements for printing. This stage includes checking the resolution, color specifications, and any potential issues that could affect print quality. Delays can occur if revisions are needed, so submitting artwork that already adheres to the provider’s guidelines can speed up this phase.
  2. Pre-Production and Setup: After artwork approval, the project moves into the pre-production stage. For traditional printing methods, this may involve creating plates or screens, which can slow down the process. Digital printing, on the other hand, typically requires less setup time, making it a faster option for smaller or more time-sensitive orders.
  3. Printing: The actual printing time varies depending on the complexity of your labels, the quantity ordered, and the printing technology used. Digital presses can produce labels relatively quickly, while traditional methods may take longer, especially for large volumes or intricate designs.
  4. Finishing and Quality Checks: Post-printing, labels undergo finishing processes such as cutting, laminating, and possibly applying adhesive. Quality assurance checks are also conducted to ensure the labels meet the brewery’s and the printer’s standards. This stage is crucial for delivering a high-quality product but can add time to the overall process.
  5. Shipping and Delivery: Finally, the completed labels are packed and shipped to your brewery. Shipping time depends on the distance between the printer and your location and the shipping method chosen. While expedited shipping options can reduce wait times, planning for standard shipping times in your overall timeline is wise.

Label printing employees

Tips for Optimizing Turnaround Time

  • Provide Ready-to-Print Artwork: Ensuring your designs meet the printer’s specifications from the start can significantly reduce delays during the artwork approval stage.
  • Communicate Your Timeline: Be upfront with your printing provider about your schedule. Some companies can accommodate rush orders, but clear communication is key to aligning expectations.
  • Consider Shipping Logistics: Factor in shipping time when planning your label order timeline, especially if you’re located far from the printer or if the labels are being shipped during busy seasons.

Questions to Ask Potential Beer Label Printing Providers

To ensure you partner with a label printer that meets your needs, here are some questions to guide your selection process, informed by insights from our own label experts.

1. What is your experience with craft beer labels?

Understanding the printer’s experience in the craft beer industry can give you insight into their familiarity with common challenges and specific requirements, such as resistance to moisture and cold, adherence to regulatory labeling standards, and the ability to produce high-quality, eye-catching labels.

2. Can you provide samples of your previous work?

Asking for samples allows you to assess the quality of the printer’s work firsthand. Look for clarity, color accuracy, material quality, and the overall finish. Samples can also inspire your own label designs and help you gauge the printer’s capabilities in delivering the visual impact you aim for.

3. What printing technologies do you use?

Inquire about the printing technologies available, such as digital, offset, or flexographic printing. Digital printing offers more flexibility, producing vibrant colors, detailed designs, and cost-effective short runs without the need for expensive setup fees, making it an ideal choice for breweries.

4. How do you ensure label durability and compliance?

Given the conditions beer bottles and cans must endure, from refrigeration to moisture exposure, it’s crucial to ask about the materials and finishes used to ensure label durability. Additionally, confirm that the printer is knowledgeable about the regulatory requirements for beer labeling to ensure compliance with legal standards.

5. What are your minimum order quantities and volume discounts?

This question is vital for budgeting and planning purposes. Understanding the minimum order requirements and how volume discounts are structured can help you optimize your orders for cost efficiency, especially important for smaller breweries or those with a wide variety of products.

6. How do you handle design and artwork preparation?

Some printers offer in-house design services or assistance in preparing your artwork for printing. Asking about these services can be particularly beneficial if you don’t have a dedicated designer on your team or if you need help ensuring your designs are optimized for printing.

7. What is your turnaround time, and how do you handle rush orders?

Knowing the expected turnaround time helps you plan your label ordering process in sync with your production schedule. It’s also wise to ask about the process for rush orders, should you need labels more quickly than anticipated.

8. Can you accommodate special requests or unique label features?

If you’re interested in unique label features, such as foil stamping, embossing, or using eco-friendly materials, ask if the printer can accommodate these requests. Special features can make your labels stand out but may require additional planning and cost.

Finding the Perfect Beer Label Printing Company

Finding the right custom label printing company for your craft beer involves more than just comparing prices and reviewing samples; it requires a deep dive into understanding each provider’s capabilities, technologies, and commitment to meeting your specific needs.

The right partner will offer the flexibility, expertise, and scalability your brewery needs. Make sure you carefully consider the factors we’ve discussed in this article—material options, cost and scalability, turnaround times, and asking the right questions—and you’ll be equipped to make an informed decision.

What are Can Wraps?

⚞ The Highlights:

  • Can wraps are custom-printed labels that completely cover your cans for a modern, seamless look
  • They differ from shrink sleeves by offering a cost-effective, flat design that’s ideal for uniform, consistent branding
  • When choosing can wraps, focus on material durability, printing quality, and how well the wrap handles your product’s environmental conditions

Simply put, a can wrap is a form of covering for beer cans and other similar containers. However, the exact meaning of can wrap can differ depending on the intended use.

For some people, a can wrap is an extra covering used to personalize a can or change the exterior of the can from its original appearance. For others, a can wrap is the main label used for a can. In this case, you have a few different options for your can wraps and tin can labels.

Types of Can Wrap Labels

When you’re looking to make your product shine with custom can wraps, you typically have two main options: Pressure Sensitive Labels and Shrink Sleeves.

Beer cans with a pressure sensitive can wrap.

Pressure Sensitive Can Wraps

Pressure sensitive labels might sound complicated, but they’re really just made up of a few simple layers:

  • Liner: Think of this as a protective wrapper—usually paper or plastic—that you peel off before applying the label.
  • Release Coat: This is a special layer on the liner that makes peeling it off a breeze.
  • Adhesive: The sticky part that helps the label cling to your can.
  • Face Stock: The visible label material that shows off your design.
  • Top Coat: A finishing layer (like a laminate) that protects your design from scratches and wear.

Printed in roll form, these labels are applied by removing the liner and pressing the label onto your can.

Beer cans with a shrink sleeve can wrap going through a filling line.

Shrink Sleeve Can Wraps

Shrink sleeves are a bit different. They use a special film that hugs your can when heat or steam is applied. Here’s why they might be right for you:

  • 360-Degree Designs: You get a full-surface wrap for a seamless, eye-catching look.
  • Form Fitting Sleeves: These sleeves mold perfectly to highlight your product’s unique shape.
  • Extra Design Protection: With the design printed on the inside, it stays protected from scratches and wear.

Shrink sleeves come pre-distorted so they fit your can perfectly after shrinking. Just keep in mind—they can be a bit more delicate. Too much heat or rough handling might lead to distortions.

Side-by-Side Comparison

Here’s a quick table to help you see the differences at a glance:

Feature Pressure Sensitive Labels Shrink Sleeves
Design Coverage Partial to full, depending on design Full 360° coverage
Durability Highly durable with a protective top coat Requires careful handling; more sensitive to heat/humidity
Application Applied by peeling off the liner and pressing Applied using heat/steam to conform
Customization Flexibility Great for varied materials and finishes Best for seamless, full-surface designs
Cost Typically lower upfront costs Higher initial costs, often balanced by longevity


Making the Right Choice for Your Can

Choosing between pressure sensitive labels and shrink sleeves isn’t just a design choice; it’s a decision that can affect your bottom line.

If you’re deciding how to package your cans, compare our printed cans and shrink sleeves to see which fits your run size, budget, and timeline best.

Cost Analysis and ROI Considerations

It’s important to know how each option affects your budget and overall return on investment. 

Pressure sensitive labels might be more budget-friendly at first, while shrink sleeves could save you money in the long run thanks to their durability and lower maintenance needs.

Vendor Evaluation Checklist

Choosing the right label or can wrap supplier is key. When you’re assessing providers, ask these questions:

  • Quality Certifications: Are they certified to meet industry standards for durability and safety?
  • Production Capabilities: Can they handle your volume and grow with your business?
  • Lead Times and Reliability: Do they offer quick turnaround times and responsive customer service?
  • After-Sales Support: Do they provide clear installation guides, troubleshooting help, and ongoing support?

Installation, Maintenance, and Troubleshooting

Even the best can wrap won’t do you any favors if it’s not installed right. Here’s what to consider:

  • Step-by-Step Installation: If you’re applying can wraps or shrink sleeves yourself, follow clear guidelines on cleaning, temperature control, and proper application techniques. Studies have shown that proper surface cleaning and a controlled environment can cut installation errors by up to 30%.
  • Common Pitfalls: Watch out for air bubbles, misalignment, or distortion. A handy tip: using a roller tool can help smooth things out.
  • Maintenance Tips: Regular inspections and careful storage can extend the life of your can wraps. Scheduling a routine check after each production cycle is a smart move.

Sustainability and Regulatory Compliance

Going green isn’t just trendy—it can be good for business (see what we did there?). Here’s how can wraps can support your eco-friendly goals:

  • Eco-Friendly Materials: Many can wrap and label solutions now use sustainable, recyclable materials. For example, some pressure sensitive labels are made with bio-based films.
  • Lifecycle Analysis: Look for vendors that offer lifecycle analyses to show how their products reduce environmental impact. Recent reports from Smithers reveal that sustainable packaging can noticeably cut down on a product’s carbon footprint.
  • Regulatory Compliance: Work with suppliers committed to environmental certifications and compliance to ensure your packaging meets evolving standards.

Comparative Branding Impact

Your packaging is like a silent salesperson on store shelves. Here’s how each option can shape your brand’s image:

  • Pressure Sensitive Labels: Known for their durability and ease of application, they offer a reliable solution for a consistent brand image.
  • Shrink Sleeves: With their full-coverage design, they create a dynamic and immersive brand experience that’s hard to ignore.

Can wraps aren’t your only option for getting branding on cans.  put the design directly on the aluminum, which avoids the visible seam that wraps create and survives cooler conditions without peeling. Wraps are usually the better fit for small runs or quick design tests. Printed cans are the better fit when you’re scaling to a few thousand cans per SKU or more.

Action Plan Summary

Here’s a quick action plan to get you started:

  1. Conduct a Cost Analysis: Gather data on both upfront and long-term costs. Compare case studies and ROI statistics from trusted industry sources.
  2. Evaluate Vendors: Use our checklist above to assess potential suppliers. Request samples and review their after-sales support.
  3. Pilot the Labels: Run a small-scale test to evaluate the labels, spot any issues, and identify performance in the market.
  4. Consider Sustainability: Ask vendors about eco-friendly options and request lifecycle analyses to ensure compliance with environmental standards.
  5. Test Branding Impact: Consider A/B testing different packaging solutions to see which one grabs your customers’ attention on the shelf.

Identify the Right Can Wraps for Your Containers

Whether you want pressure sensitive labels or shrink sleeves, a good can wrap will make a world of difference for your brand. Of course, there are still plenty of steps required to figure out the right solution for your cans. At Blue Label, our experts work directly with your business to identify the right materials, adhesives, and design considerations to protect your containers and beer can wraps and maximize the appeal of your product.

Ready to invest in quality, cost-effective custom beer can wraps for your business? Contact us today to talk about your labeling and label printing needs.

Varietal Wine Labels: How to Follow the TTB’s Rules on Varietal Labeling

From chardonnay to pinot noir, wine types play a significant role in communicating what your bottle has to offer to shoppers, restaurant-goers, and any other form of oenophiles. However, there are some specific rules regarding how you present various varietals on your wine labels.

As with just about everything you need to include on a wine label, the Alcohol and Tobacco Tax and Trade Bureau (TTB) is pretty particular about your varietal presentation. There are three official categories of wine – table wine, dessert wine, and sparkling wine. However, a label may list a specific varietal statement instead as long as you follow a few specific rules.

Meet Minimum Grape Percentage Requirements

If you want to use a specific varietal name, your wine needs to meet some minimum requirements. To start, any wine label with the name of a grape variety must be made from at least 75 percent of the listed type of grape. However, that percentage can change depending on which varietal you use and your region.

In addition to wine type, the TTB also requires that you list an appellation of origin on your label. This appellation is simply a statement of where the dominant grapes used in a wine were grown. This appellation can range from only stating the name of the country to a very specific viticultural area.

As you move into more specific areas, your grape usage requirements can change. For example, certain semi-generic designations like an American marsala may carry additional requirements, such as a certain alcohol range. Each level of geographic detail has its own rules and designations, but that’s a conversation for another blog post. When it comes to varietal rules, the main takeaway is that you use the right percentage of grapes so that the TTB doesn’t turn down your label.

A wine bottle label for Park Farm Winery that lists marechal foch as the varietal of grapes used in the wine.

Use an Approved Varietal

If you’re concerned that the TTB won’t recognize some lesser-known grape varieties, don’t worry. From aglianico to zweigelt, there are more than 300 approved varietal names listed in the Electronic Code of Federal Regulations (e-CFR), all of which are approved for use as a type designation for American wines.

While you may choose to capitalize the names of your varietal or use any hyphens, accents, or any other phonetic marks when printed on your label, the TTB does not require you to do either. As long as you use one of the approved spellings of your grape, or one of the alternative names listed in the e-CFR, you’re all set, regardless of if you opt for a lowercase presentation or choose to remove the umlaut out of grüner veltliner.

If for some reason your preferred varietal is not on the approved list, you’re not completely out of luck. You’ll need to petition the TTB administrator and provide some evidence as to why your grape of choice is deserving of inclusion.

List Breakdowns of Each Varietal if You Use More Than One

There is a way around the 75 percent grape baseline – blends. The TTB allows you to list more than one wine type designation on a label as long as you meet a few different requirements.

First, your wine must be made with all the varieties you list on your label. You can’t include three types that make up 95 percent of your bottle and decide not to include the varietal that makes up the final five percent. Second, you need to include a percentage breakdown of each variety. The TTB gives you a two-percent cushion on accuracy, so you’re fine as long as each type falls within that tolerance.

These rules get a bit trickier with the inclusion of grapes from multiple areas. If your label has multiple counties or states listed as the appellation of origin, you’ll need to include the percentage of each variety by the county or state that variety comes from, which could notably increase the total percentages listed on your bottle.

Two different types of wine listing varietals on their bottle labels.

Follow General Label Guidelines

According to the e-CFR, all wine labels must be “readily legible under ordinary conditions, and all such statement shall be on a contrasting background.” Contrasting backgrounds are simple enough, but what exactly does “readily legible” mean?

Simply put, it means that your type listing, along with other mandatory wine label elements, needs to meet specific TTB rules. The requirements that impact your wine type listings are as follows:

  • Required text must be at least two millimeters in size for containers of more than 187 milliliters or at least 1 millimeter for containers of less than 187 milliliters
  • Mandatory information should be in English
  • Important details should not be obscured by the label itself or any other elements

Of course, these rules don’t mean that you can’t have some fun with how you present your wine type. As long as you meet the guidelines, you can work your varietal’s name into your design to match your style. Compliance doesn’t need to be boring.

Find the Right Packaging Company for Your Wine Labels

When your wine is on the line, it’s important that your labels are more than just fine. Once you have all the mandatory details out of the way, it’s time to find a packaging company that can help you get the most out of your wine labels.

At Blue Label, we have the equipment and expertise necessary to take your labels to the next level. Whether we’re identifying the perfect stock for your wine label or taking advantage of special printing capabilities to amp up your design, we work with you to print the perfect labels for your brand and budget.

Ready to invest in quality labels for your bottles or cans? Contact us today to have us print your next batch of wine labels.

Label Considerations for Bottling vs. Canning Craft Beer

Beer can’t make the important journey from your brewing facility to your consumers’ mouths without a container. Whether you decide to bottle or can your brews, you’re going to need a good beer label to showcase your product and stay in compliance with alcohol regulations. Of course, the style of the container you choose can impact a few of your labeling decisions.
(more…)

Crowler Packaging: Guidelines and Rules to Know

Crowlers are great for several reasons. They’re extremely portable. They’re able to keep light out and help beer stay fresh for up to a month. They’re more convenient than lugging around a glass growler. In all, crowlers are a wonderful way to sell beverages in convenient 32 oz. containers—if they’re in accordance with the law, that is.

Like their glassy growler cousins, crowler packaging can run into some legal issues if you’re not careful. Consider the following legal guidelines for your custom crowler labels.
(more…)