Die Cutting 101: How to Order Custom Die Cut Label Printing
There can be a lot to think about when considering die cut label printing. From the costs of purchasing a custom die to creating your desired shape, it can be confusing for anyone who isn’t well-versed in die cutting. To help simplify the process, we outlined some of the basics when it comes to creating a custom die cut label.
What is a die?
“We don’t have that die.” “Make sure you check the die line.” “You might need a custom die.” You may have heard these phrases in conversations with your label printer. Well when a label converter is talking about dies, it can sound a bit like a game of Yahtzee. Let’s start with some basic die cutting definitions:
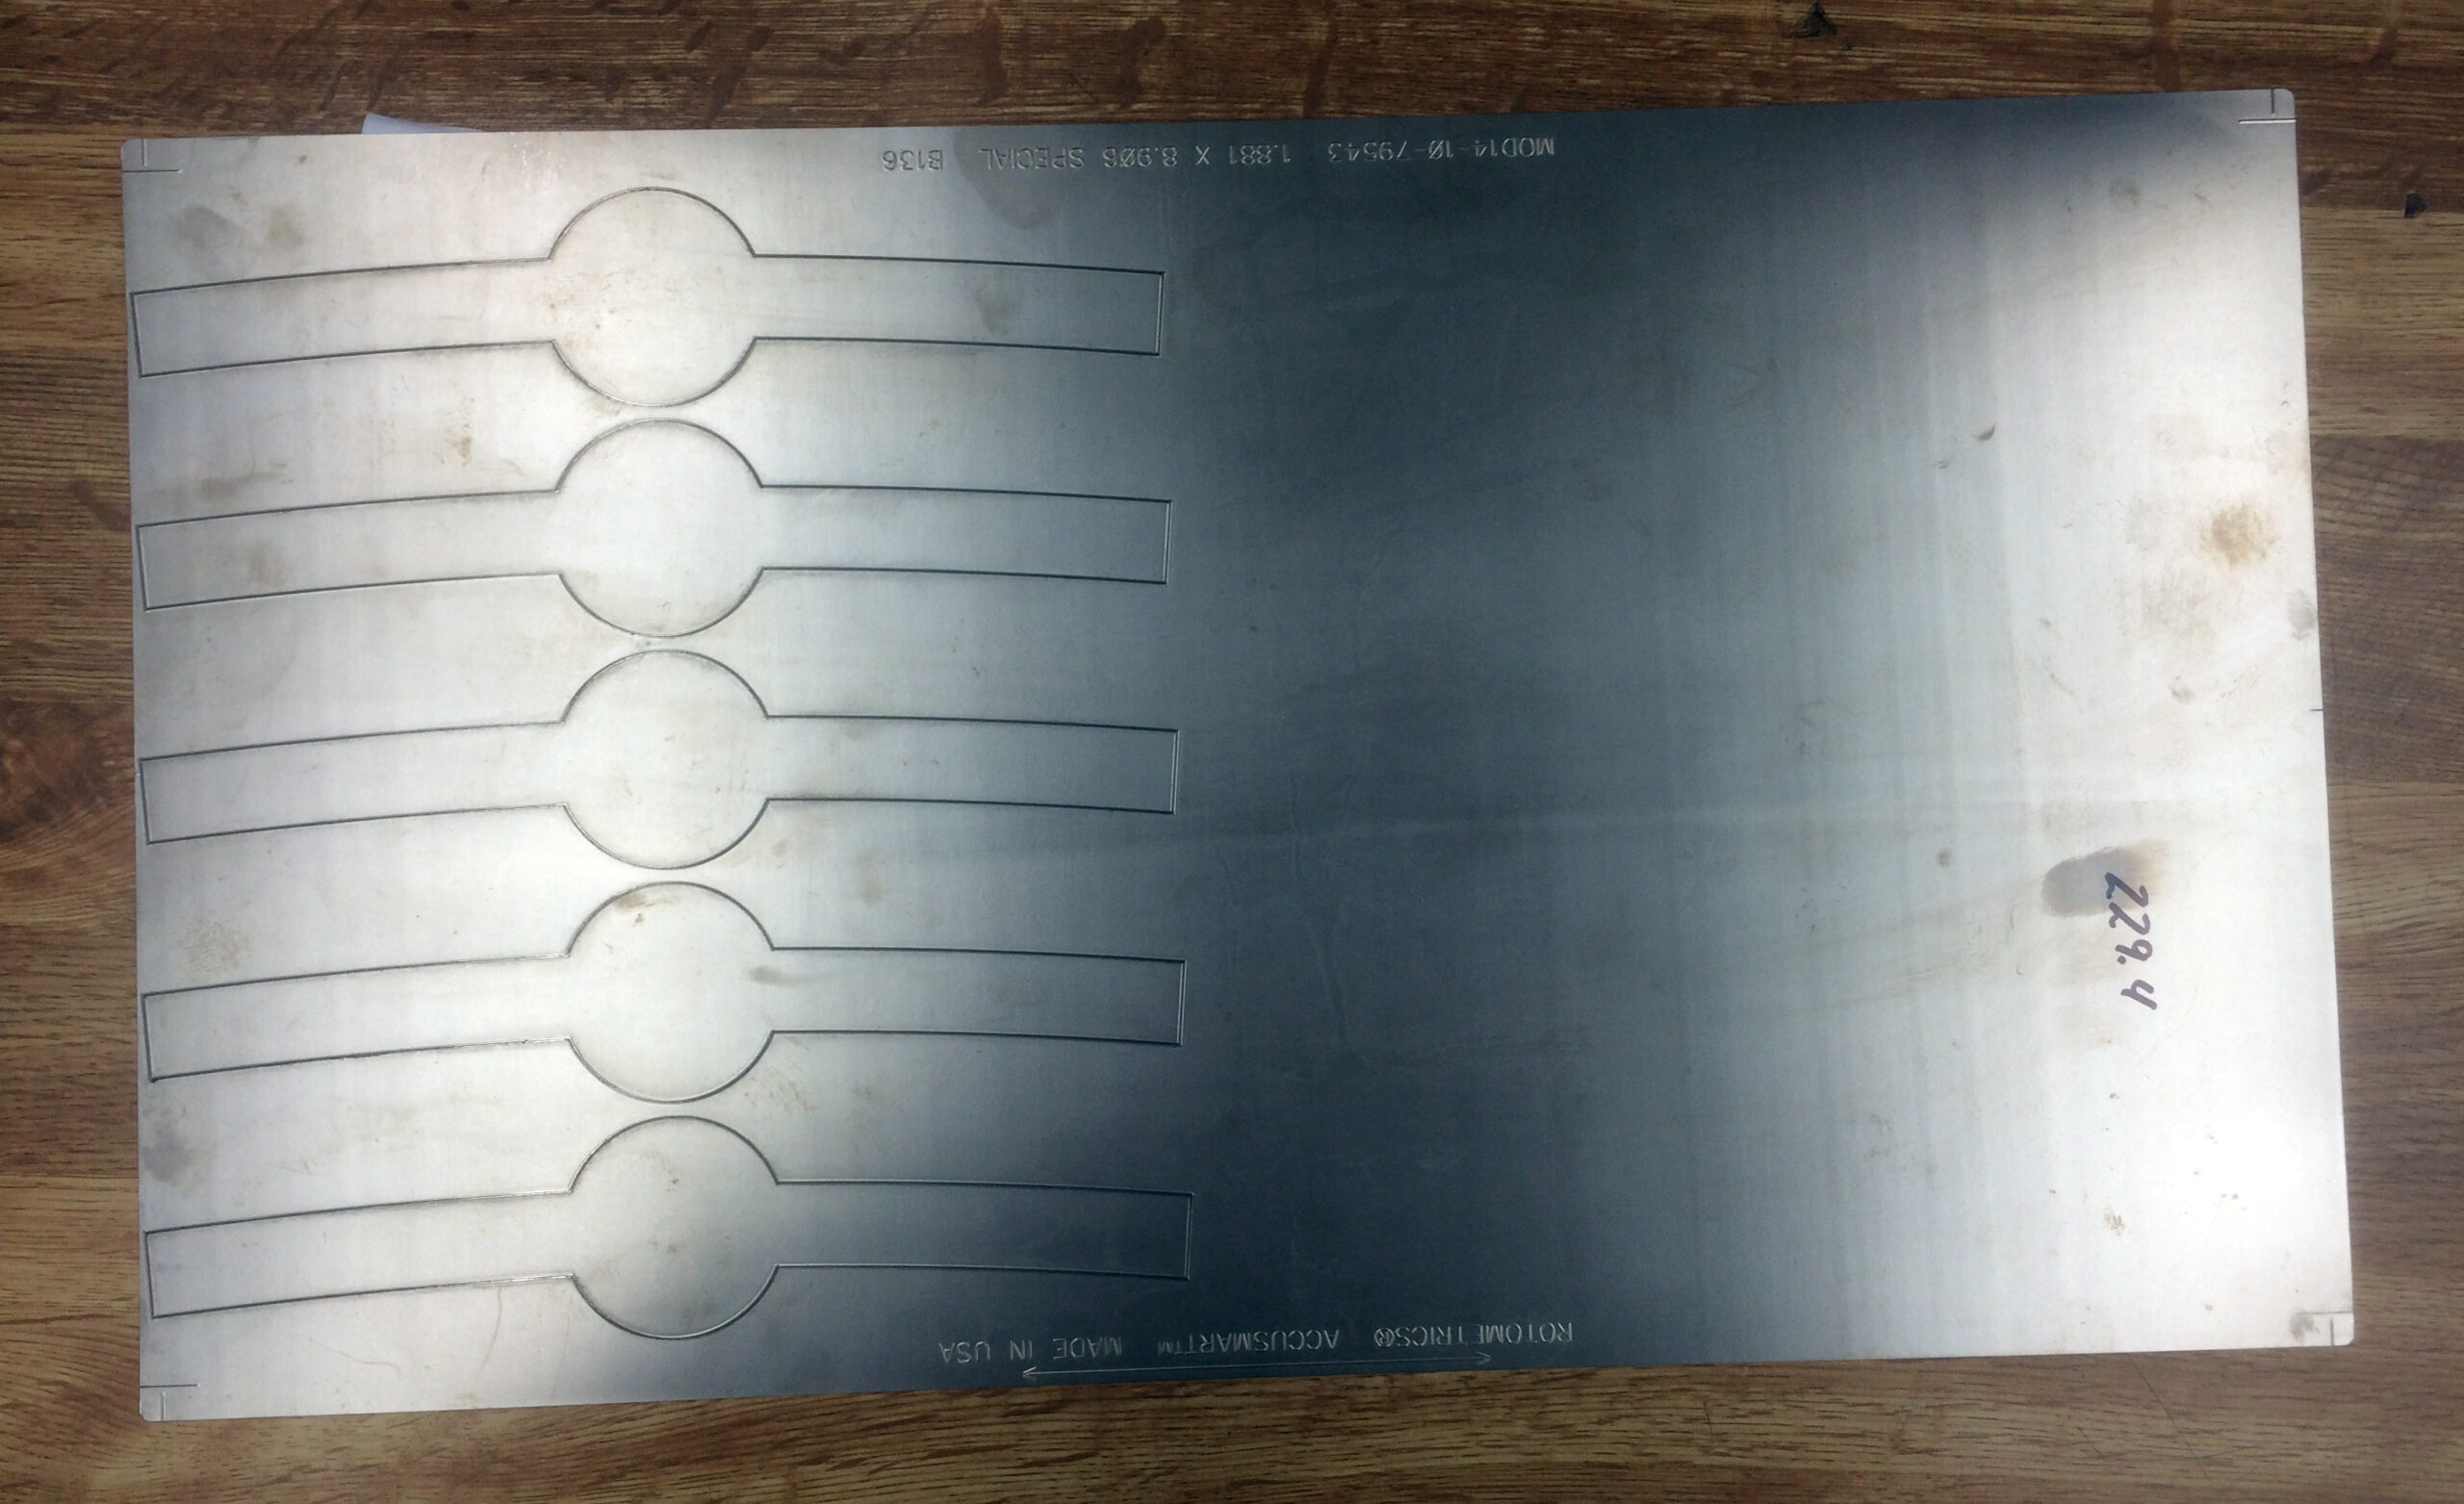
- Die – A die, also referred to as tooling, is a tool used to cut a shape out of a material. For a label converter, this means cutting the individual label out of a sheet of paper or film. Think of it as a cookie cutter, but instead of a sheet of cookies, it is a sheet of label material.
- Matrix – Once the die is cut out of the material, we remove the excess material (called the ‘matrix’).
- Die line – The die line is the outline of where the die will cut. It is usually shown as a thick colored line in proofs.
Do I need a custom die for my label?
When working with a label converter, you may be wondering if you need a custom die to create your label. The answer to this question will depend on the shape you are trying to achieve and the dies your label converter already has in stock.
At Blue Label, we have a stock of over 2,000 different dies that we have accumulated over the years, which includes most common shapes (different sized rectangles, squares, circles, and ovals). We also have some distinctive shapes, like triangles and diamonds. However, if you want something that is specific to your brand, like a label in the shape of your logo or a label that fits a piece of custom packaging, you’ll likely need a custom die.

How do I create a die?
First, start by measuring the surface you have to affix the label to. For instance, if you have a 12-ounce bottle, you’re not going to want a label much bigger than 3 ½” by 7 3/8”.
Once you know your size constraints, you can begin to design the shape. Make sure you stay away from sharp corners and acute angles; these can cause tears when the matrix is being stripped away.
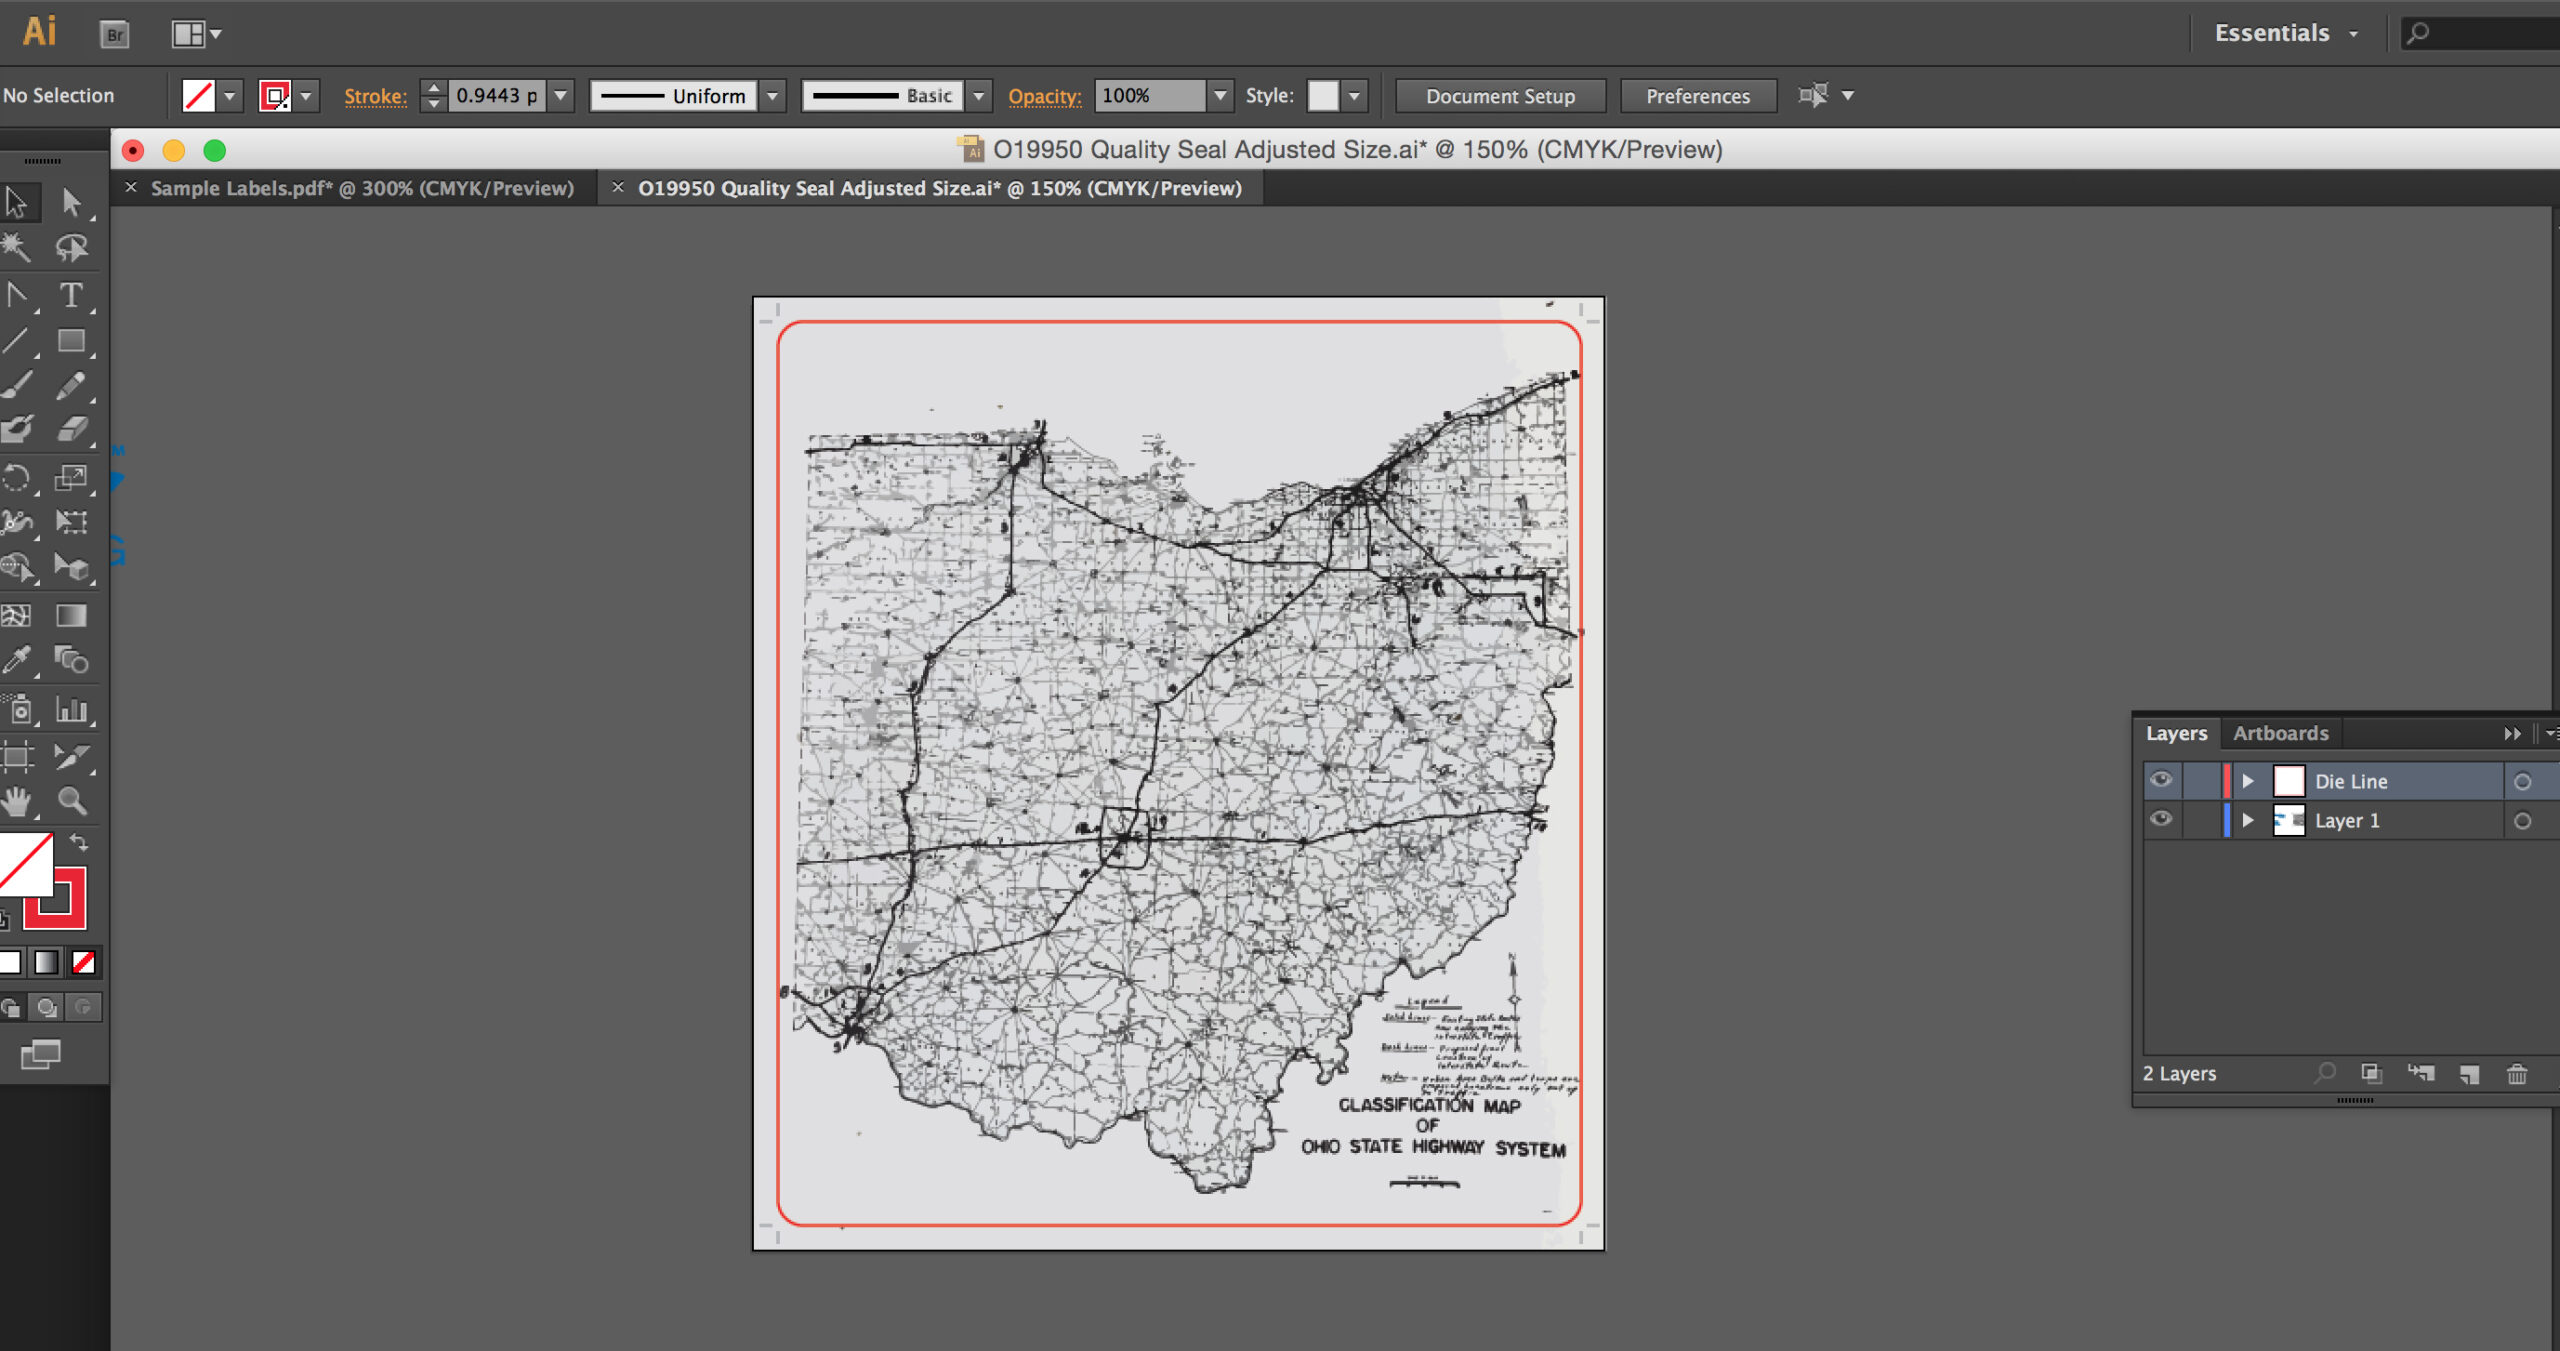
After you have decided on your shape, convert it into a line in Adobe Illustrator using the “Average” command. To do this:
- Select the “Direct Selection” tool or the “Lasso” tool. Select all the curved points and click the “convert selected anchor point to corner” icon in the control panel.
- Select the “Selection” tool and select the shape you want to convert to a line.
- Click “Object” in the menu bar and select “Average” from the “Path” submenu.
- Select “Horizontal” to create a horizontal line, or “Vertical.” Then click “ok” and the shape will be converted into a line.
It is very important that it is a joined line (not a bunch of overlaid segments) so that the die is continuous. Make sure the die is the correct size, and then overlay it on the Illustrator file that contains your artwork. Name the die line as a specific spot color, and make sure it is on its own layer.
How much does a die cost?
The average die costs around $150, but it really depends on the size and shape of the label. If you have a label that is a complex shape (a lot of corners and curves), the die could cost more. The cost of a die is also determined by how many individual labels are on each sheet of the die (these are called cavities). If you have a very small label, the price of the die could also increase.
At Blue Label, we pass the cost of the die directly on to you without markups. So, when we recommend a custom die, you can trust that we are doing it with your best interest in mind when you order die cut labels.
Is the die mine?
Yes, any custom die you order is yours. That being said, the die you purchased is formulated for a specific piece of manufacturing equipment, mainly, our ABG Digicon 2. So even if you were to leave us (and we hope not), you’ll have to make sure your die will work on other converters’ equipment. But we will send it to you regardless.
Once we have purchased a die, we will replace it when it wears out or if it is damaged. You will only pay for each die once as long as you are our client.
This is just a basic overview of dies, there is a lot more to know, like corner tolerance, minimum and maximum thicknesses, how material choice effects die formulation, who makes dies, etc. We will cover some of this in future posts, but you can always contact us if you have additional questions regarding dies (or anything else about labels for that matter).