Label Application Issues: How to Prevent Common Label Defects
- Wrinkles
- Darting
- Air bubbles
- Cupping
- Edge lift
- Tearing during application
- Adhesive not sticking
Whether it’s due to improper adhesives, applicator issues, or a harsh environment, one thing is certain: defects detract from your product labels. Each fault will negatively impact the appearance of your brand (and that’s if the labels are able to stick to your container in the first place). As such, it’s important to identify the source behind these issues and take steps to solve the situation.
Potential Causes of Label Application Issues
There are several different reasons why a label would wrinkle, cup, or fall off entirely. Of course, each situation can depend on multiple factors, to name a couple: the type of product you sell or the material and adhesive combination chosen for your label. Once the issue is identified, your label manufacturer and applicator can make the appropriate adjustments to help ensure optimal label performance. To identify the source of your label failure, you’ll want to consider the following potential reasons for label defects.
The container
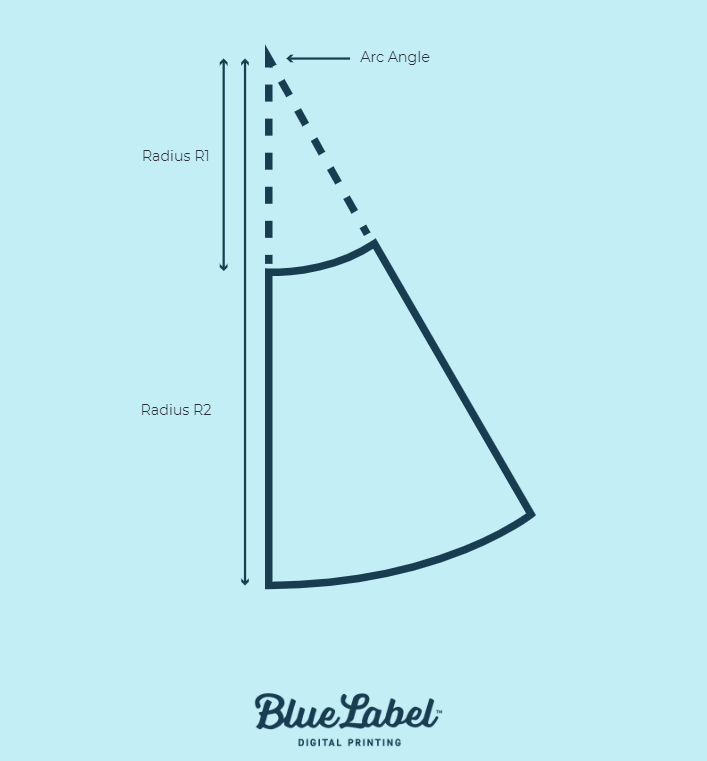
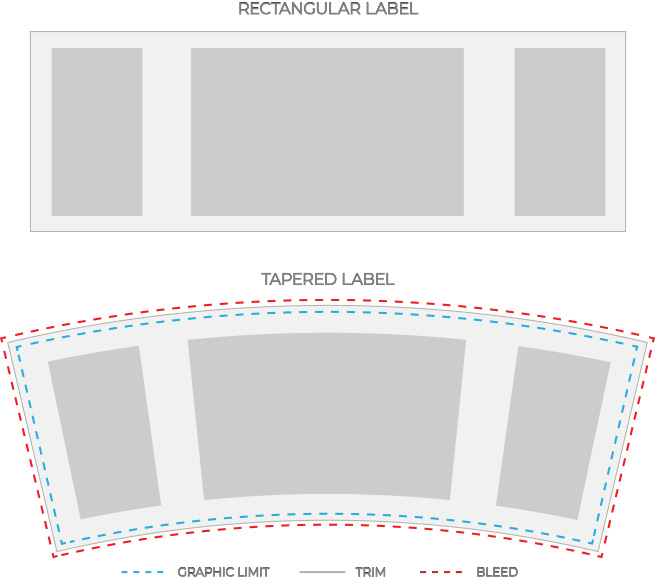
One of the early steps in identifying potential issues involves knowing your container. It’s important to know the dimensions of your container so that you can base your design around them. The downfall of not knowing your container’s dimensions is that your label could wrinkle or trap in air bubbles upon application. For example, a square label won’t properly apply to a tapered bottle without issue. By tapering your label to fit your dimensions, you can help prevent darting or wrinkles early on in the process.
If you need these dimensions, you should contact the manufacturer of your container for this information. If you use glass bottles, you may have already received something called a “mechanical,” which is essentially a spec sheet for your containers.
It’s also important to recognize that the surface of your container can impact label application. For example, lower quality glass may be pitted or more rigid than smooth. These little peaks and valleys on the surface of your container will trap air under your label upon application, which will result in a higher likelihood of visible bubbles.
The applicating environment and process
In addition to considering the container itself, it’s also important to weigh the condition of the container and the environment surrounding it during application. Environmental factors make a massive impact on which materials and adhesives are right for your labels. Factors like temperature, the presence of moisture, and potential contamination will directly cause peeling or label failure if you don’t plan for them.
Beer labels are a common example of this issue. If a brewery prefills the can and applies a lid, there’s a rinse in the process that makes the cans wet. This situation would call for some type of wet apply adhesive. These options aren’t bulletproof given the nature of water and adhesive, but it will be much more successful than a standard adhesive. If existing moisture is still an issue, you can add what’s called an air knife to blow condensation off the can and lessen the chances of label defects.
Of course, these issues can’t be addressed until you examine your applicating environment and share these details with your label manufacturer. Even small details may help you avoid lengthy troubleshooting. For example, you may need a different adhesive or material solution for a sour beer compare to a standard lager because the acidity from the fruit in the sour beer can cause oxidation between aluminum can and a metallic BOPP material.
Belt problems
Another area of potential concern involves the wrap belt on an applicator. In certain instances, the belt can create a static charge as it moves the cans forward. That static charge can tug on the label and make the label crooked or completely pull it off in the belt area. As this happens, whoever is at the end of the applicator will need to fix affected containers – and that’s if you have an adhesive that you can remove after application.
This static charge can be caused by a few factors. In some cases, there may be too much pressure on the belt. In other, there may not be enough pressure on the belt. Certain circumstances may also call for some form of anti-skid tape to limit the amount of friction and static on the belt. This process is especially helpful for labels with matte or soft touch laminations. These laminations are very hydrophilic, which can cause the wipe down pads to accidentally suck labels off containers. Adding anti-skid tape or even sandpaper will give the backing pad lower surface energy than the lamination, which in turn lowers the odds of accidental label removal.
Liner issues
In some situations, your liner label can be the source of application issues. Labels have either paper or clear plastic liners, but some applicators can’t use one type of liner and vice versa.
Your choice of liner doesn’t cause a lot of issues, but it does impact the die cut. When you cut out the shape of the label, you’re basically pushing down on that liner. You can push down harder on the clear liner because it’s plastic. If you push too hard on the paper, it can make a small hairpin split that’s hard to see. However, if that slightly split paper line is hooked up to an applicator, the pressure and tension used in that applicator can rip the liner and force you to stop production and splice the roll back together.
In this situation, the solution would be to opt for a clear liner as long as your applicator can handle a change. Each applicator has a sensor, but some aren’t set up to work correctly with clear liner. Imagine if you’re trying to scan something that’s clear – it doesn’t always register. In this case, you may need to get a special sensor to avoid potential tearing.
Improper storage
Another potential source of label defects stems from the way labels a stored before application. Certain environmental factors can impact the success of your labels, such as keeping them in a place that’s too hot, cold, dry, or wet. Typically, you want labels stores in a temperature controlled environment – the exact temperature and humidity varies based on your specific label, so make sure to get these details from your label printer if you plan on storing them before use.
While environmental factors can impact all labels during storage, shrink sleeve labels are particularly tricky. Shrink sleeves are made with special materials that make them more susceptible to potential damage prior to application. Excess heat, cold, or other uncontrolled environmental factors can cause shrink sleeves to warp or even melt, leading to distortion or complete failure. As such, these labels require refrigerated trailers for shipping and have particular storage needs to prevent avoidable waste.
Shelf life is another key consideration for potential defects. Typically there’s a one-year warranty on labels, so you don’t want to wait past that time because the adhesive can lose effectiveness if you let it sit that long.
Work with a Collaborative Label Printing Company
The best tool for preventing label defects is communication. From air bubbles to wrinkles, Blue Label works with you to identify potential hazards and deliver solutions for your label problems. Our experts develop a collaborative relationship with our customers to understand the ins and outs of their label process to avoid issues ahead of time or troubleshoot defects over time.
Ready to work with a collaborative label printing company for your product labels? Contact us today to request label samples or talk to one of our experts about your needs.
